This article explains how to create automated sequences in the media section of the ScoreVision Cloud.
Automated sequences are groupings of media that you put together so that they can be assigned to show on areas of your displays and played automatically during games and events.
Creating an Automated Sequence
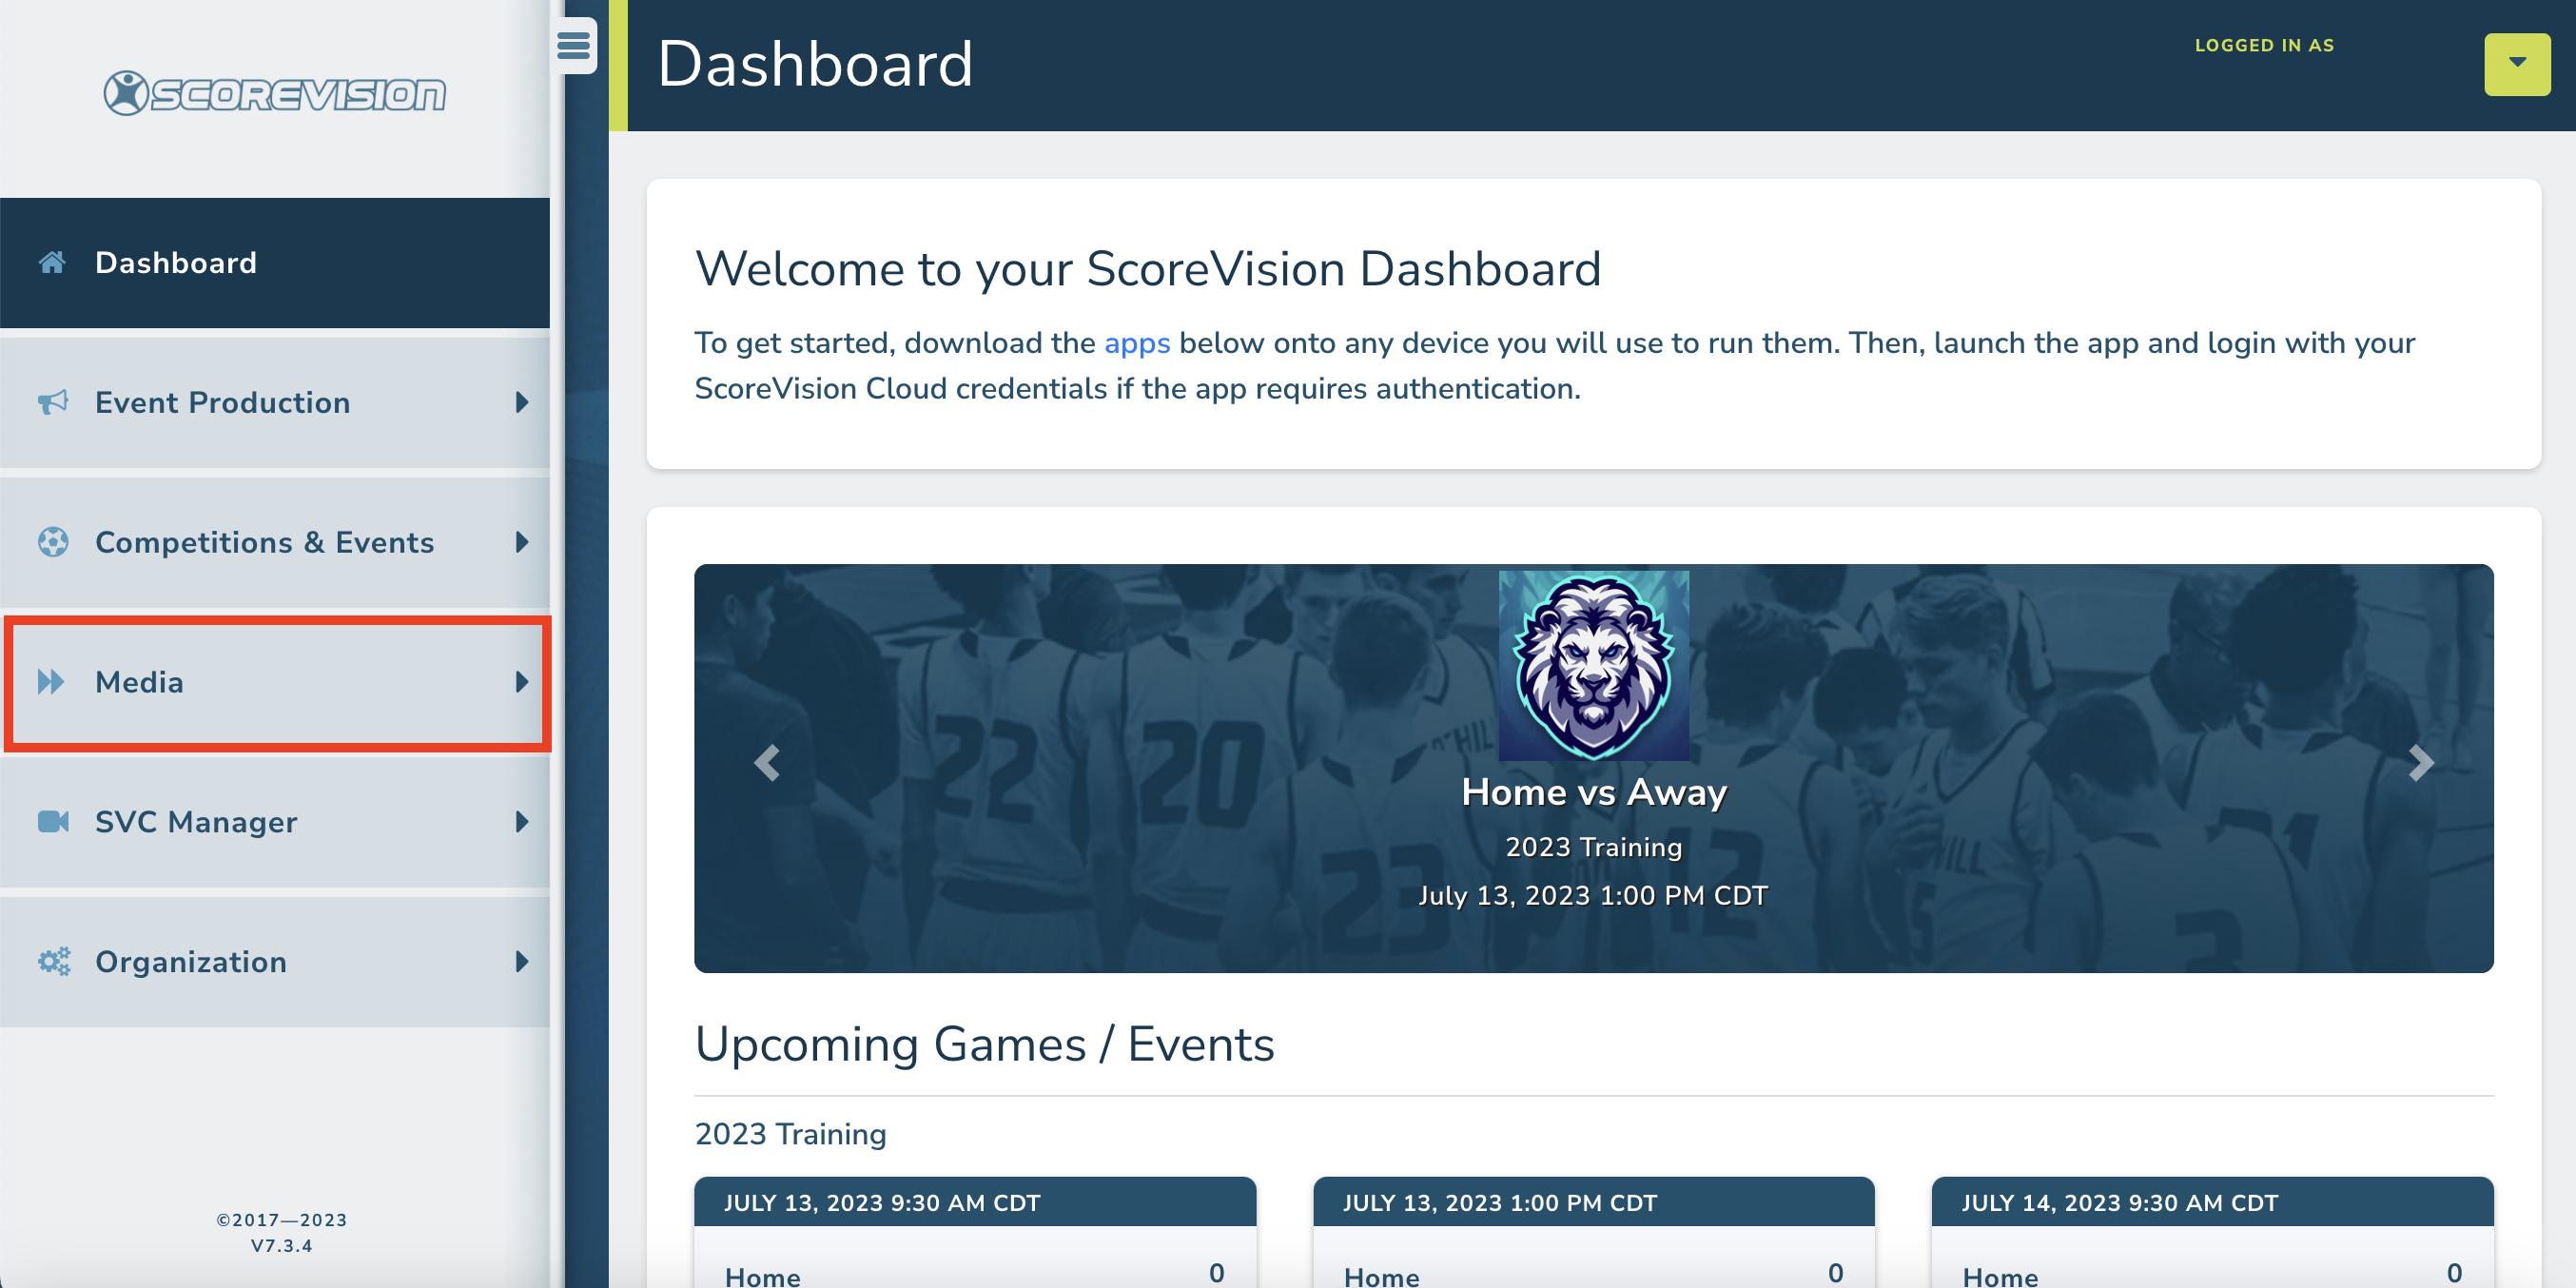
1. Go to app.scorevision.com and log in to your ScoreVision Cloud account using your credentials. Once logged in, you will be on the dashboard screen. Select MEDIA from the control panel on the left side of the window to see the dropdown options.
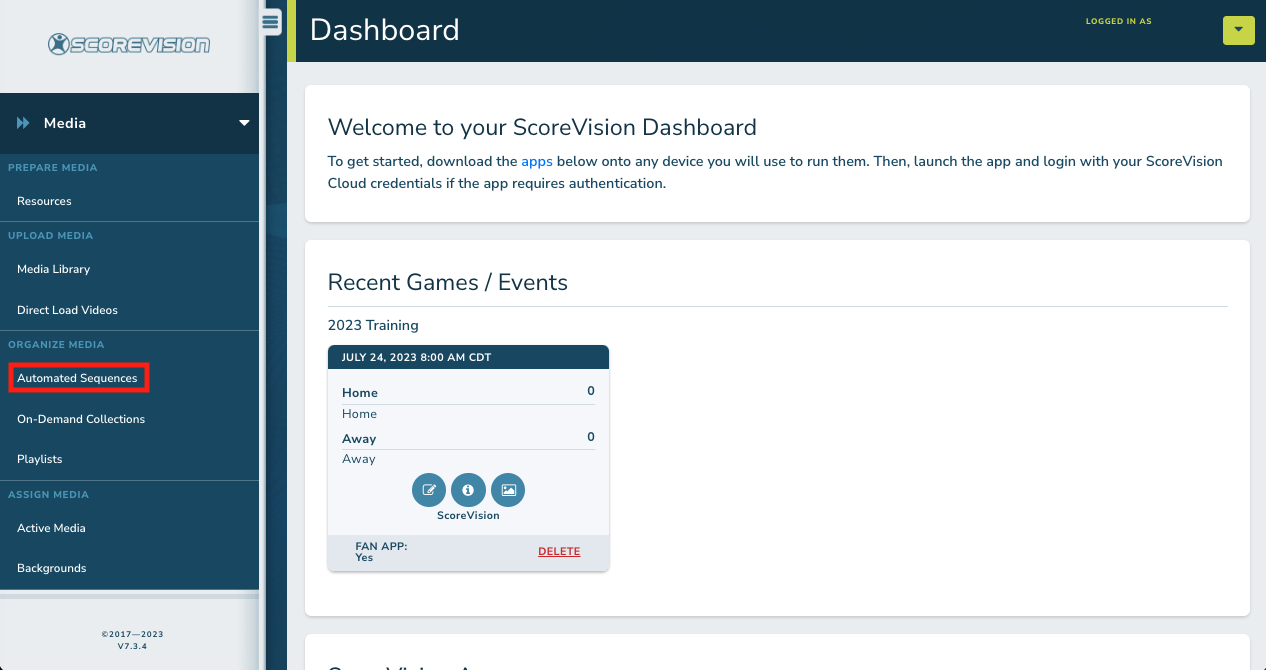
2. From the dropdown options, click on AUTOMATED SEQUENCES under the organize media heading.
3. Choose a category of media forms (such as cinema, fan app event feed, etc.) and click ADD to create a new sequence. You may also click EXPAND and then CREATE A NEW SEQUENCE. NOTE: By clicking on EXPAND you can view sequences previously created and edit or delete the sequences as you wish.


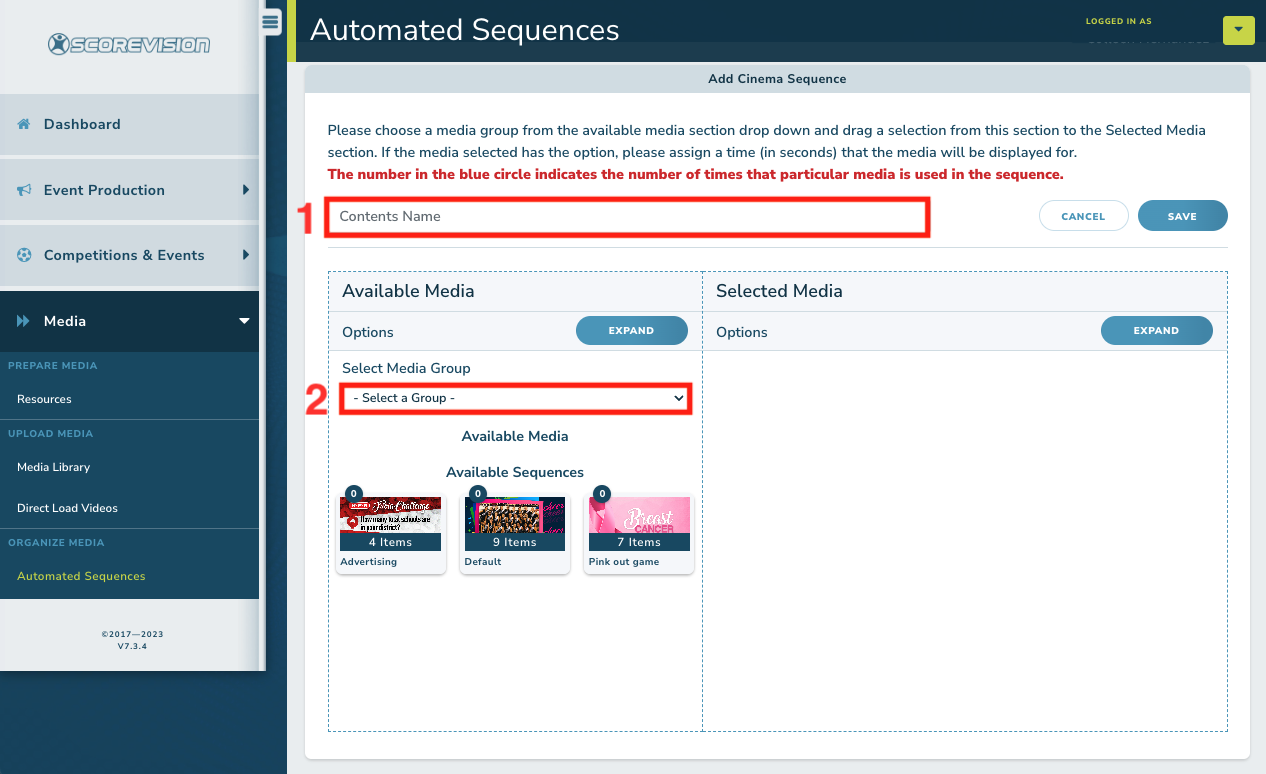
4. Choose a name for the new sequence and enter it in the field marked CONTENTS NAME. Then click on SELECT A GROUP to choose from which group you would like to select media.
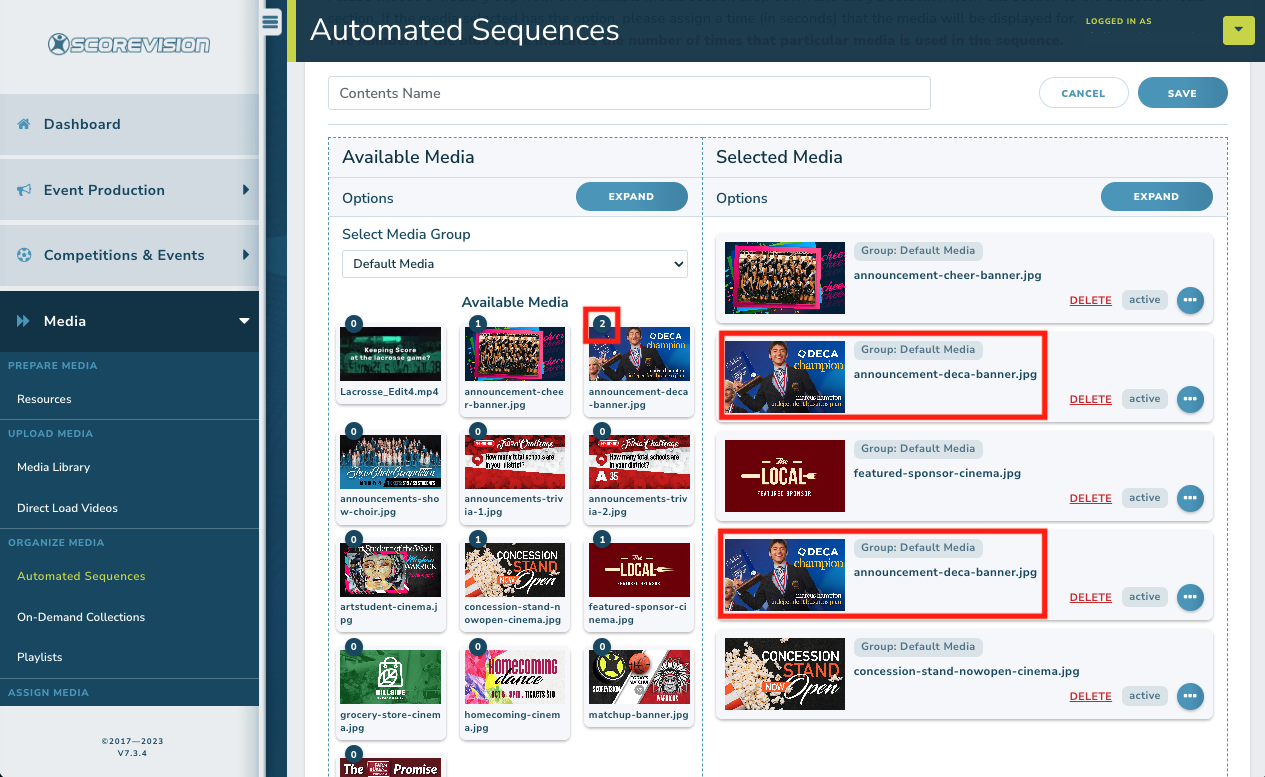
5. Drag the media you want to add to the sequence from the Available Media column to the Selected Media column.
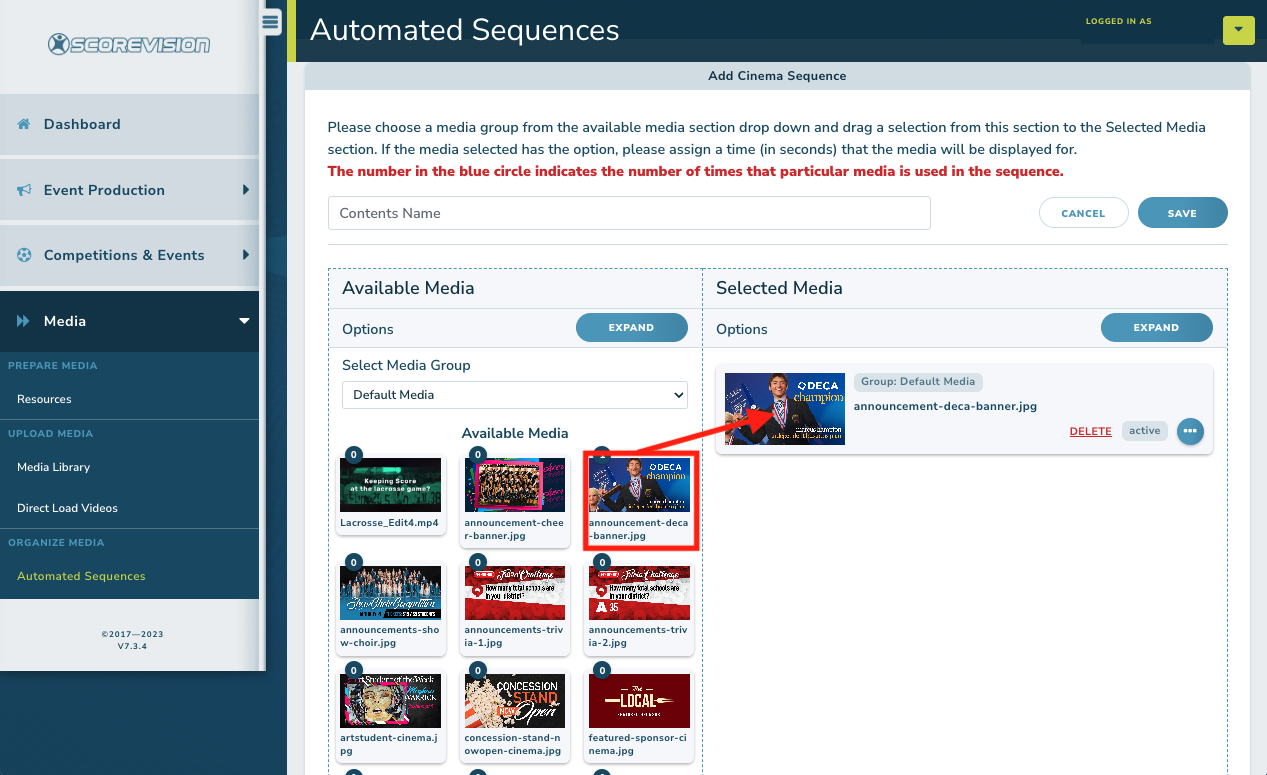
You can select multiple pieces of media by click on the file names to highlight them and then dragging the group to the Selected Media column altogether.


When selecting media, you are not restricted to choosing from a single media group. Automated Sequences can contain media from various groups so select a different media group in the available media column if you would like to view other groups.
6. Reorder the selected media within the sequence list by dragging and dropping in the order you prefer the files to be displayed. If you would like a particular piece of media to show in the sequence more often, simply drag it over to the selected media again to place it in your sequence list. Notice that each piece of available media has a blue circle in the upper left corner to indicate how many times it appears in your selected media sequence.
Editing Selected Media Options
1. Click on the blue circle with three dots next to a piece of media in your sequence. This opens the information related to display time and schedule.
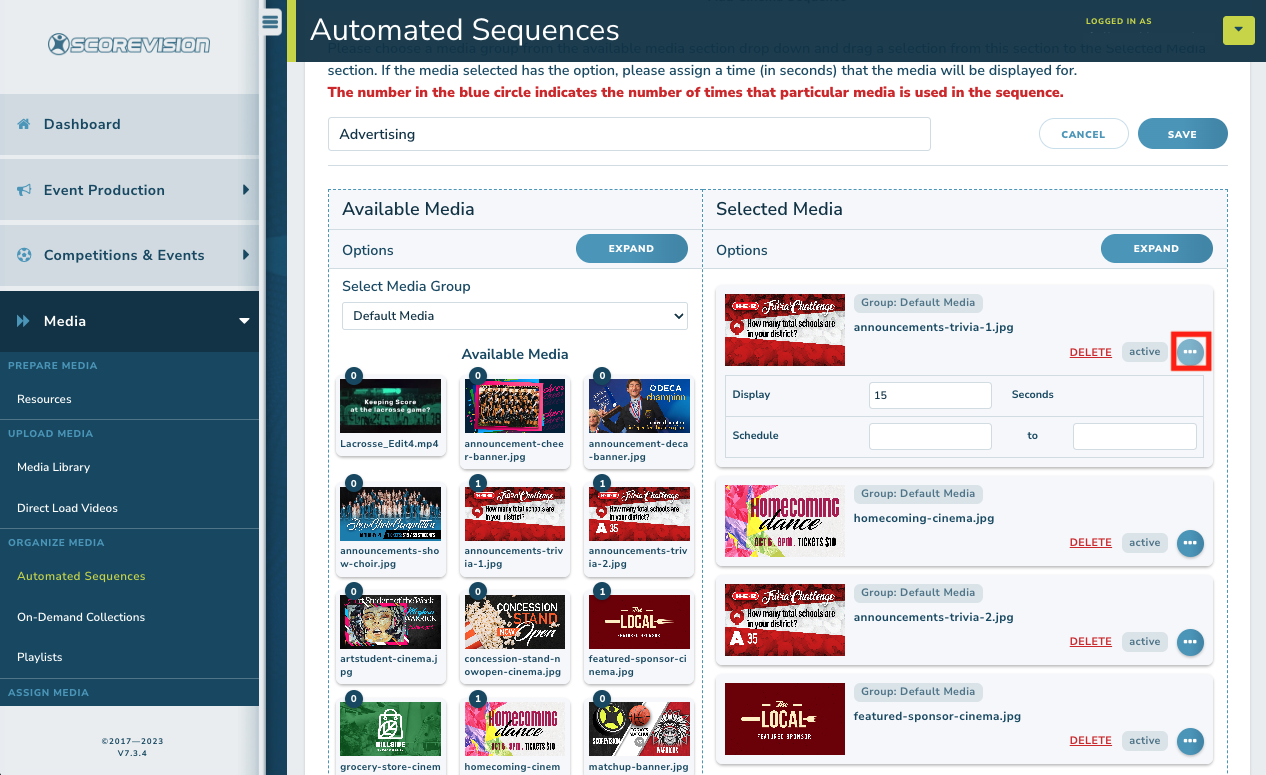
- The display time indicates how many seconds a static image should remain on the display before switching to the next piece of media in the sequence.
- Click on the schedule fields to reveal a calendar. Chose a start and end date for this media file to be active. This feature is helpful when you have advertisements that are only meant to display during a specific date range (such as a McDonald's Shamrock Shake only in the month of March).
- When you set a schedule for a piece of media, an email is automatically sent before the media becomes active to ensure you still want that media in the sequence and no changes are needed.
- Similarly, an email is also sent alerting you that a piece of media is about to expire and become inactive so that you can adjust the schedule if needed.


Selected Media will indicate if the media will be upcoming, active, or expired for the sequence.
2. When you have confirmed the details of the media in your sequence to display for the length and dates of your choice, click SAVE near the top of the window.
Automated Sequences of Wrappers
Wrappers can also be set to follow automated sequences. This feature is commonly used if you would like a different wrapper to appear during specific periods of the game or for overtime.
1. Create an automated sequence in the same manner described above by choosing the wrapper category, naming your new sequence, selecting a group from which to choose media, and dragging the wrappers you want in this sequence from active media to selected media.
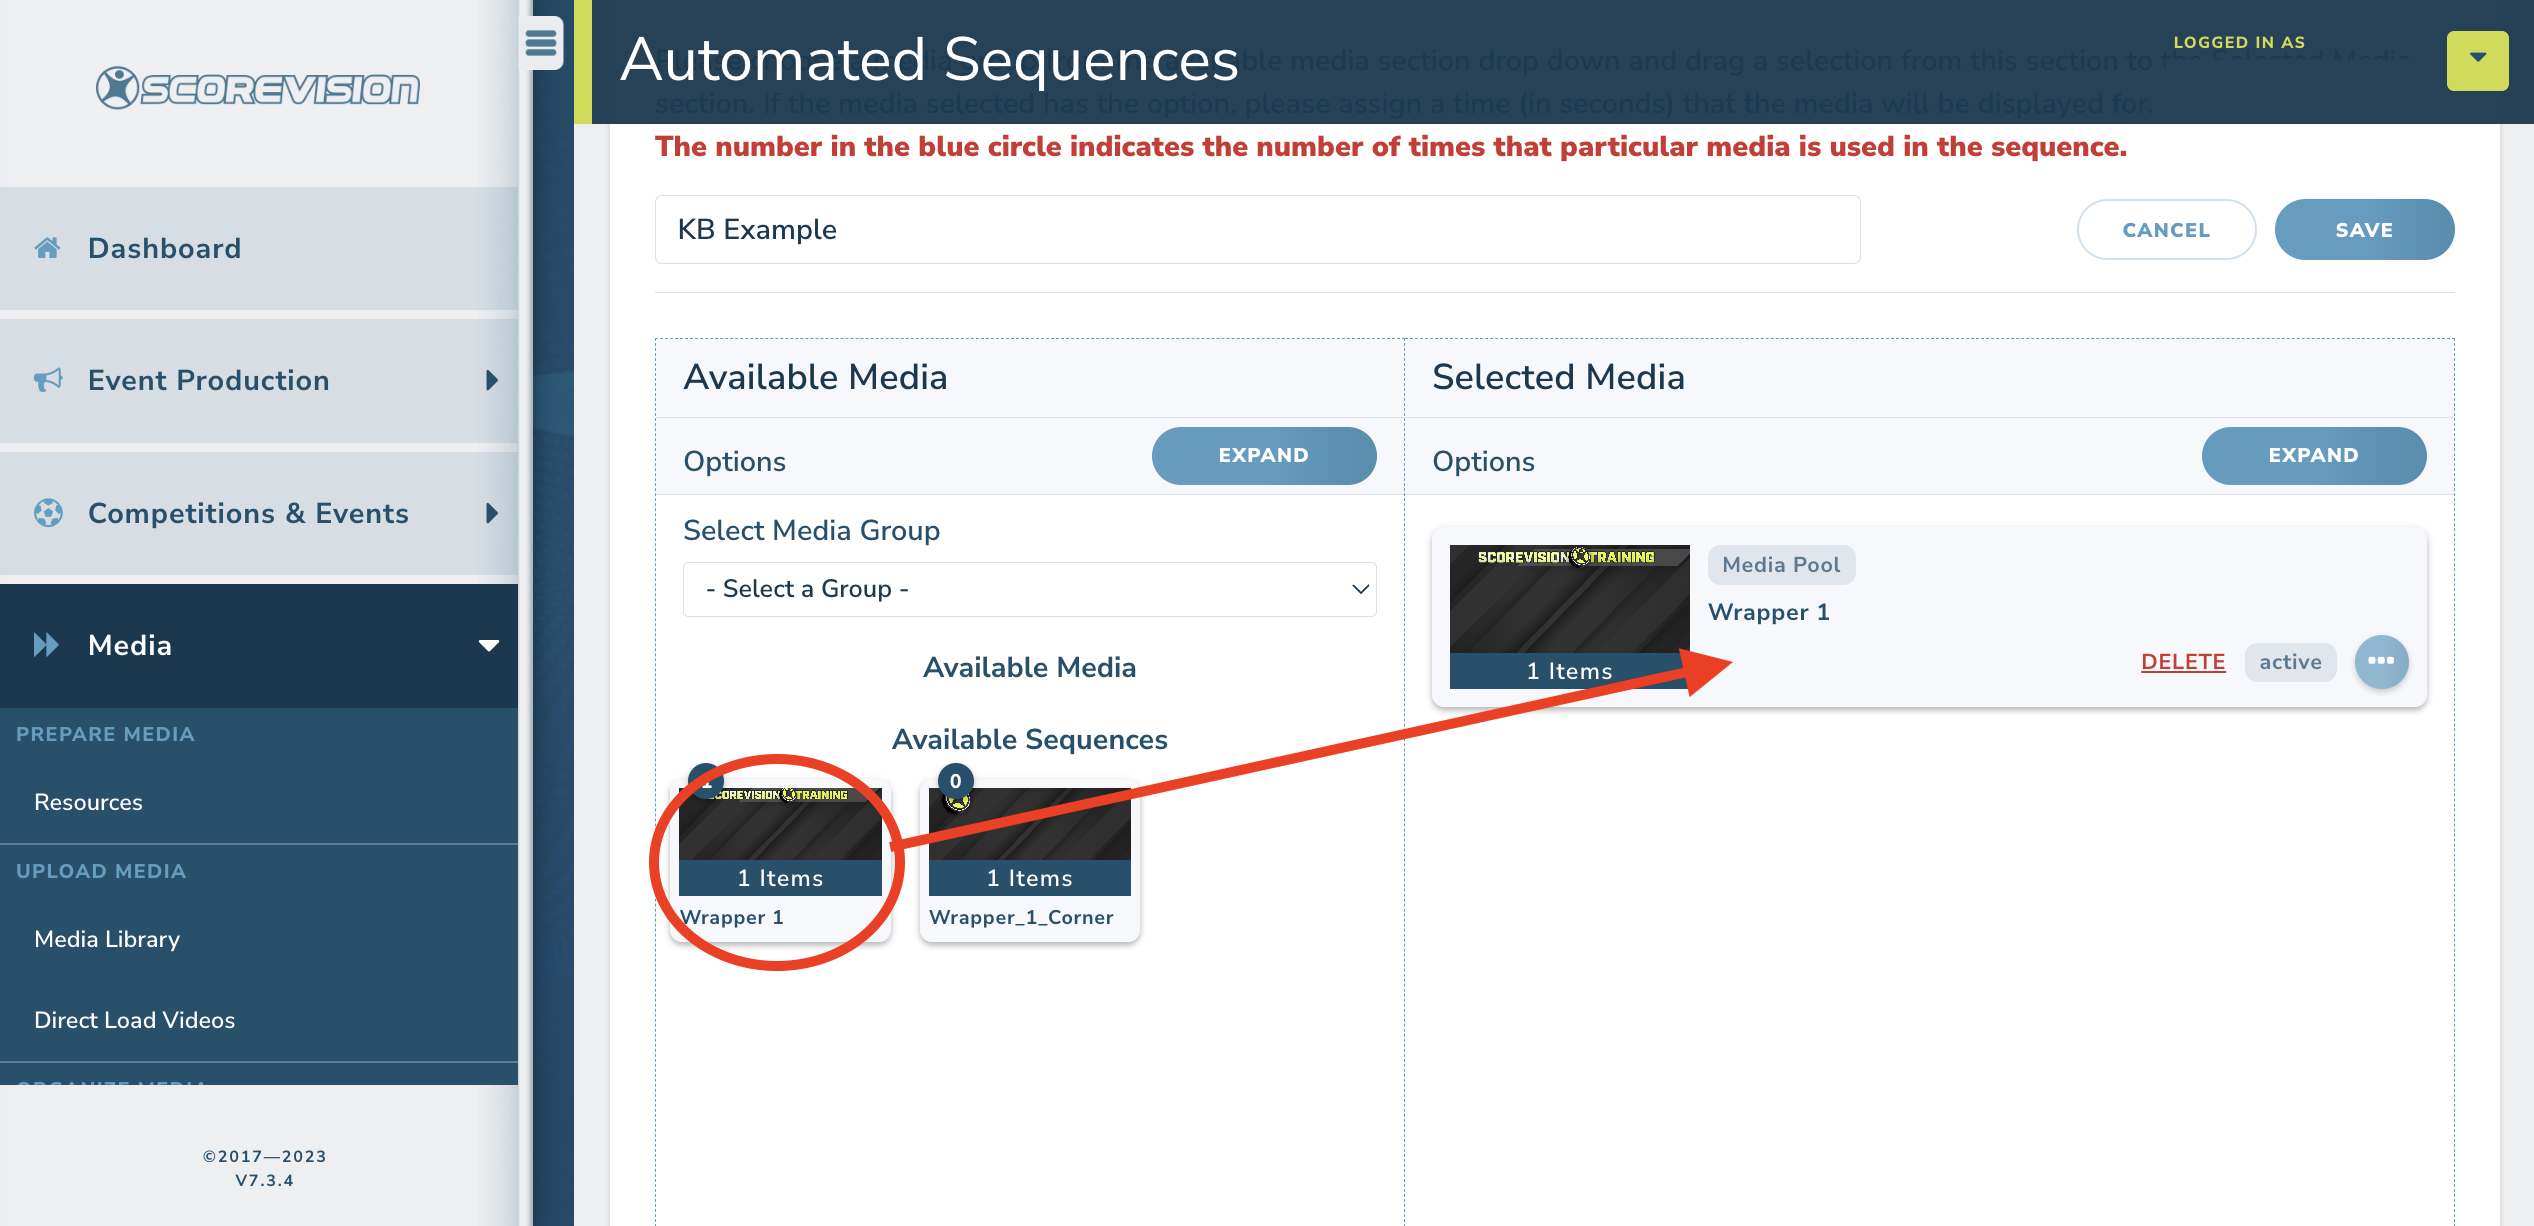
2. After you have added two or more wrappers to the automated sequence, click on the blue circle with three dots to view/edit the information for each wrapper.
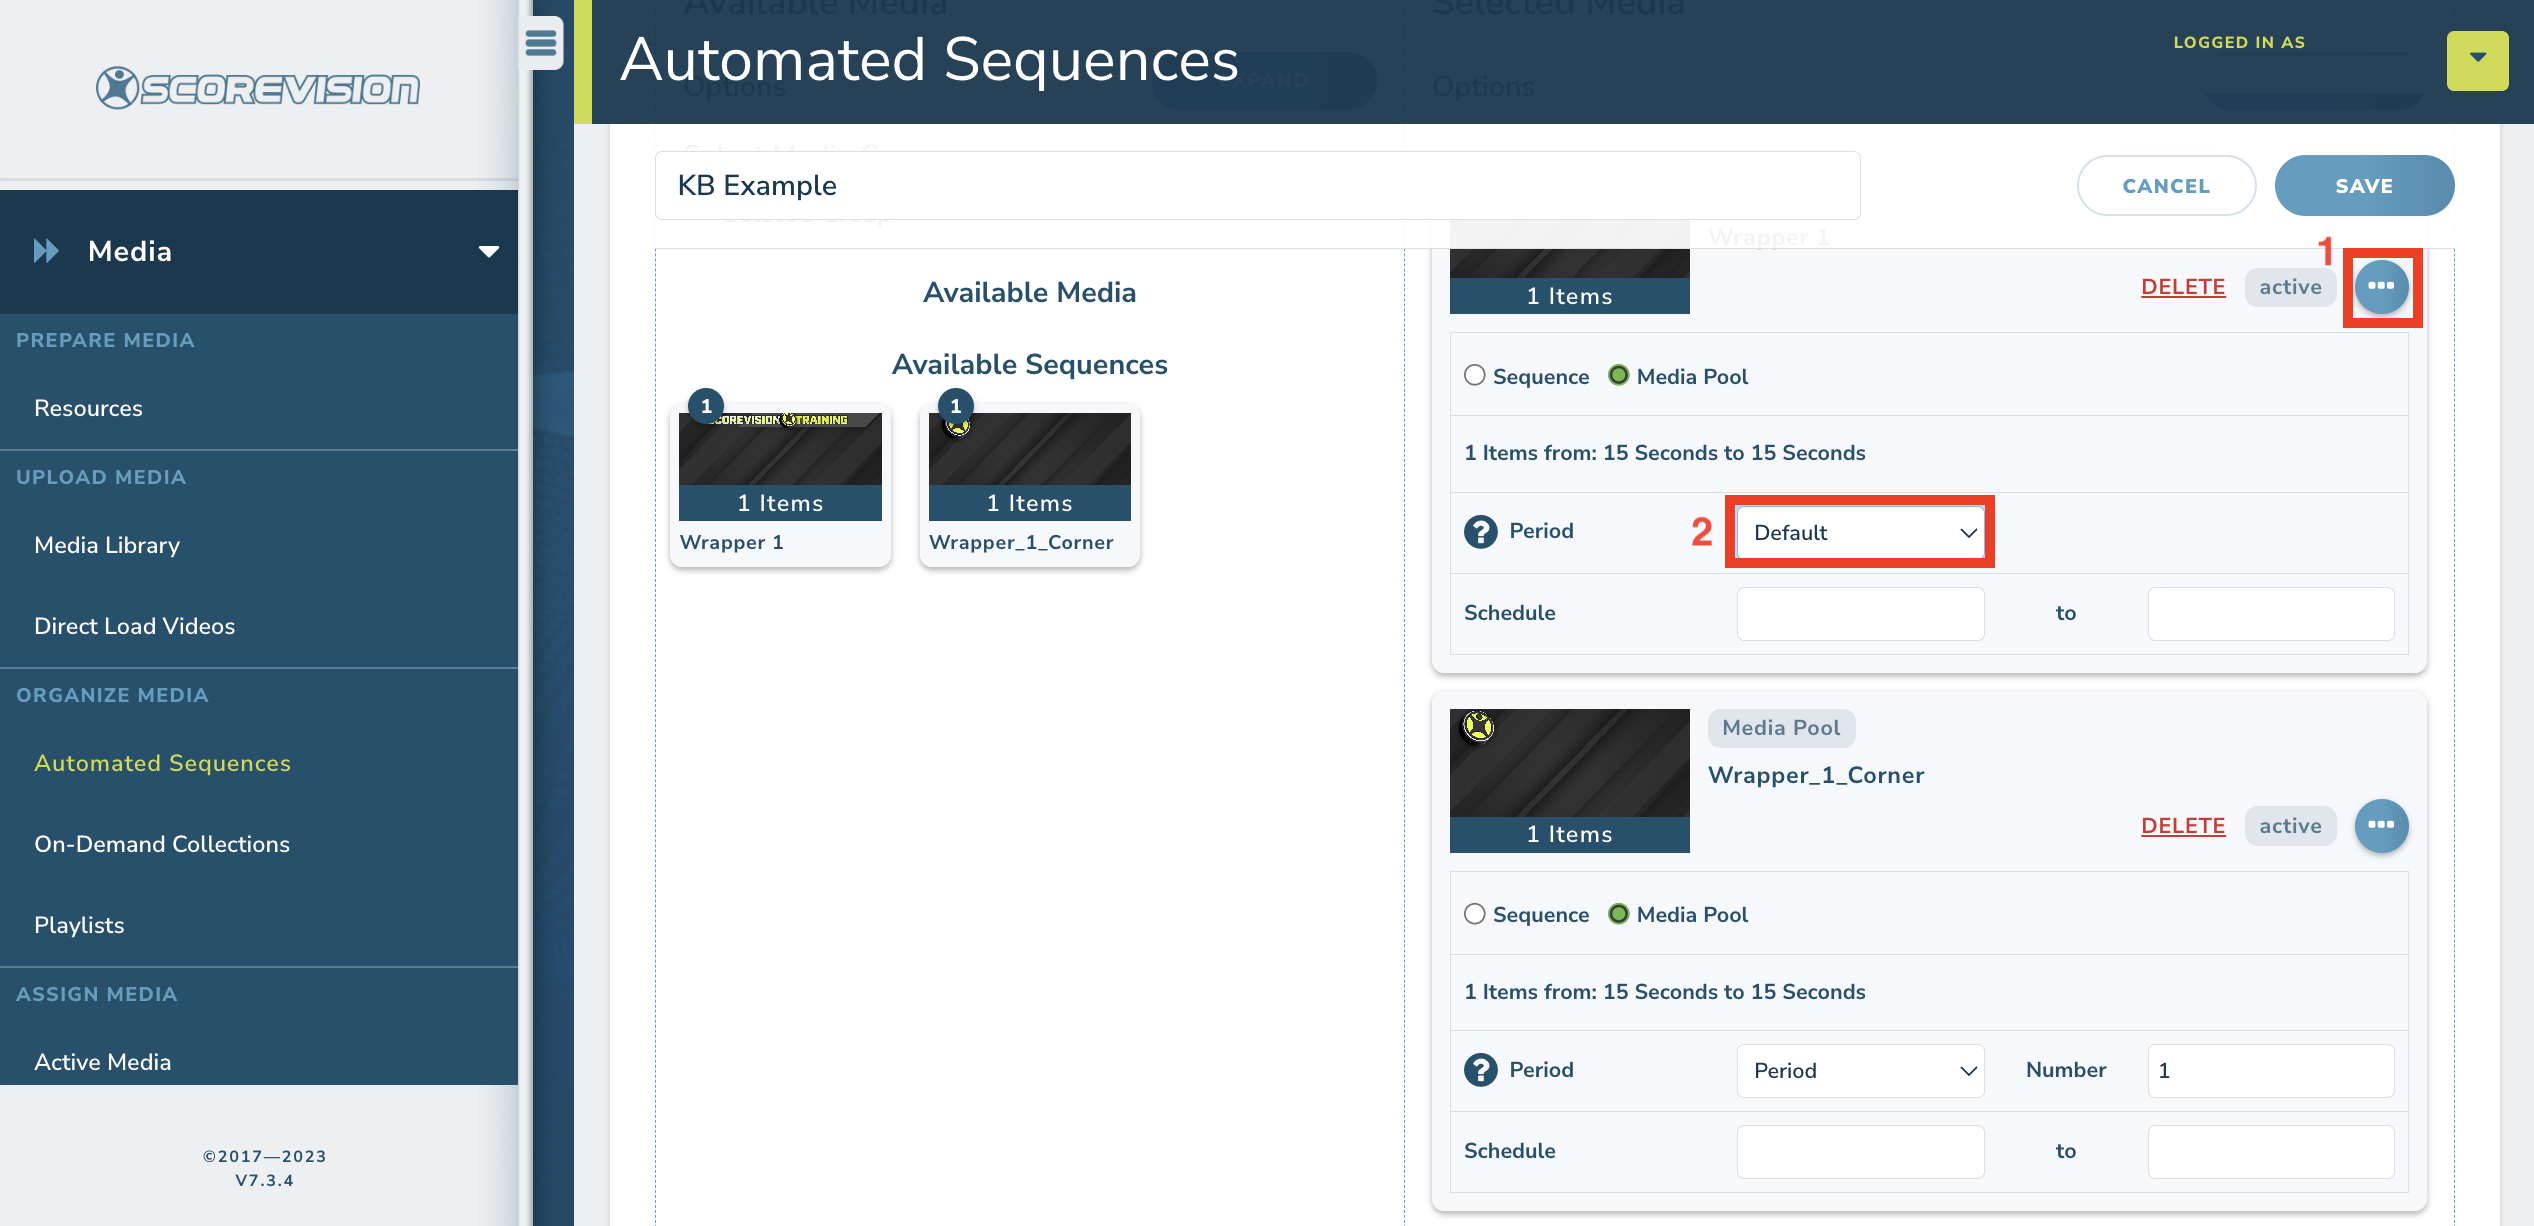
- One wrapper must be designated as DEFAULT in the period section. The Default option will apply the selected wrapper to all periods and overtime(s) for the games and events utilizing this wrapper sequence if no other overrides are defined. You can only add one Default wrapper per sequence.
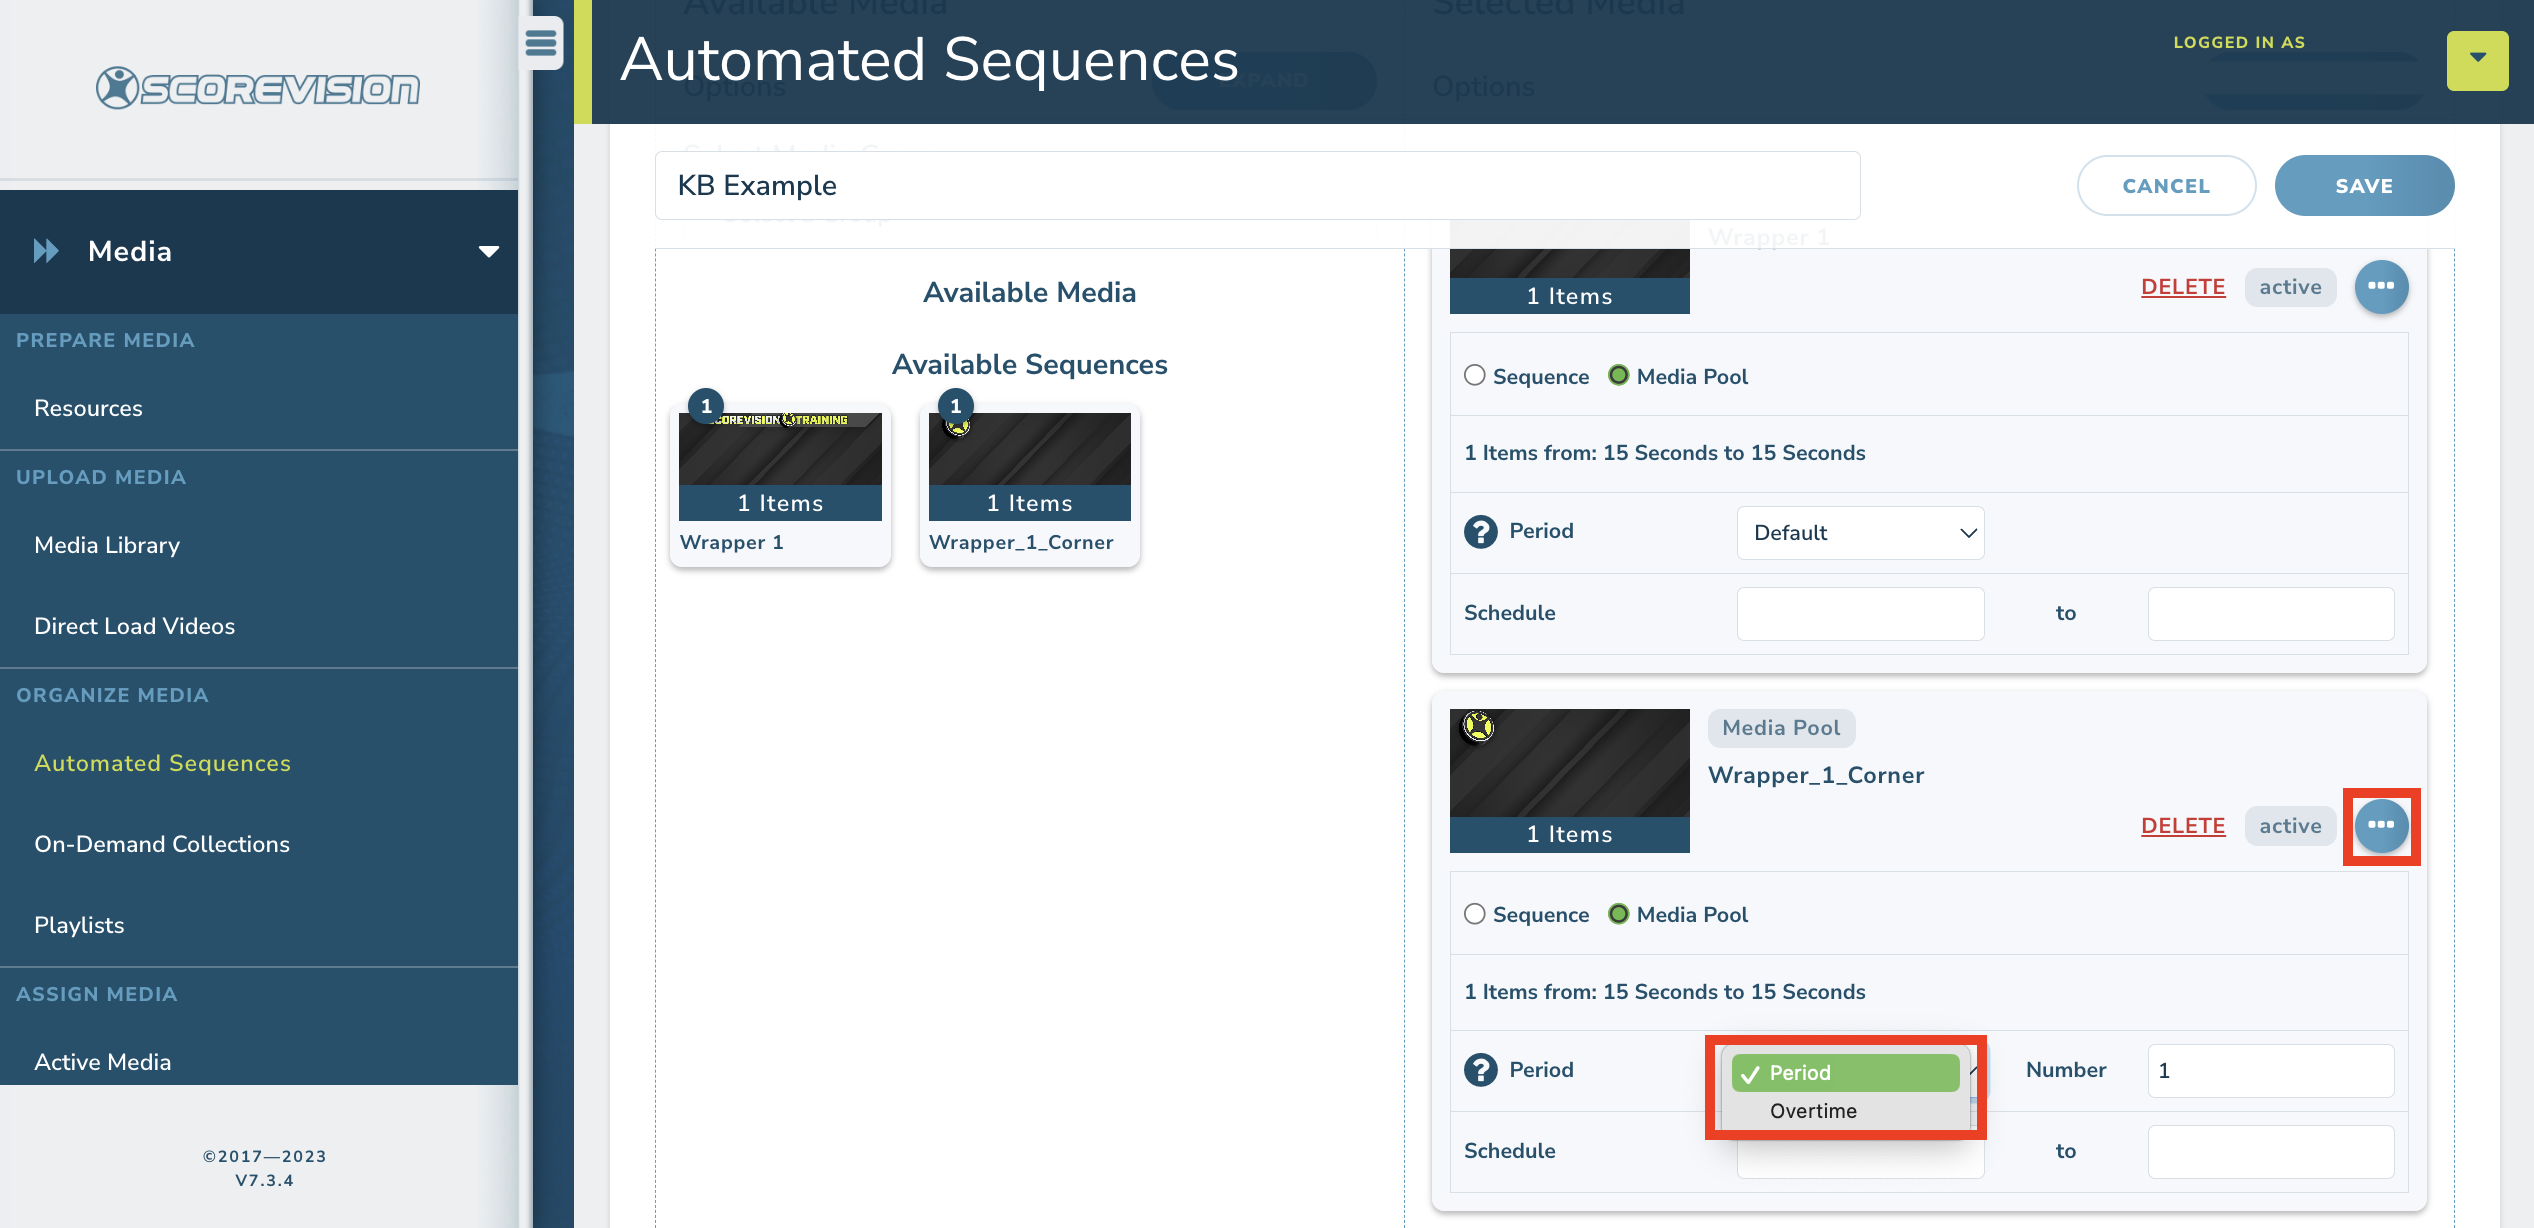
- The OVERTIME option is an override that will apply the selected wrapper to all overtimes associated with the games and events utilizing this wrapper sequence. You can only add one Overtime override per sequence.
- The PERIOD option is an override that will apply the selected wrapper to the specific period you indicate in the setting for the games and events utilizing this wrapper sequence. You can add as many Period override wrappers as you'd like, and you can assign any numeric value to the Period that you wish. The wrapper with a specific period assignment will show in place of the Default wrapper during that specific period in the game or event. For example, if you have a wrapper with a Period assignment of 2, that wrapper will override the Default wrapper when a game reaches its second period (i.e. 2nd quarter, 2nd half, 2nd Period, etc.). Any wrappers with a numeric value in the Period assignment that is not available in the game or event will be ignored.
Wrappers can be scheduled in the same manner as previously described in this article if you want specific wrappers to only be seen during specific dates.
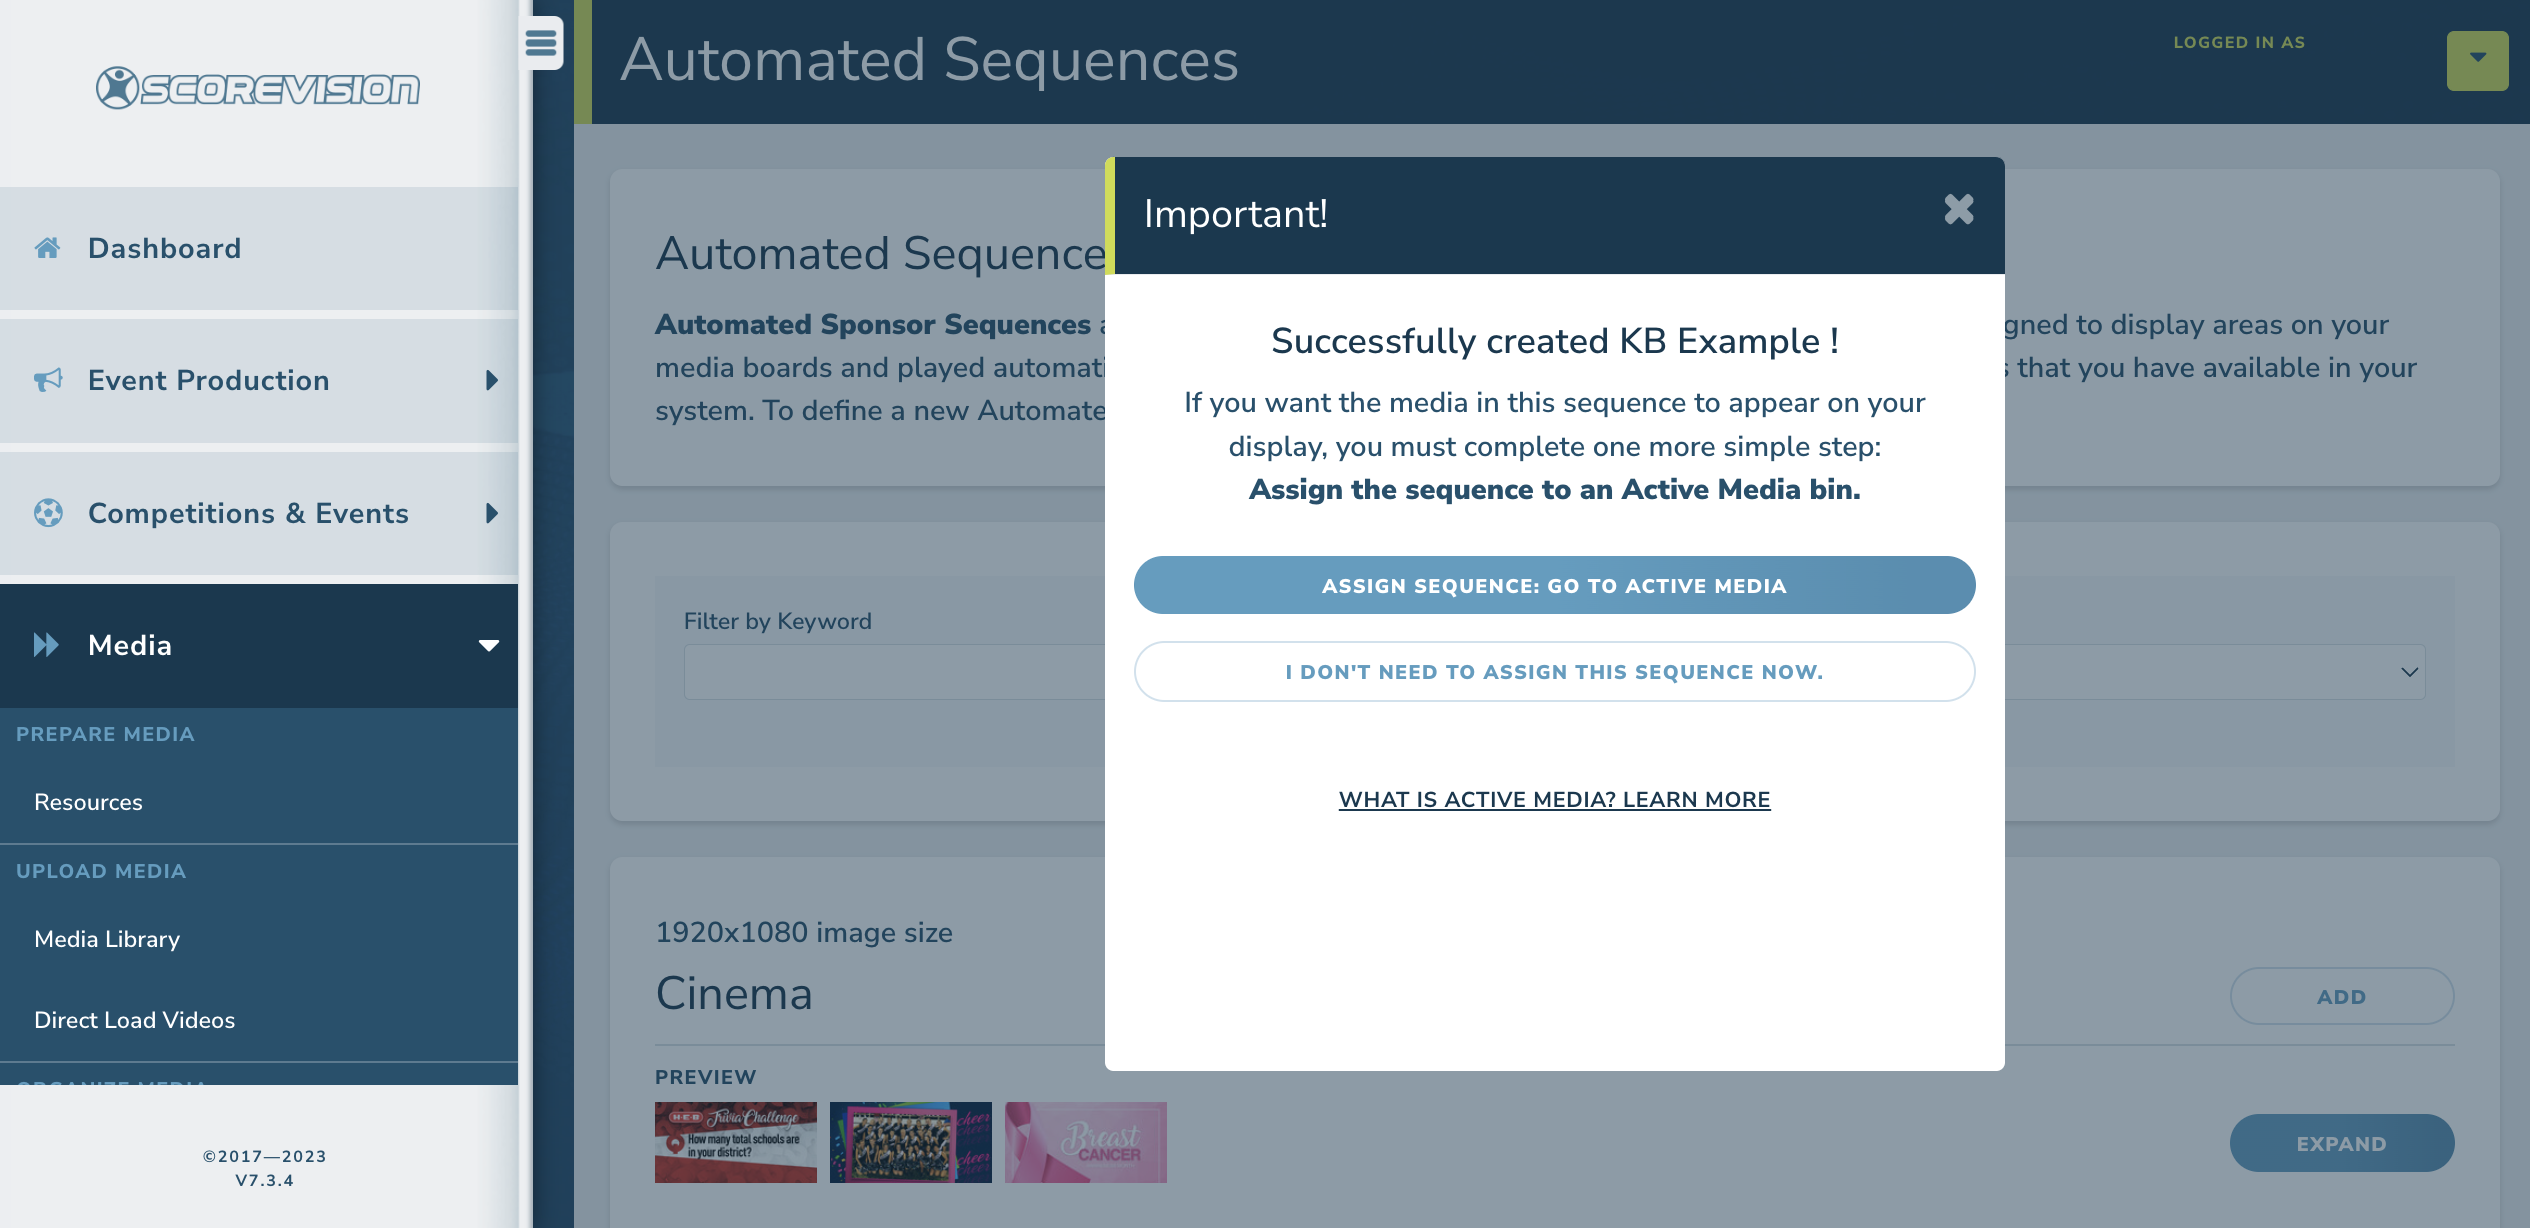
3. When you have confirmed the options of the wrappers in your automated sequence, click SAVE near the top of the window. This will trigger a popup window informing you that the sequence was successfully created. Choose to assign the sequence to active media now or later. NOTE: Automated Sequences must be assigned to Active Media in order to be available on the Producer app. Please see our other video and article to learn more about Active Media.
ScoreVision Support Contact Information
If you have any questions or need assistance, our support team is available to help.
