This article provides steps on how to start and run a game on the ScoreVision Volleyball Scorekeeper App.
Connecting Your Scorekeeper App to a Scoreboard Display
1. Log in to your Scorekeeper App using your ScoreVision credentials. If you want to connect the Scorekeeper app to a display, ensure that the YES tab is selected. Then, press CONNECT on your display of choice (generally, you will select SV-1, but SV-2 also works; naming may vary based on your facility). If you do not want to connect to a display, refer to #2 below.


2. If you do not want to connect the Scorekeeper app to a display, ensure that the NO tab is selected. The most common reason for choosing NO is when you scoring at an away game in order to send information to the ScoreVision Fan App. To do this, you will need a source of wifi such as a hotspot or a connection to the wifi in the facility you are visiting.
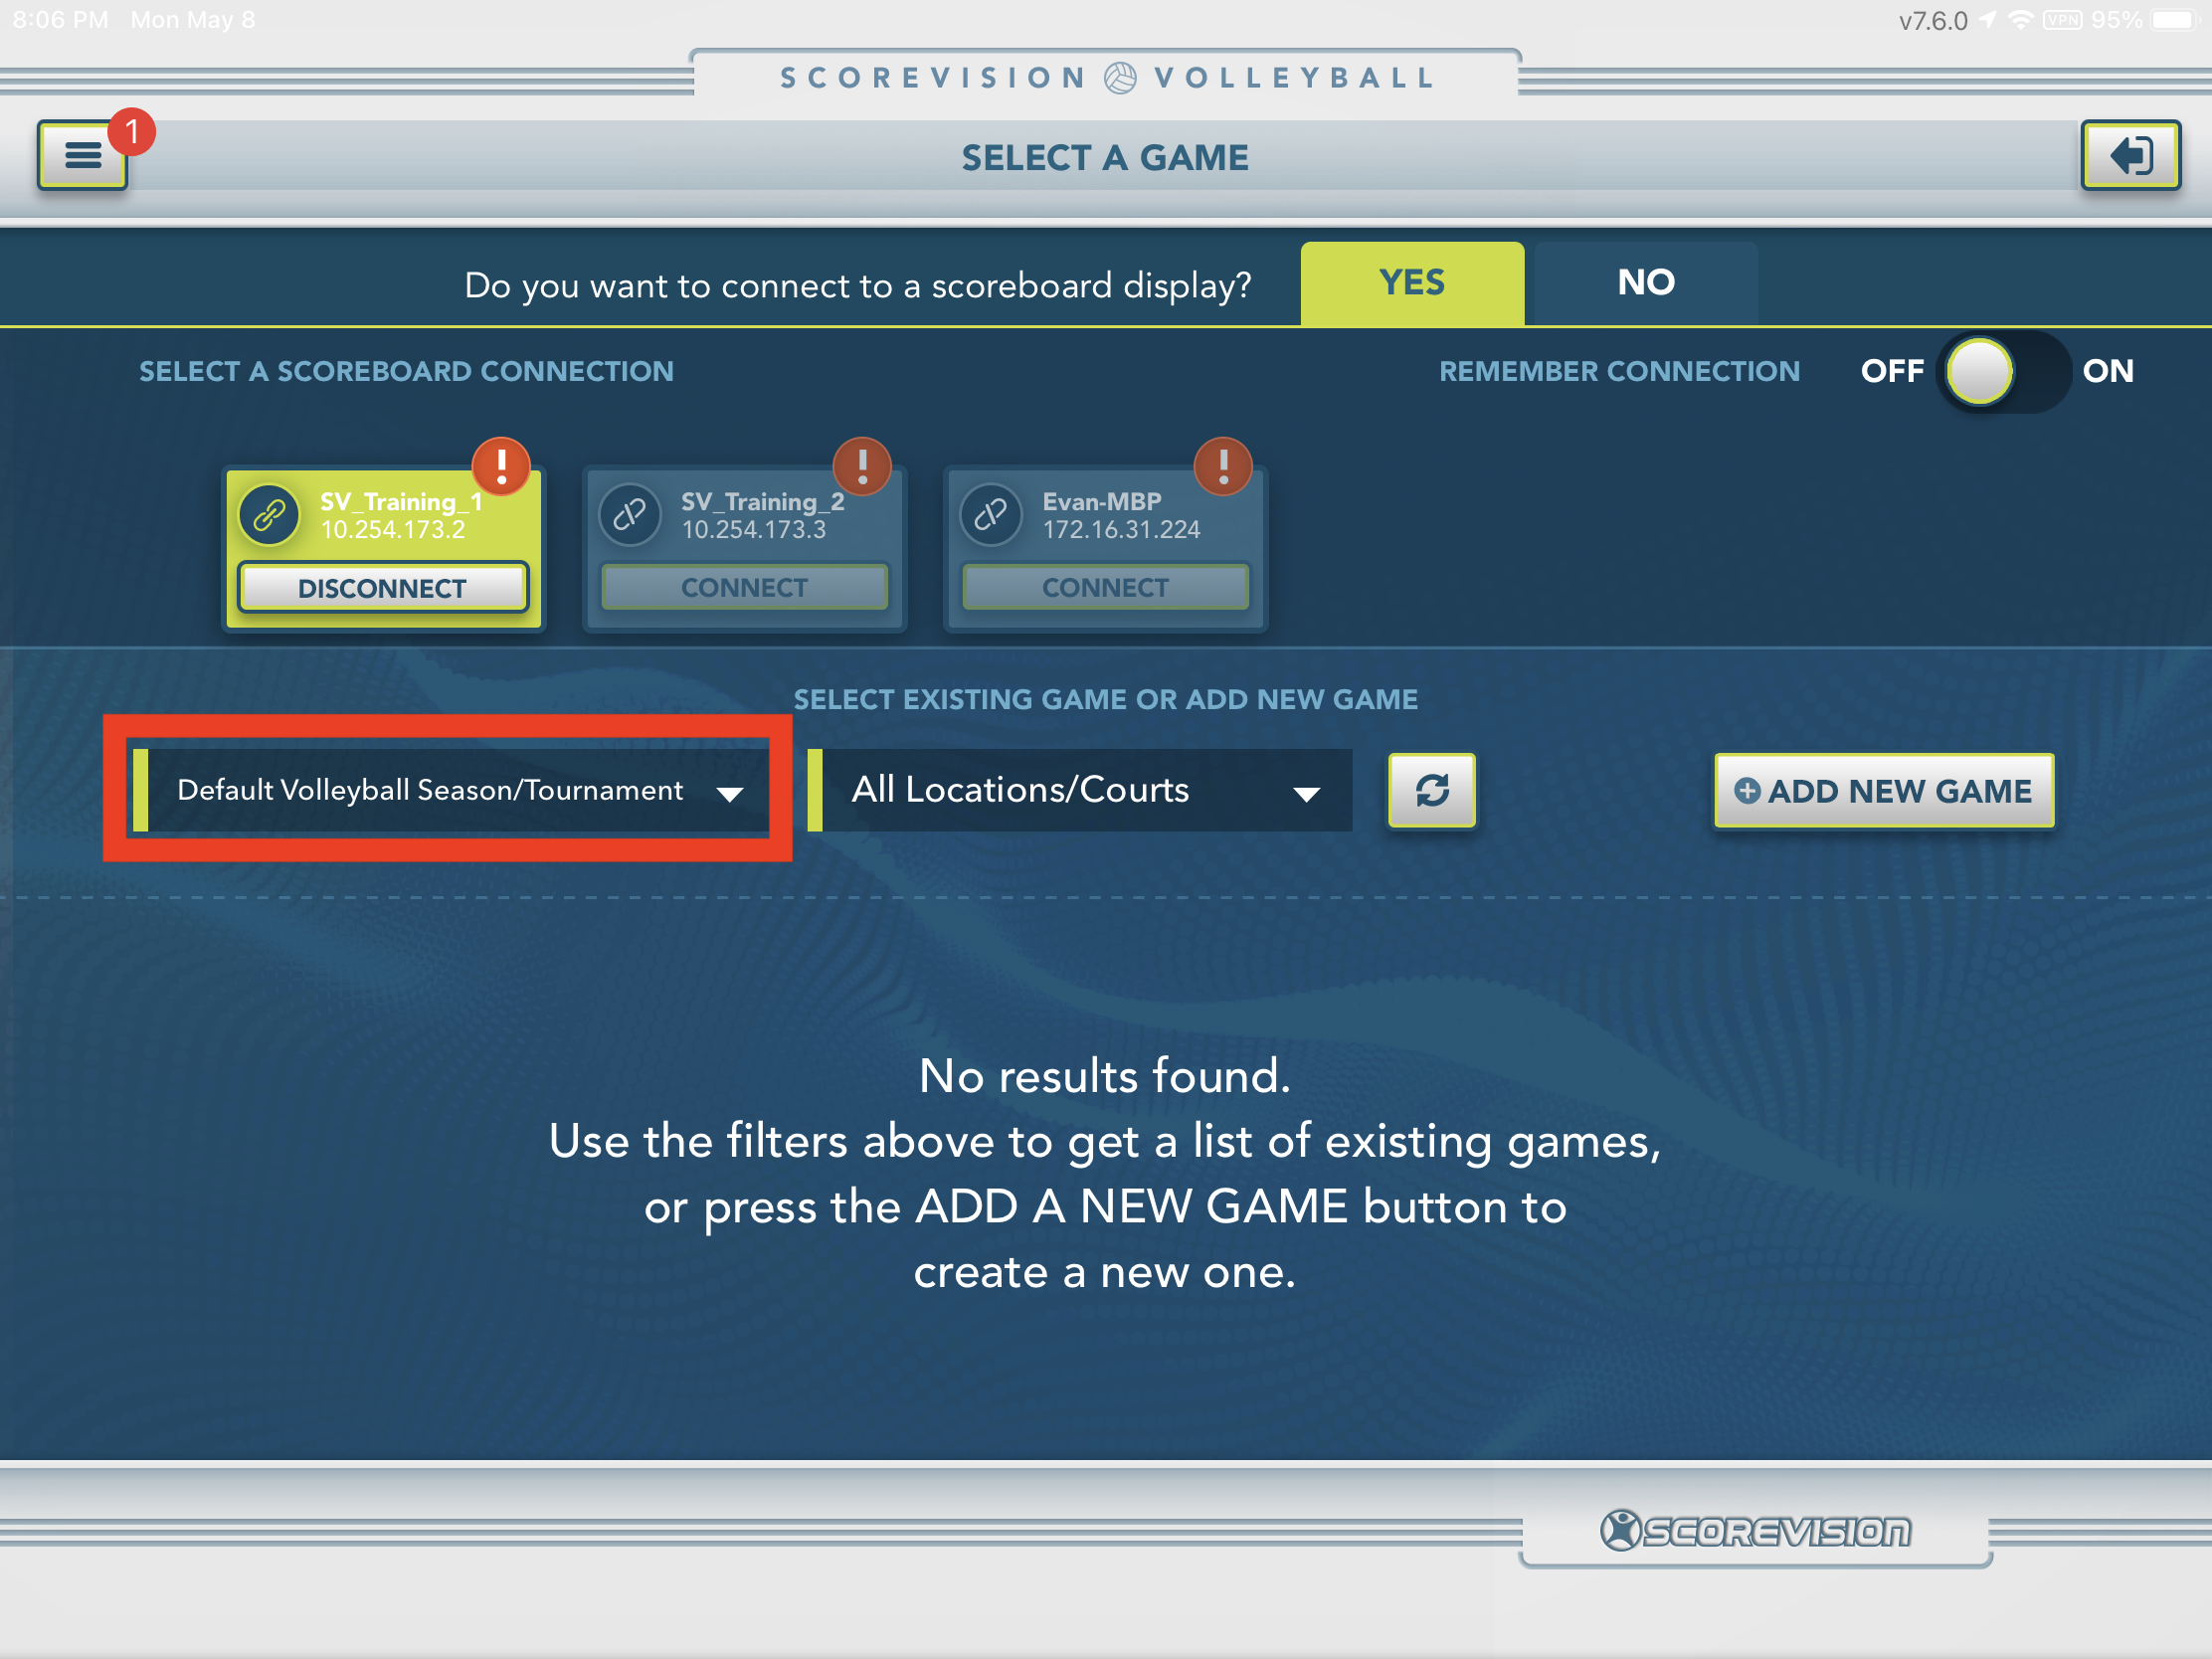
3. Press DEFAULT VOLLEYBALL SEASON/TOURNAMENT to bring up a list of any active seasons created in the cloud.
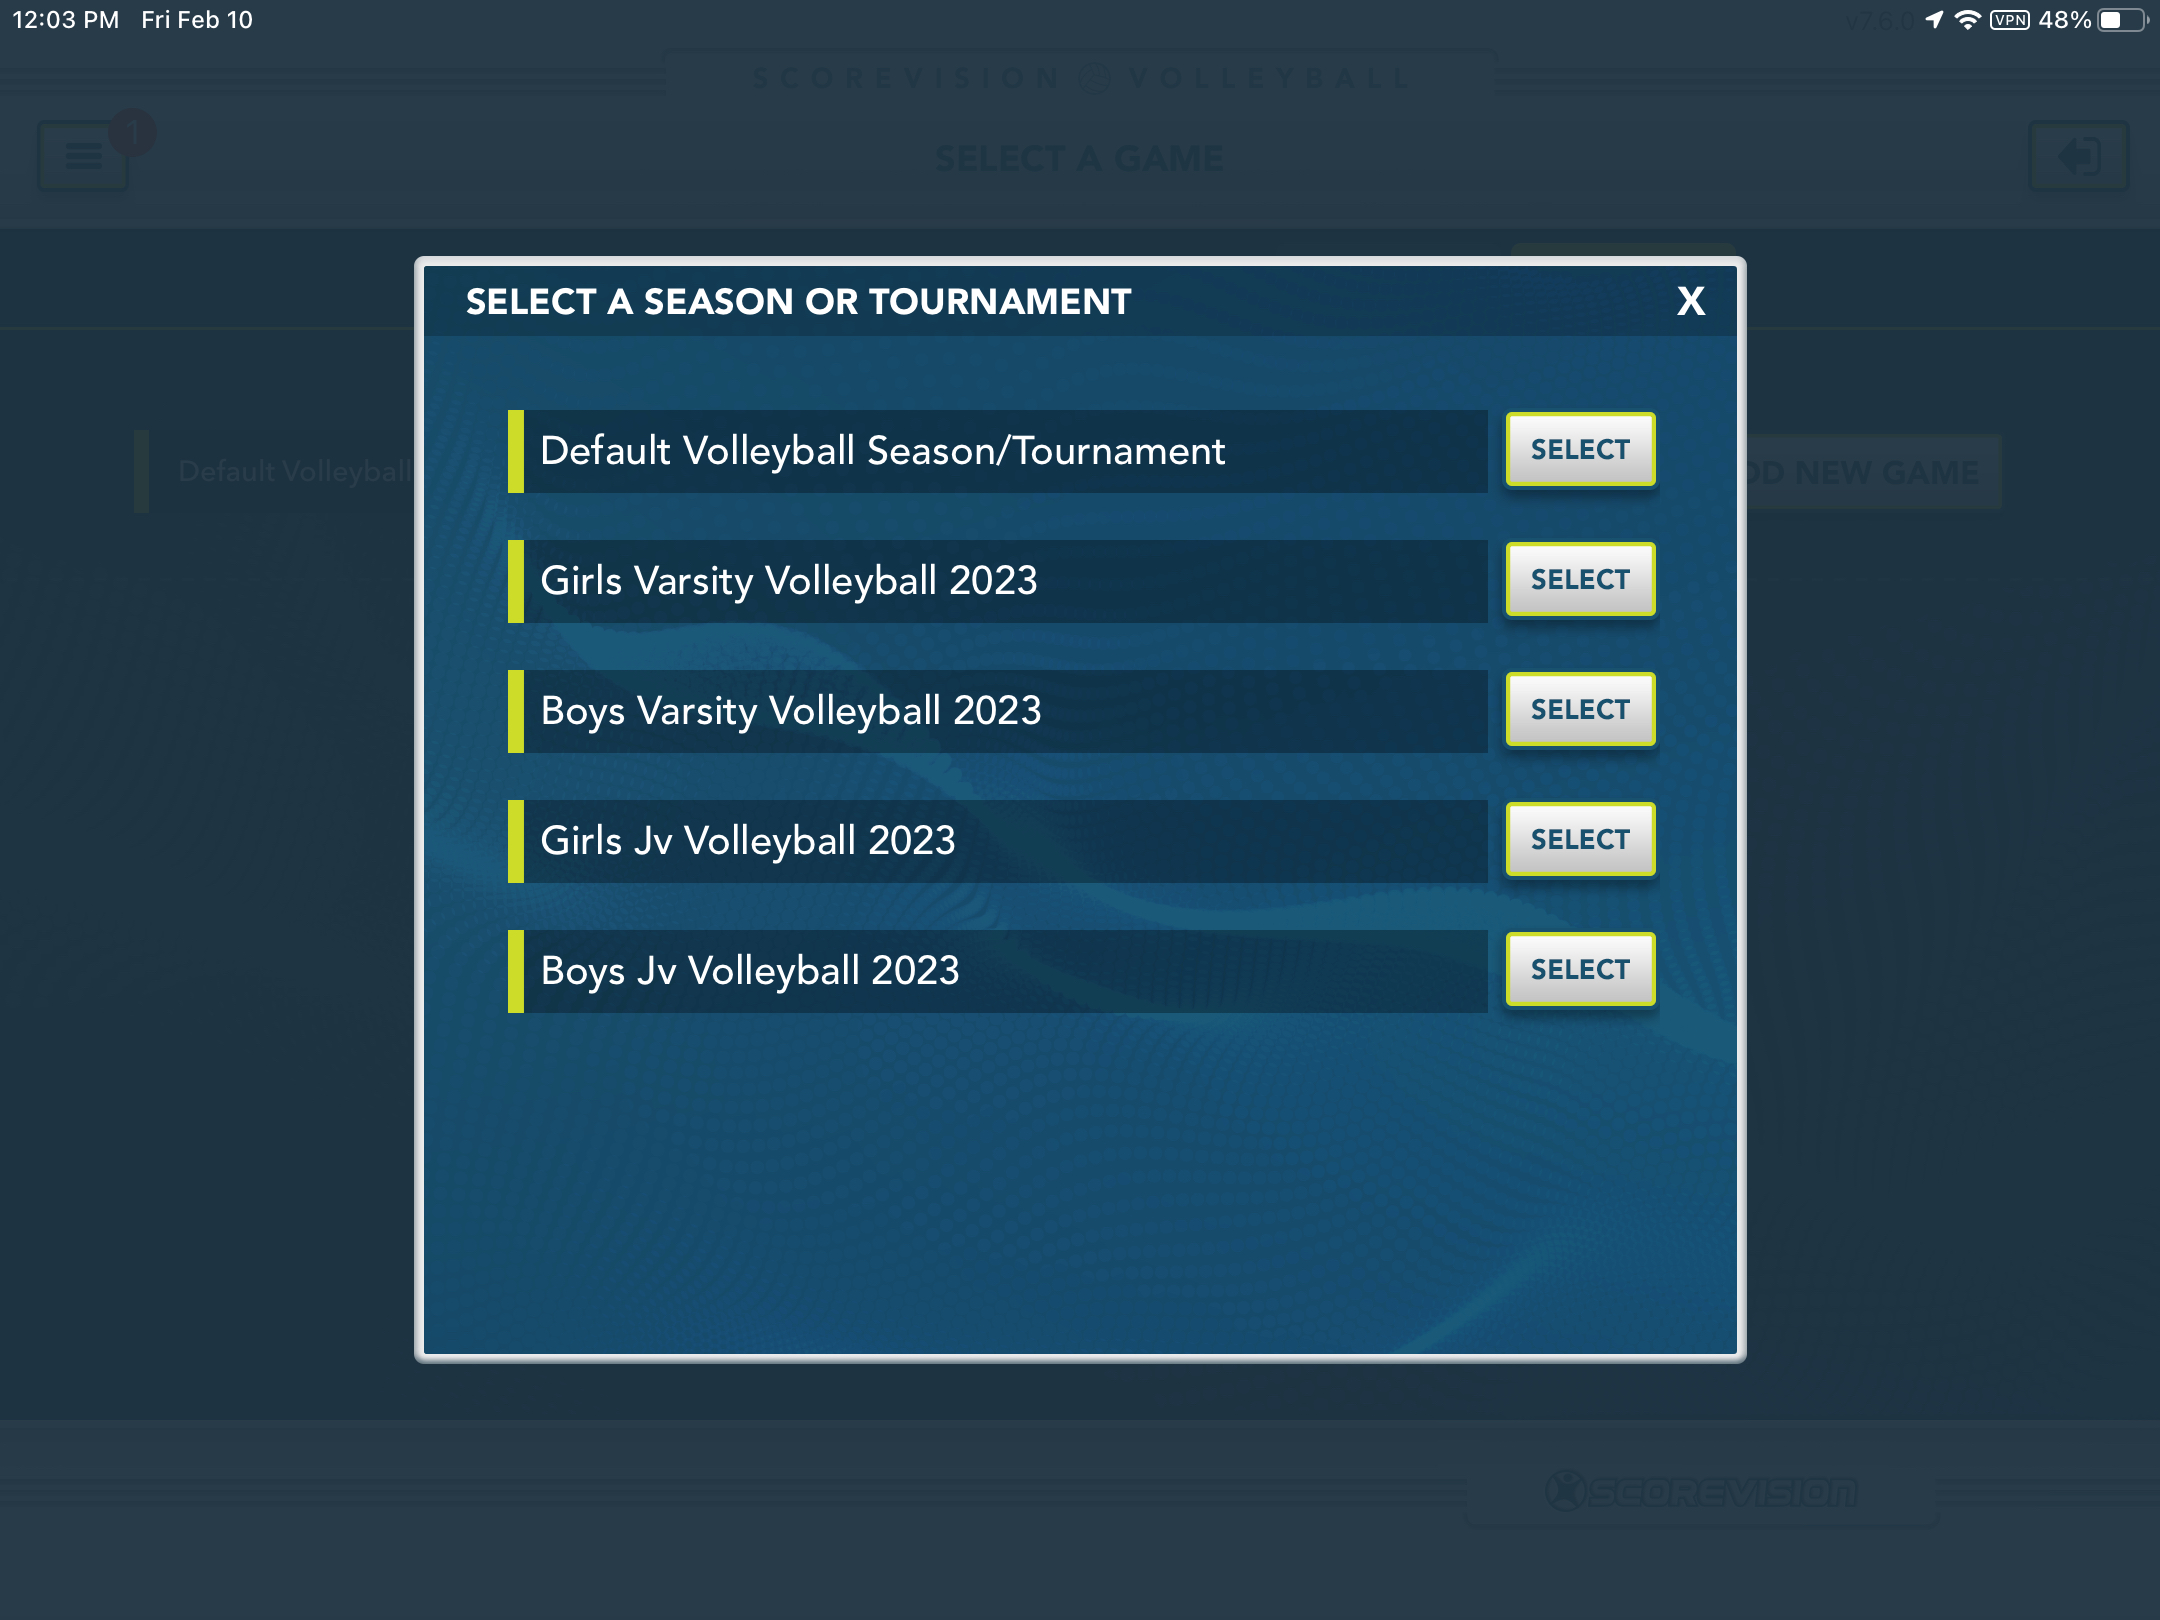
4. A list of available pre-made seasons will appear in a pop-up window. Select the season that you want to use. NOTE: If Default Season/Tournament is the only season available in this list, seasons will need to be created in the cloud.
5. If you have previously entered games in the cloud, a list of those games will appear in the open space below the filter menus. These games will be sorted by start date and time, the nearest upcoming game first.
Press SELECT to begin the game of your choice. The rules that were defined in the cloud (number of periods, timeouts, etc.) will automatically be applied. NOTE: Games created in the cloud will be visible 24 hours prior to the scheduled start time. 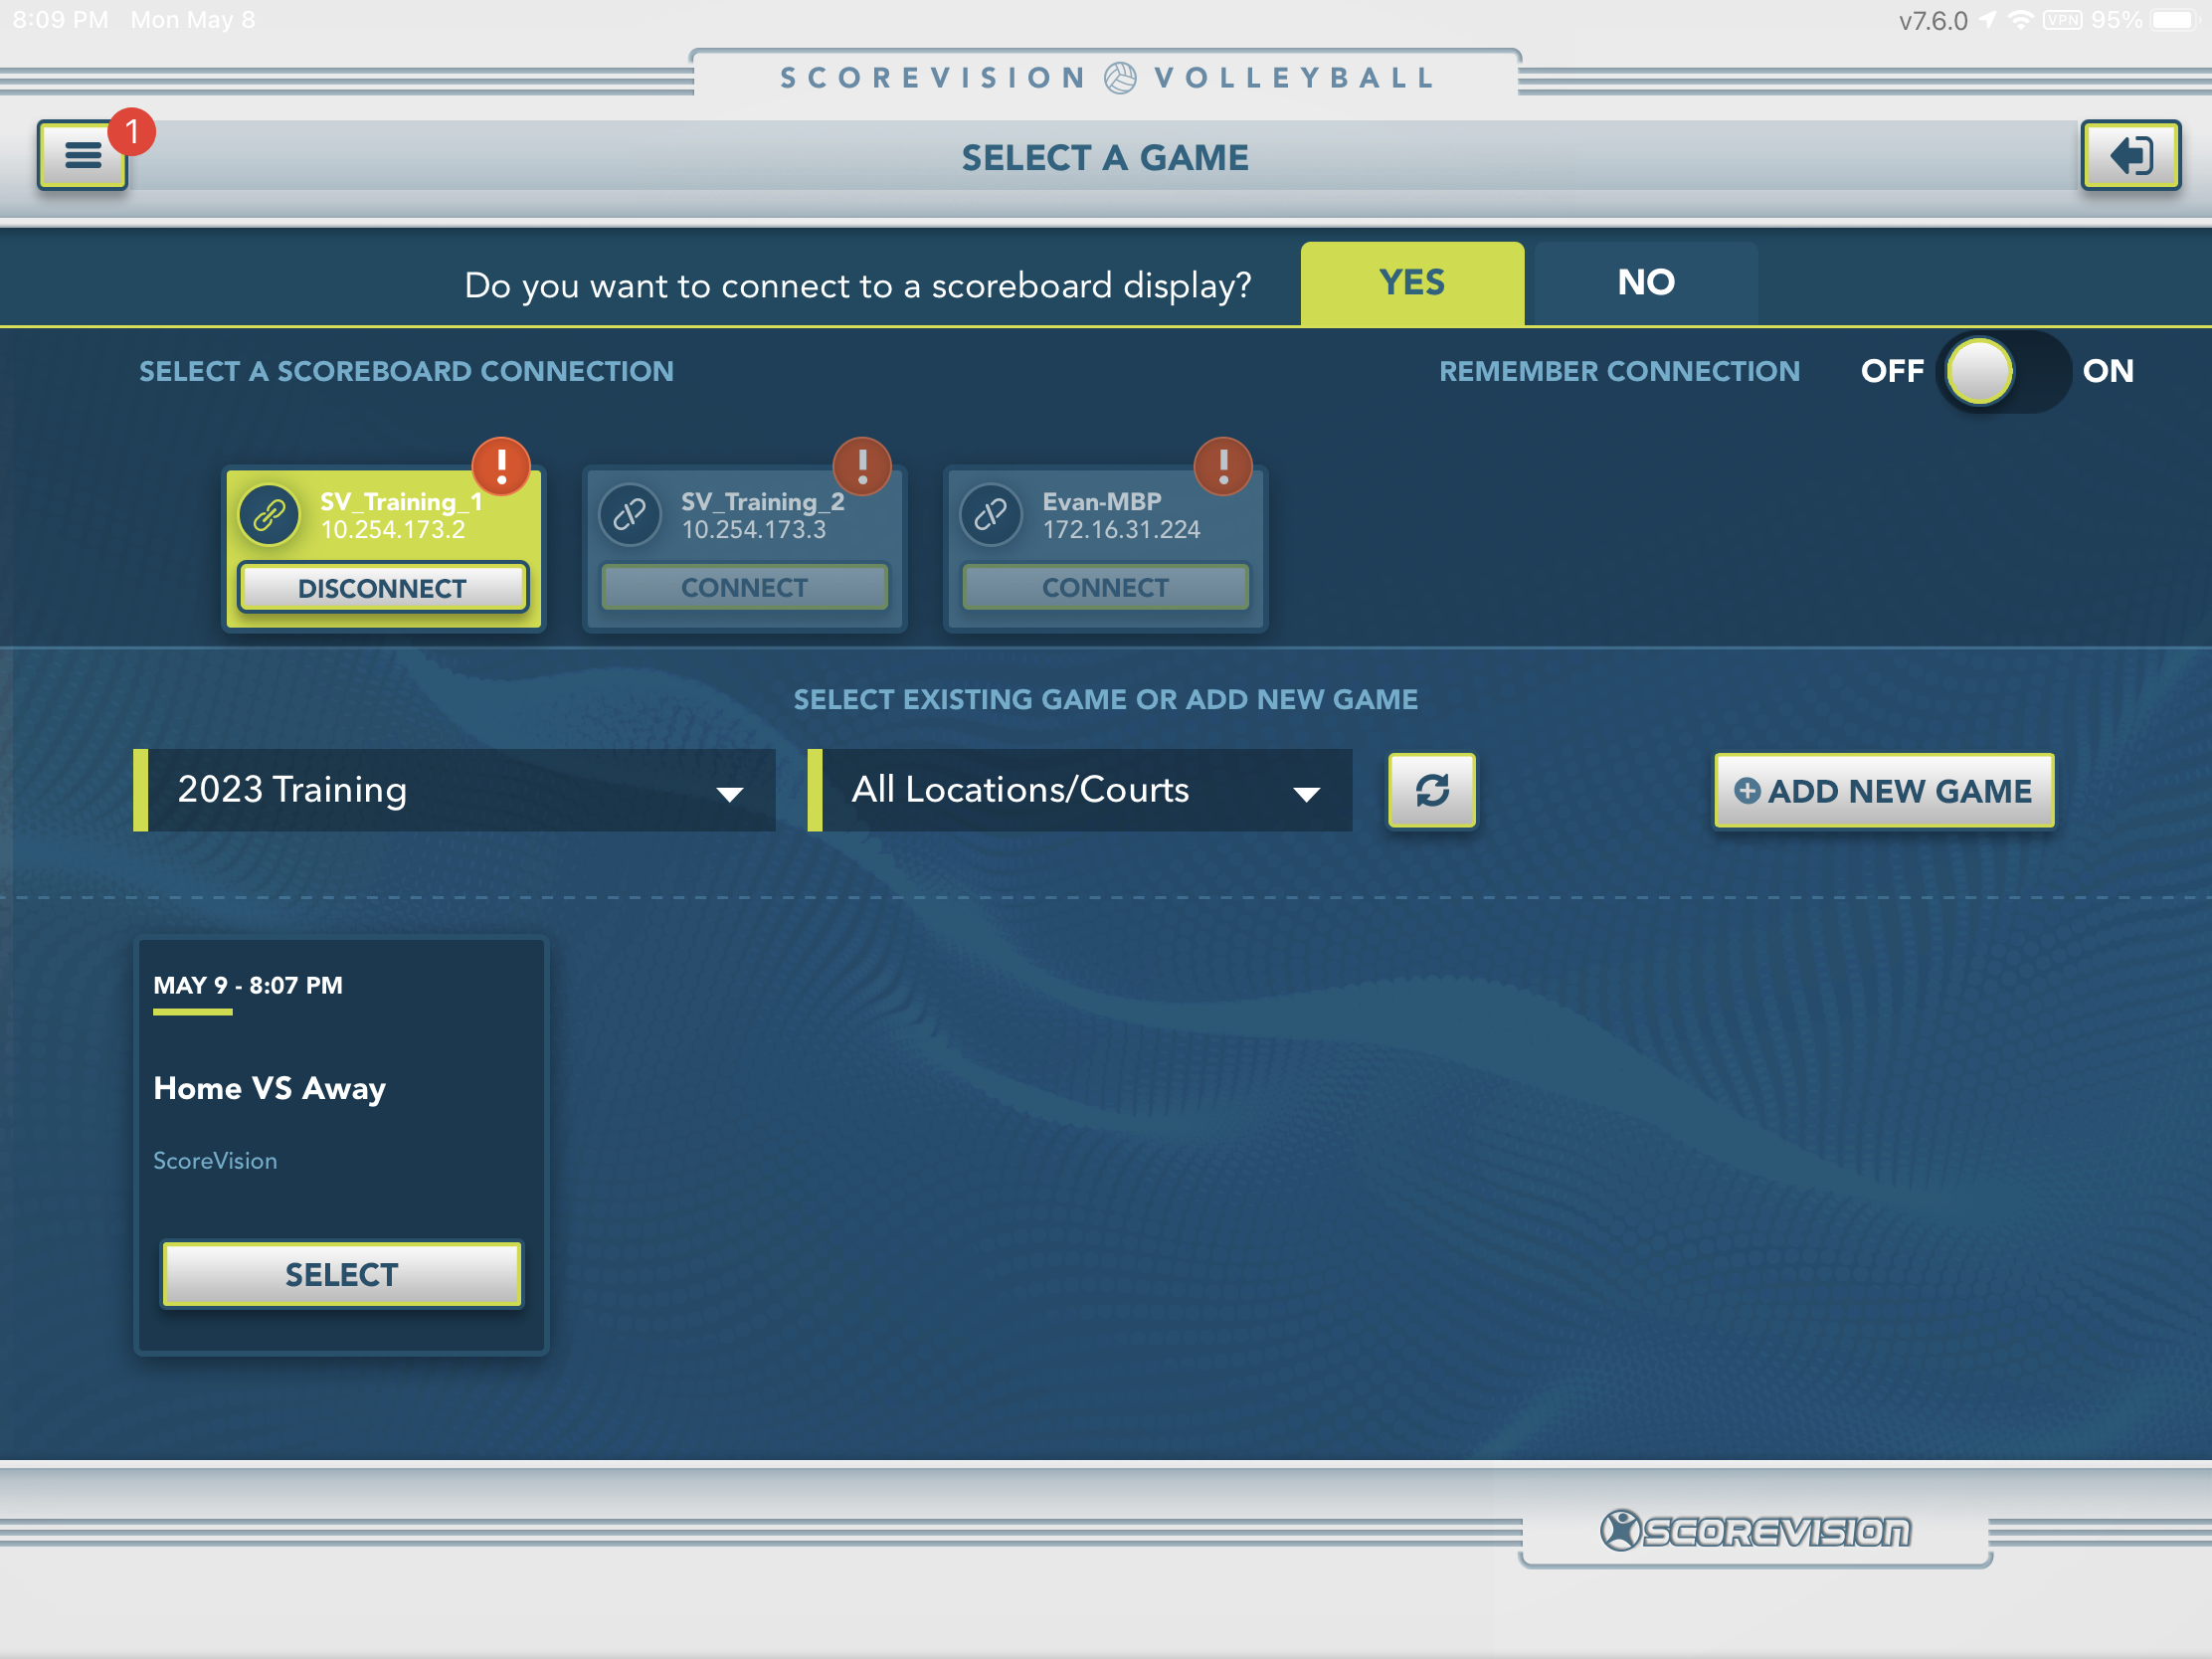
Setting Pre-Game Clock
1. Once you’ve selected the game, a scoreboard assistant for PRE-GAME CLOCK will appear giving you three options for pre-game:
- set clock to default time (if game was scheduled in the cloud, this button will say "set based on game time" and will countdown to the specified game time you have scheduled),
- set clock to custom time (such as 2:00 in the screenshot below), or
- I am ready to keep score, skipping pregame all together
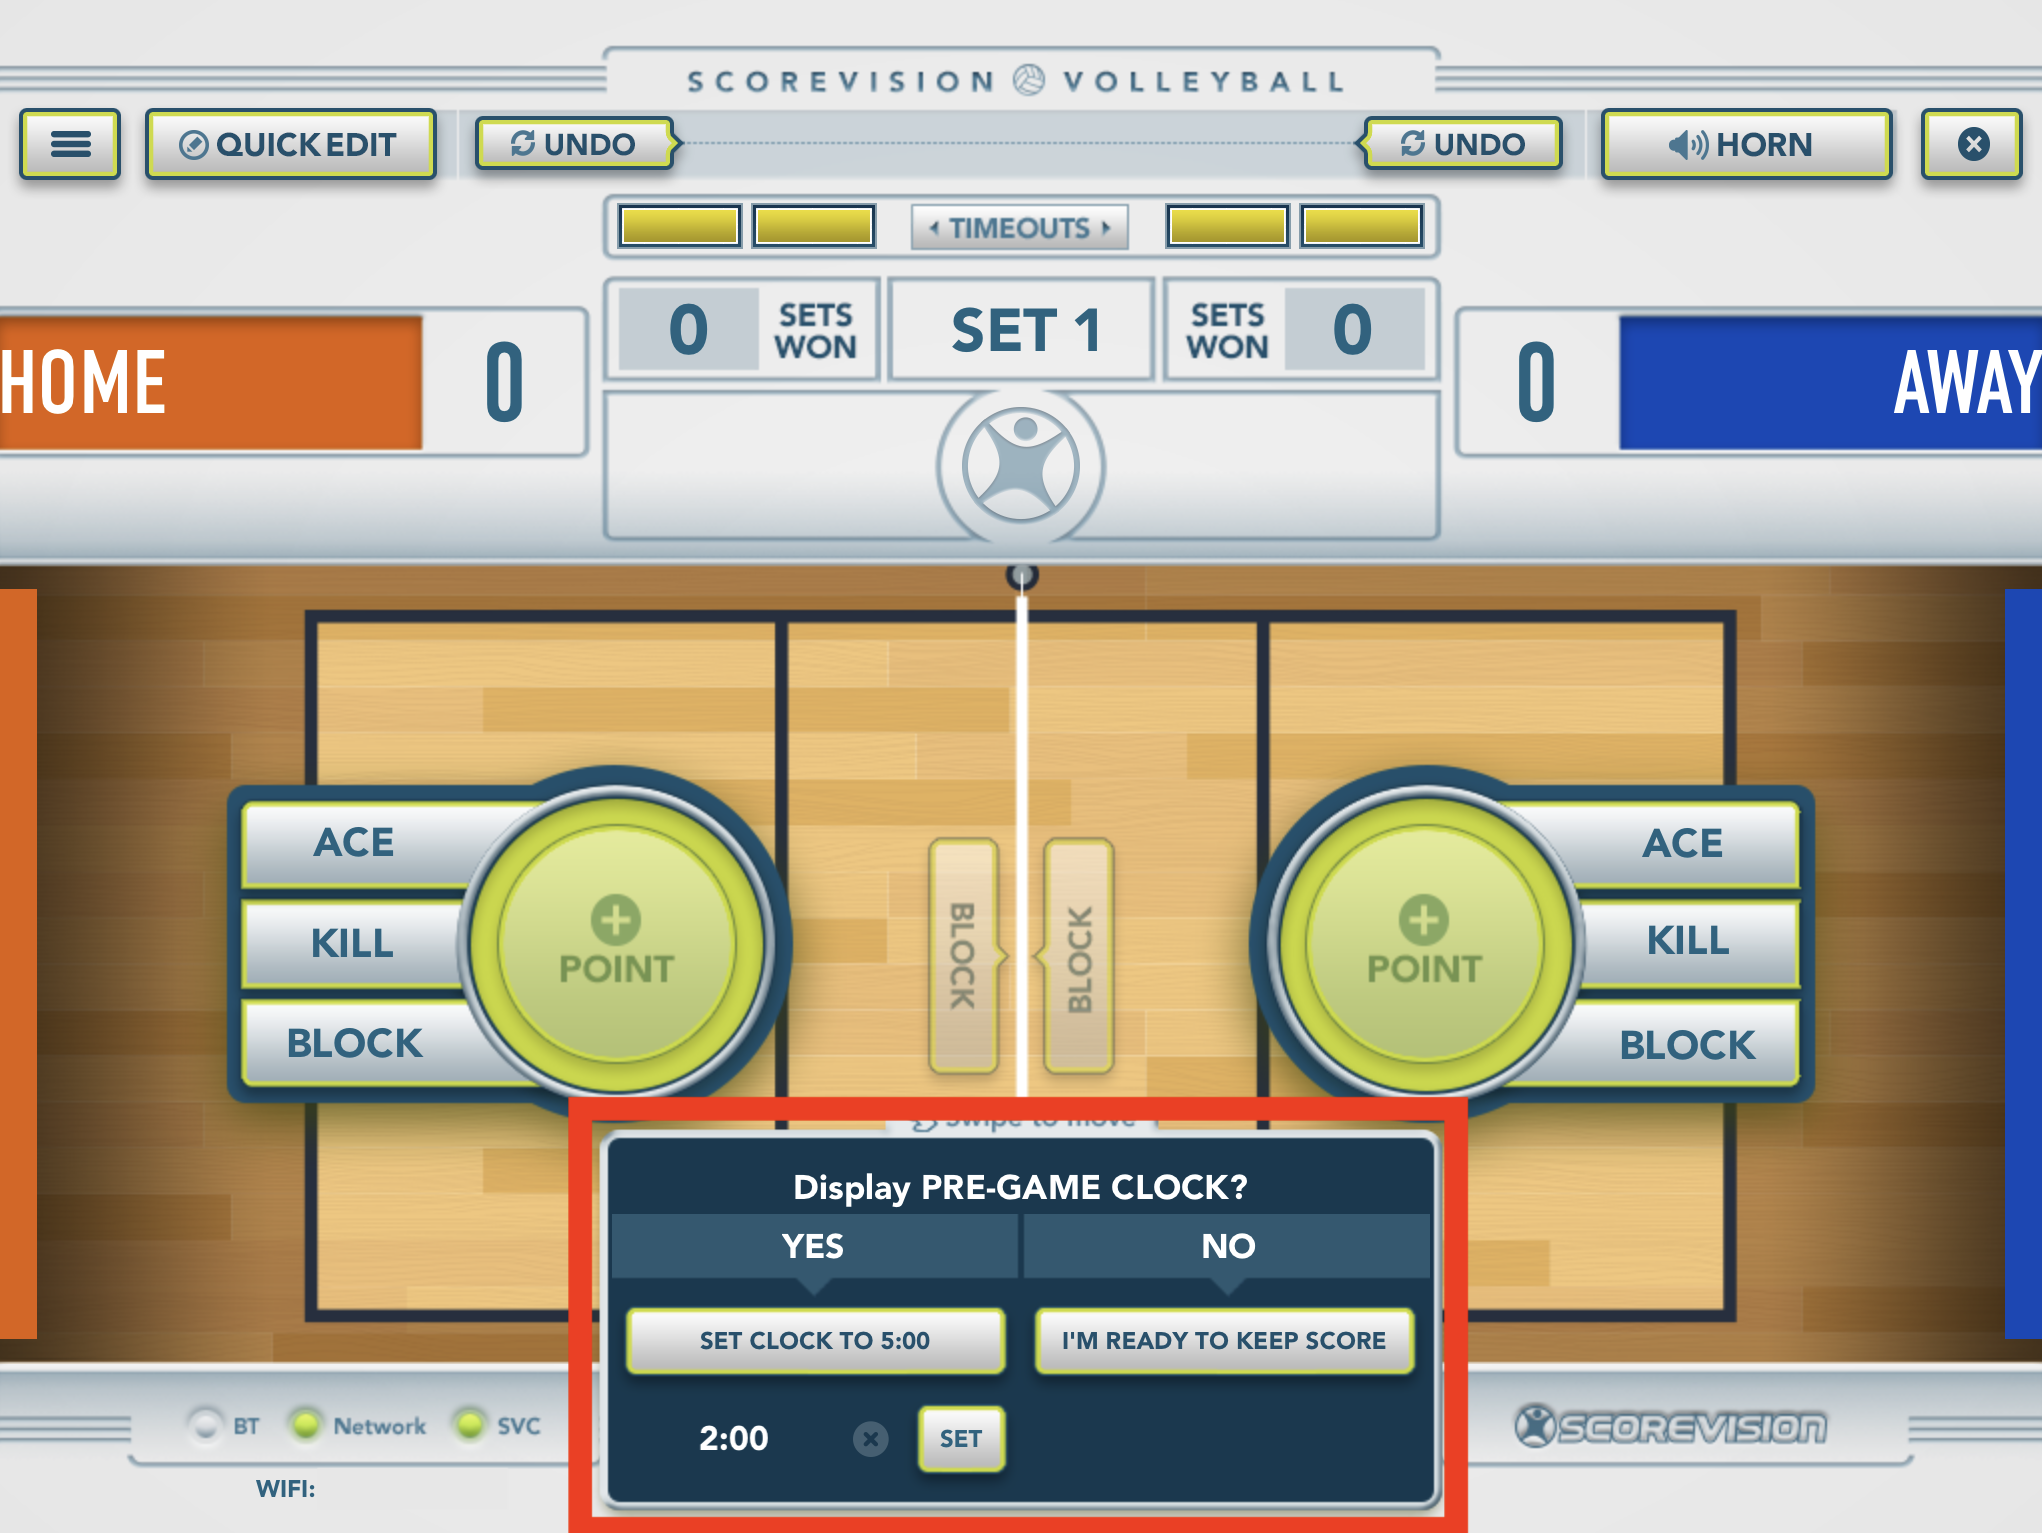 NOTE: The board will not engage until you start the pre-game clock. Ads will continue to run.
To set a custom length for your pre-game clock, press the time at the bottom of the scoreboard assistant.
- Type in the desired amount of clock time.
- Drop the keyboard by pressing the button in the lower right corner.
- Then press SET to engage the pre-game clock on the board.
- Press END if you would like to stop a running pre-game clock after it has been engaged.
- Set the pre-game clock to include the whole pre-game time as one session.
- If you would like the option of setting the pre-game clock for split intervals (such as individual court time and shared court time) press the menu button in the upper left-hand corner and then press PRE-GAME to restart the clock for each session.
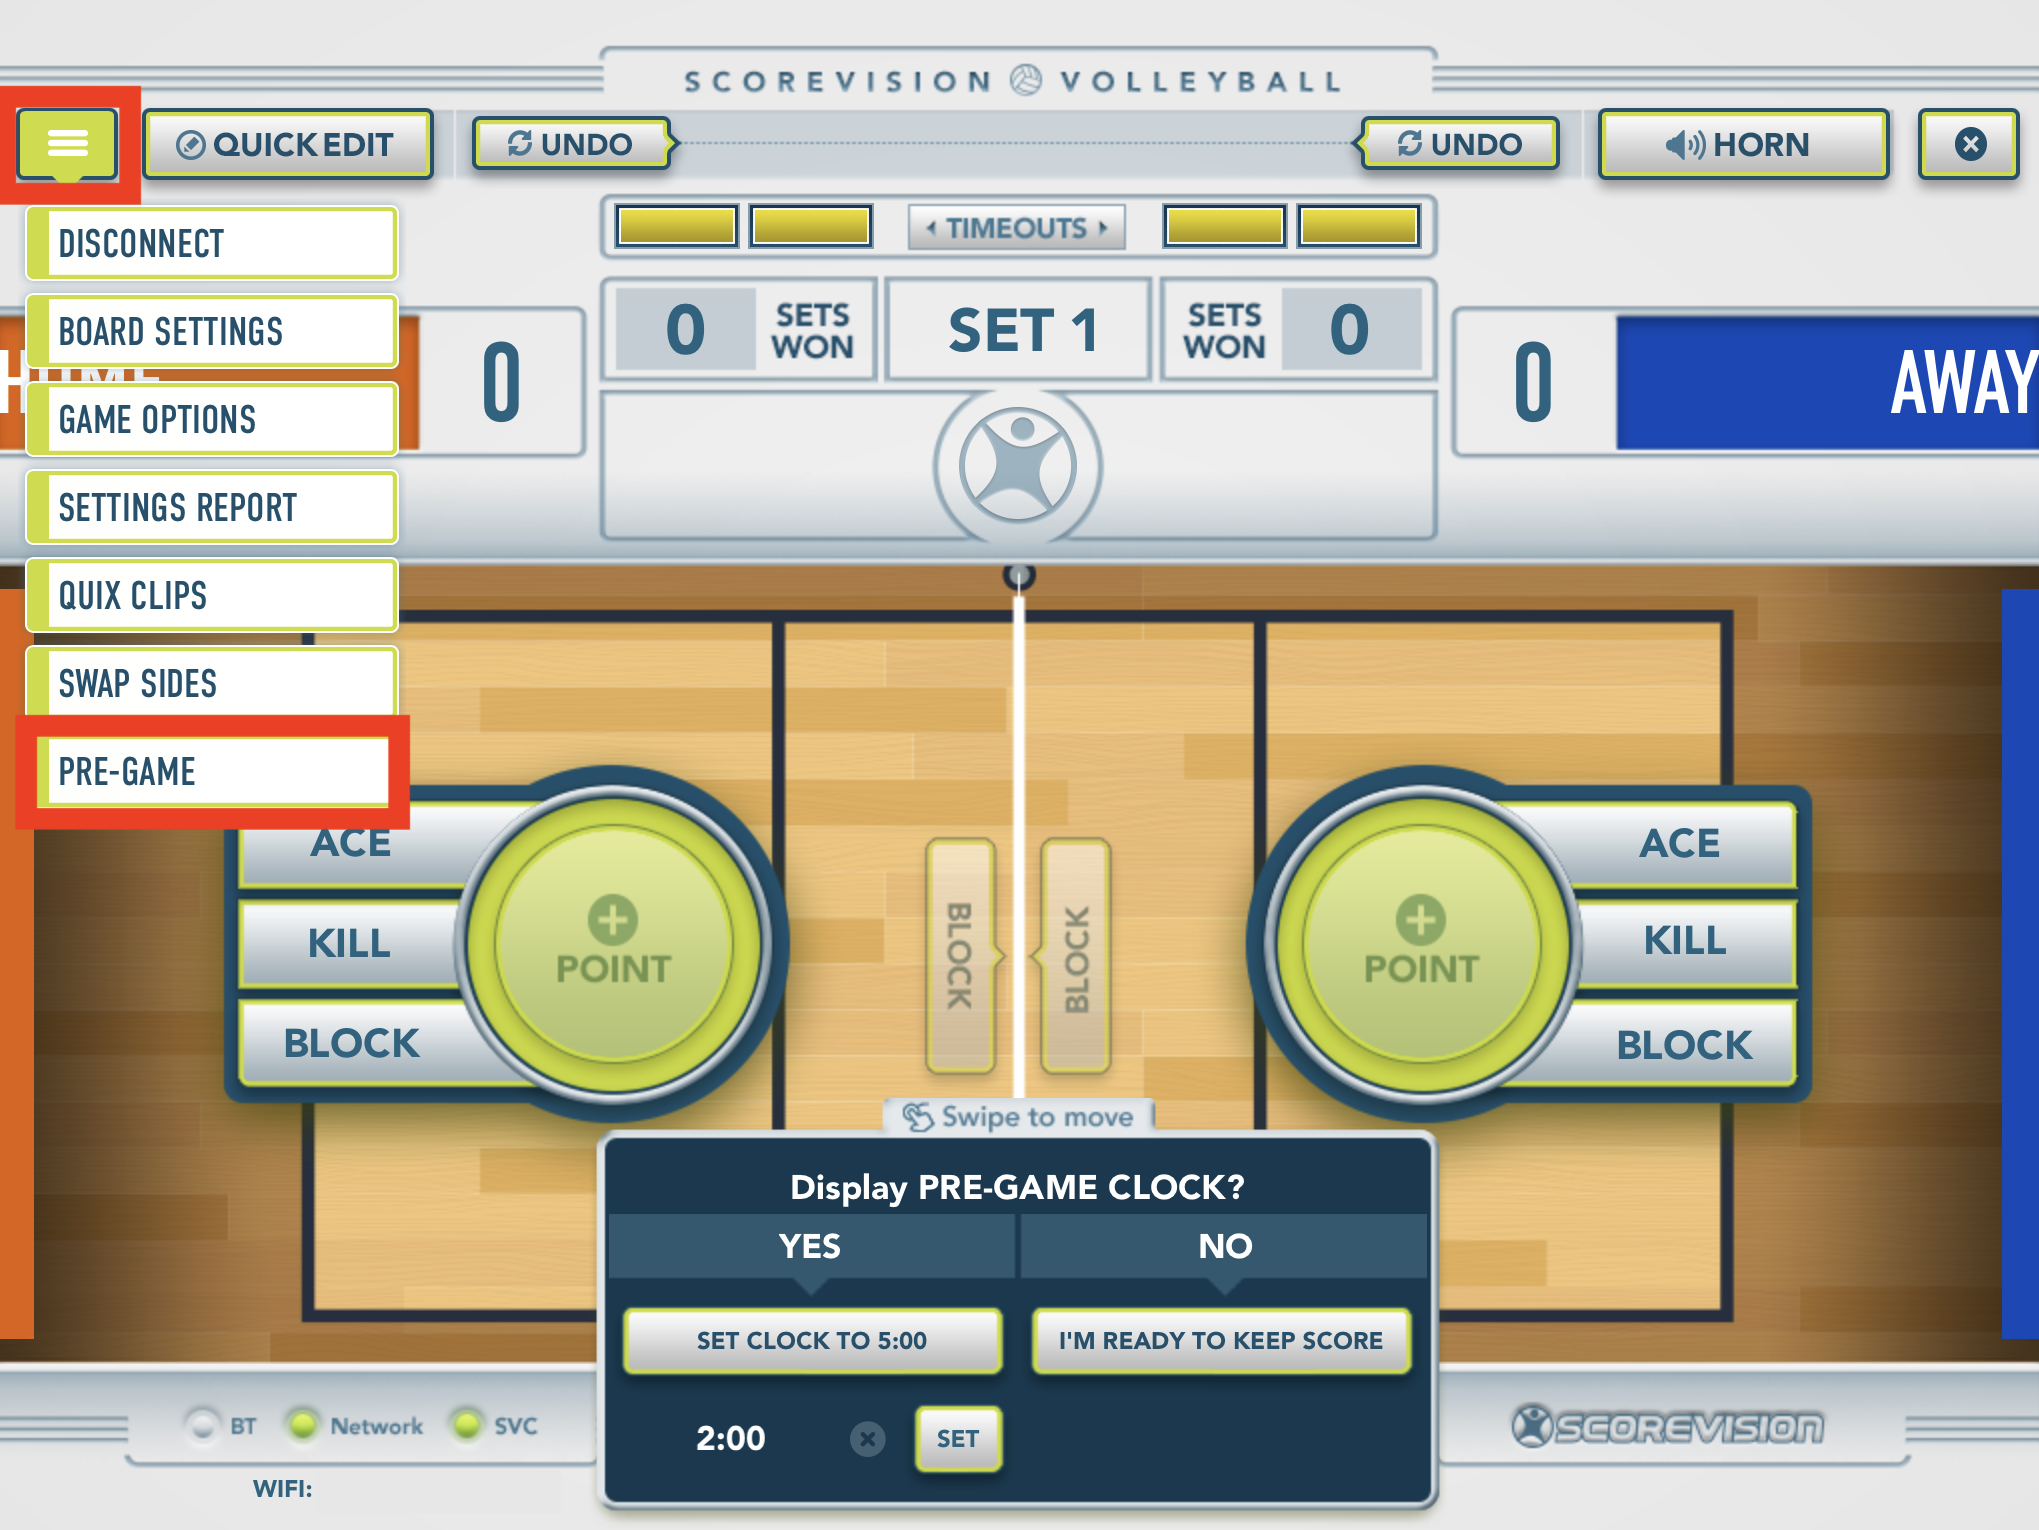
NOTE: The Pre-Game option from the menu can be selected to restart the pre-game clock as many times as you need but will disappear from the menu once you start keeping score for this game.
2. At any time during pre-game, press the menu icon in the top left corner and select GAME OPTIONS to review or alter the Game Settings.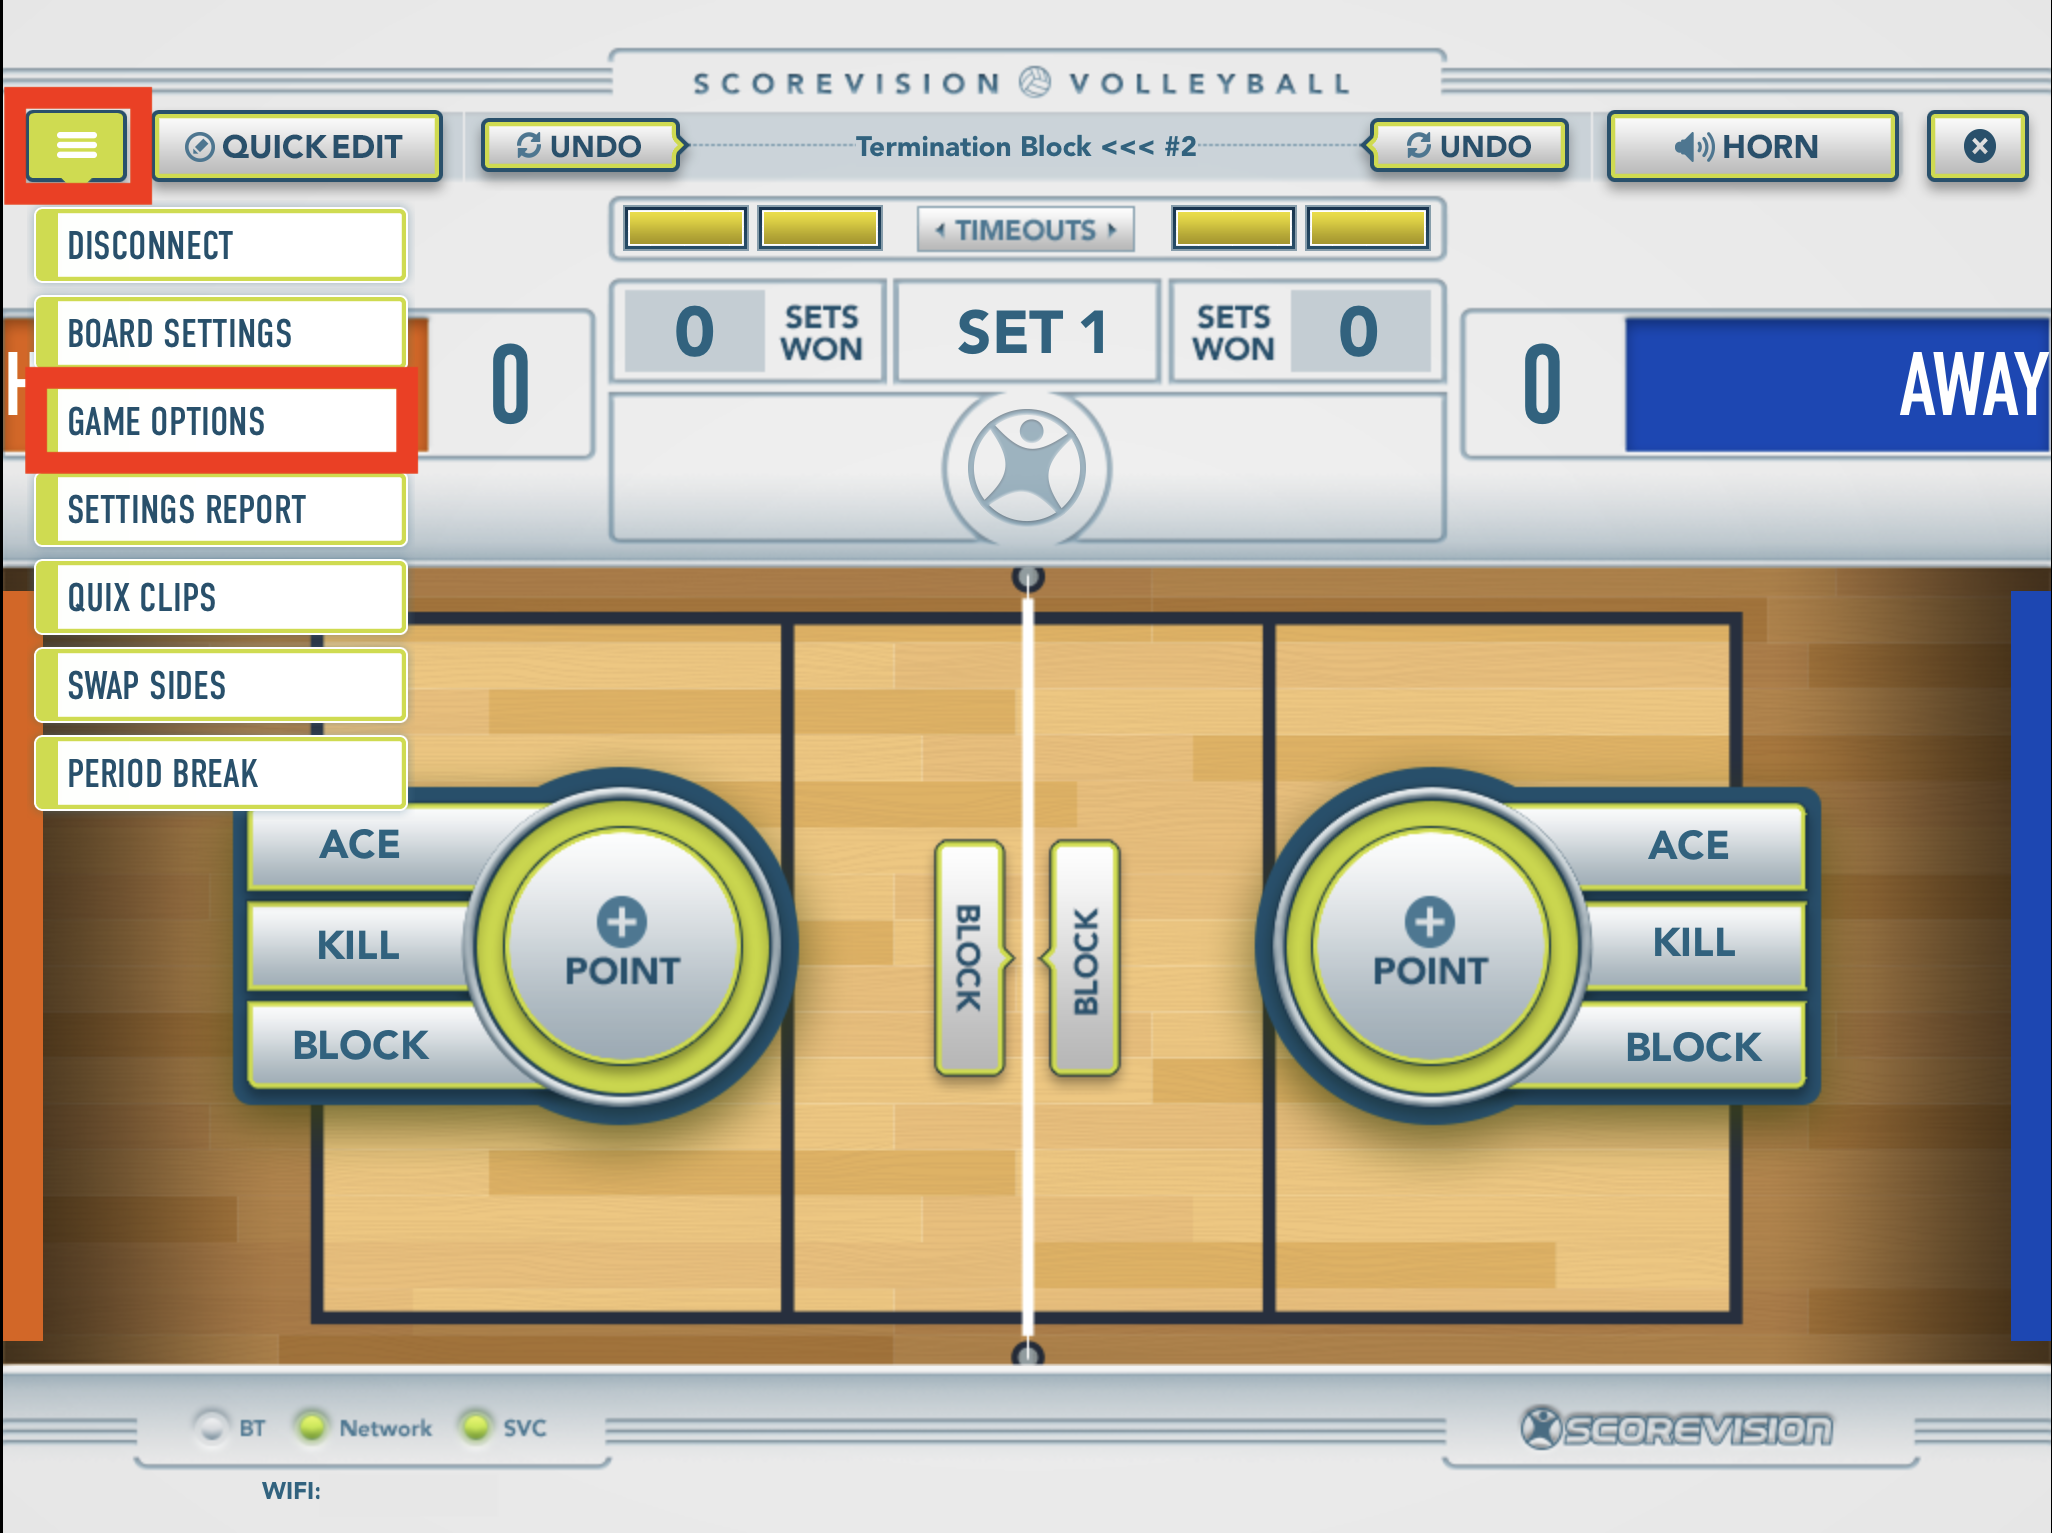
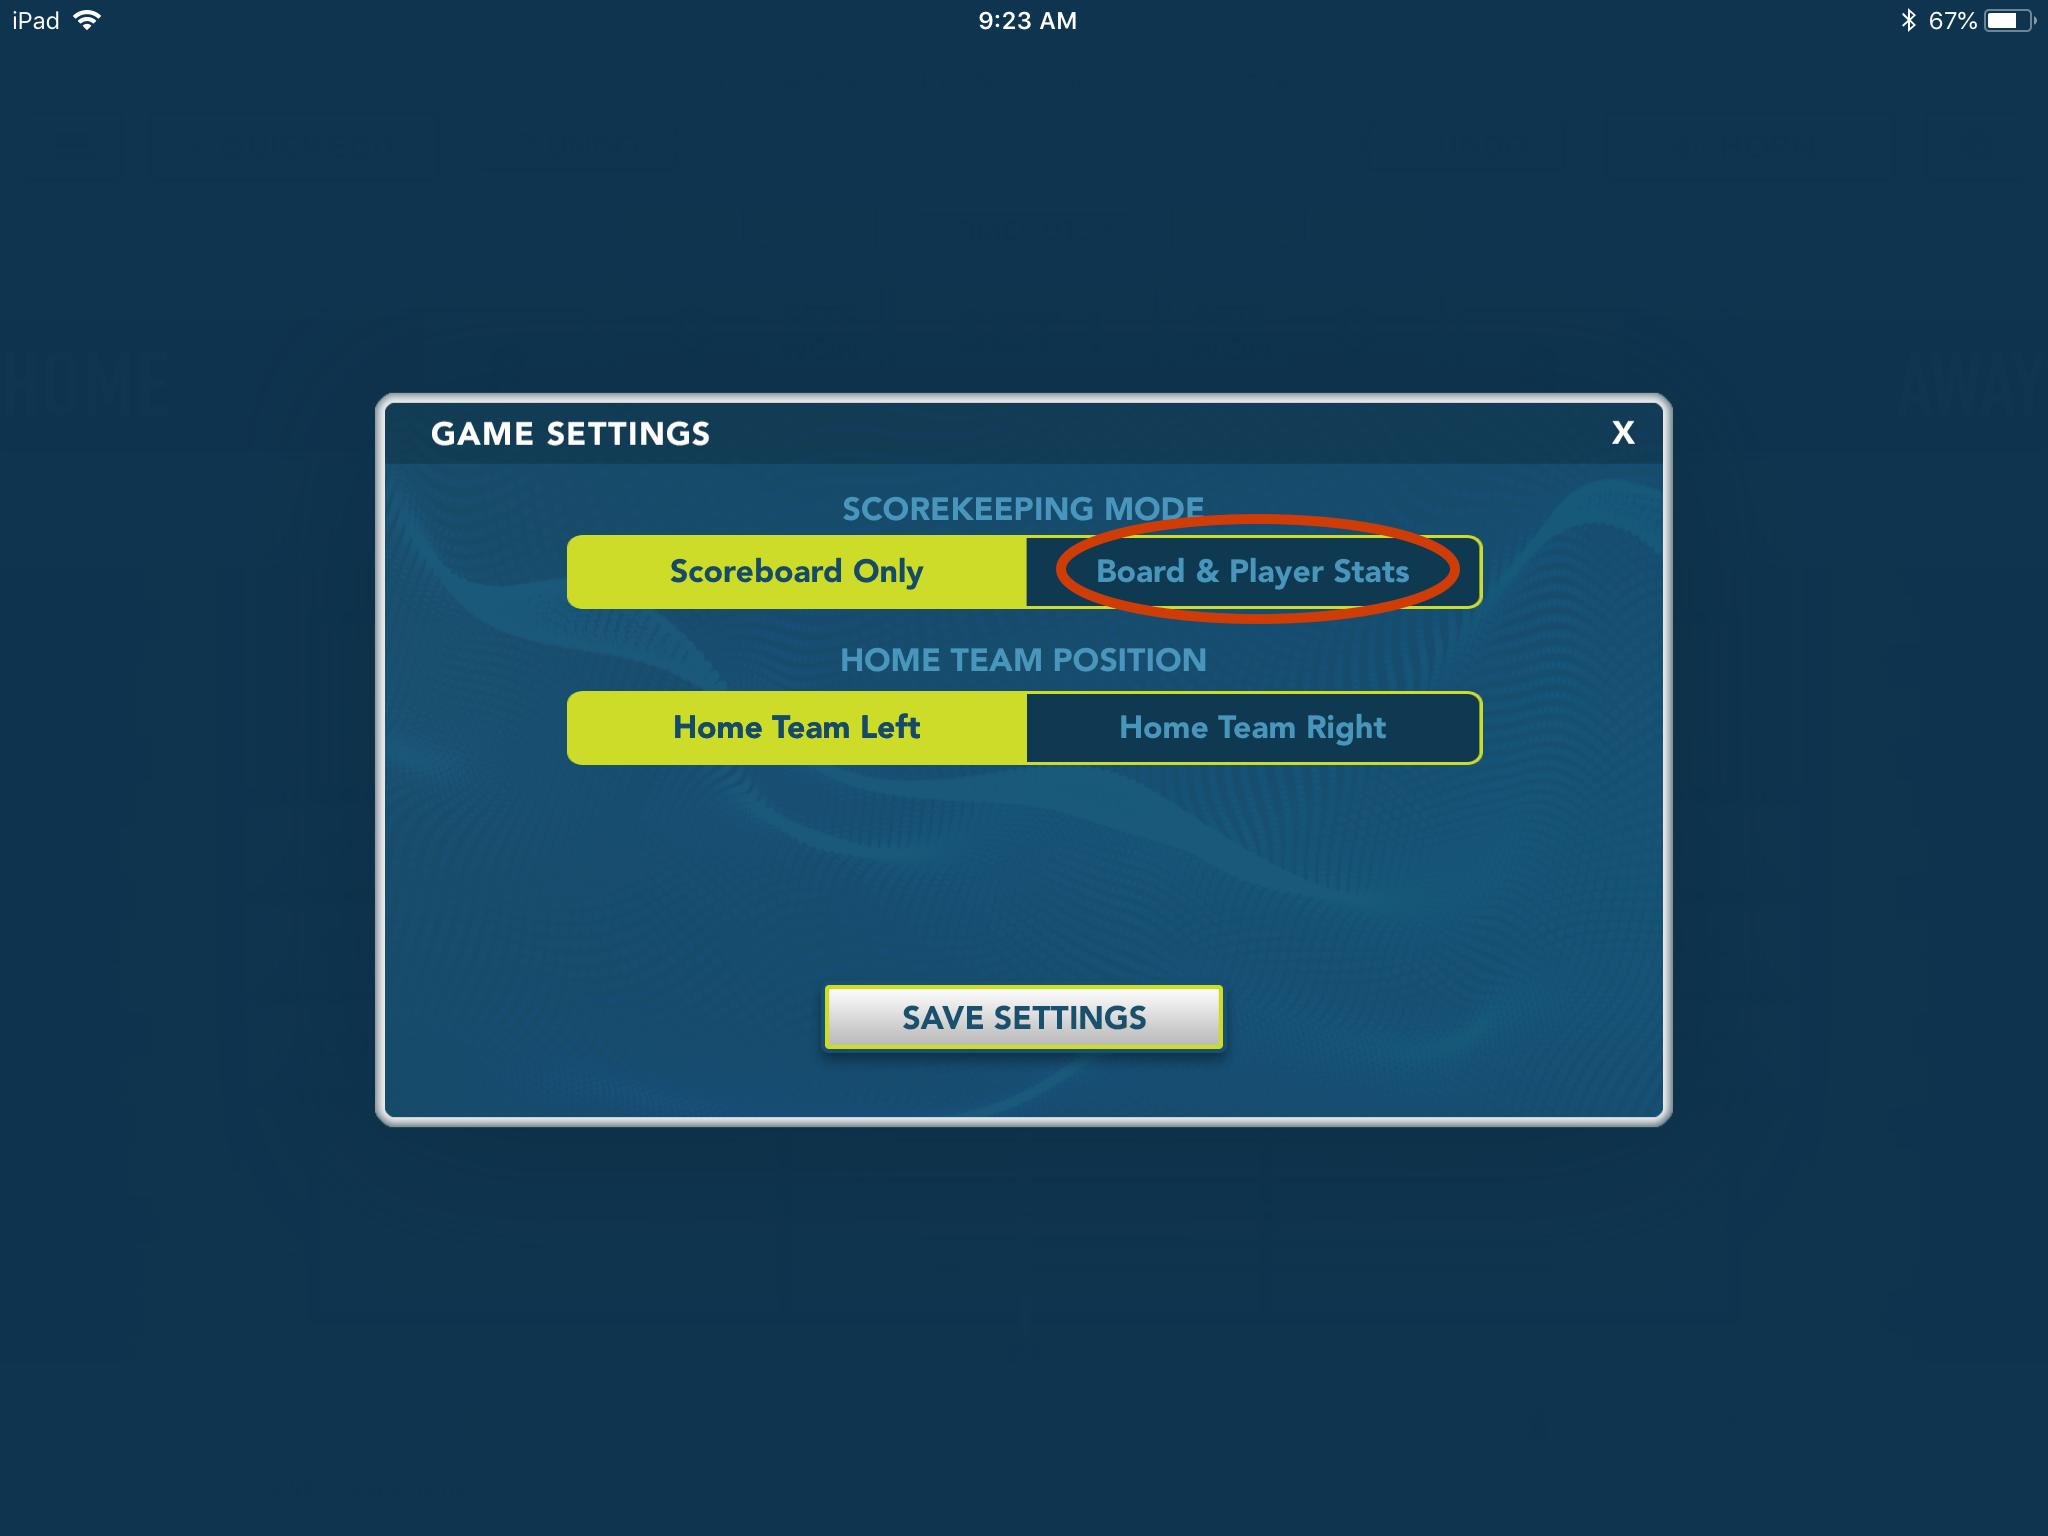
3. As best practice, you should confirm the Scorekeeping Mode in which your game is set, because once the game is started, your options for changing modes is restricted.
- Choose SCOREBOARD ONLY if you wish to keep the scorekeeper’s job super simple and do not want to track points and stats for your players during this game. This is referred to as simple scorekeeping.
- Choose BOARD & PLAYER STATS if you want to attribute points and stats to players and wish to use accolades as well as a leaderboard that shows all players who have scored points during the game.
Simple Scorekeeping (Scoreboard Only Scorekeeping Mode)
1. This scorekeeping mode does not attribute points nor stats for individual players. Press POINT, ACE, KILL, or BLOCK to give a point to the correlated team.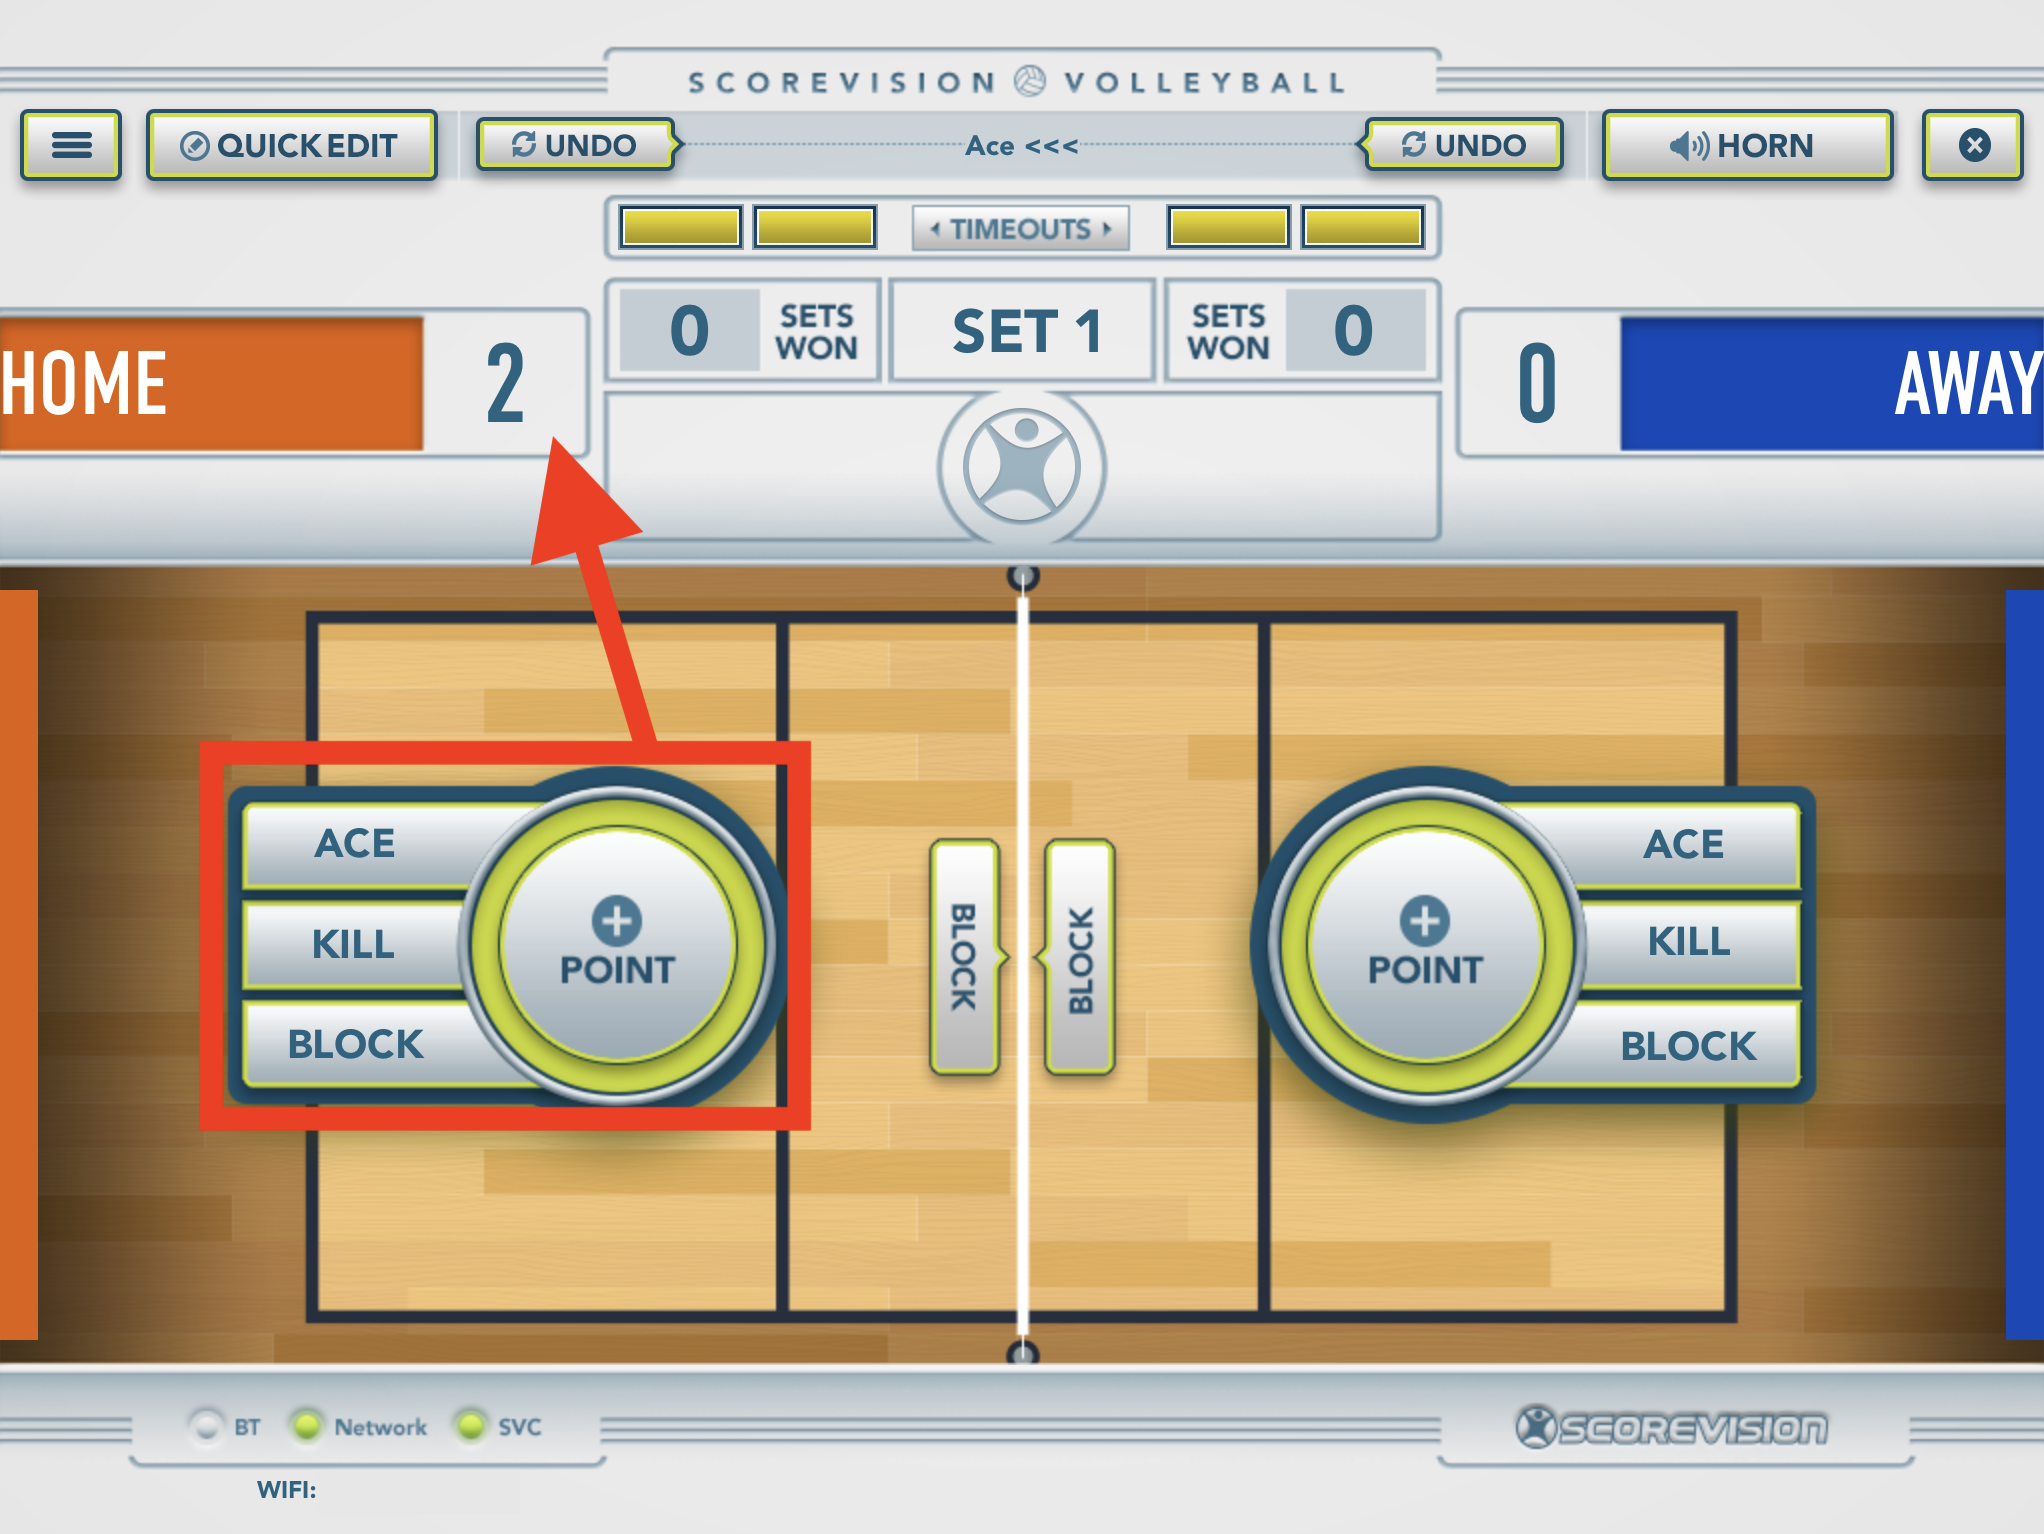 NOTE: The BLOCK buttons in the center of the court are for stats of a block that was not a termination point. This button does not need to be used during simple scorekeeping since we chose to not record stats.
2. When the set is won, a scoreboard assistant will appear giving you three options for transitioning into the next set:
- start a period break with the clock set to the default time,
- start a period break with the clock set to a custom time,
- jump to the next set without a period break, or
- cancel
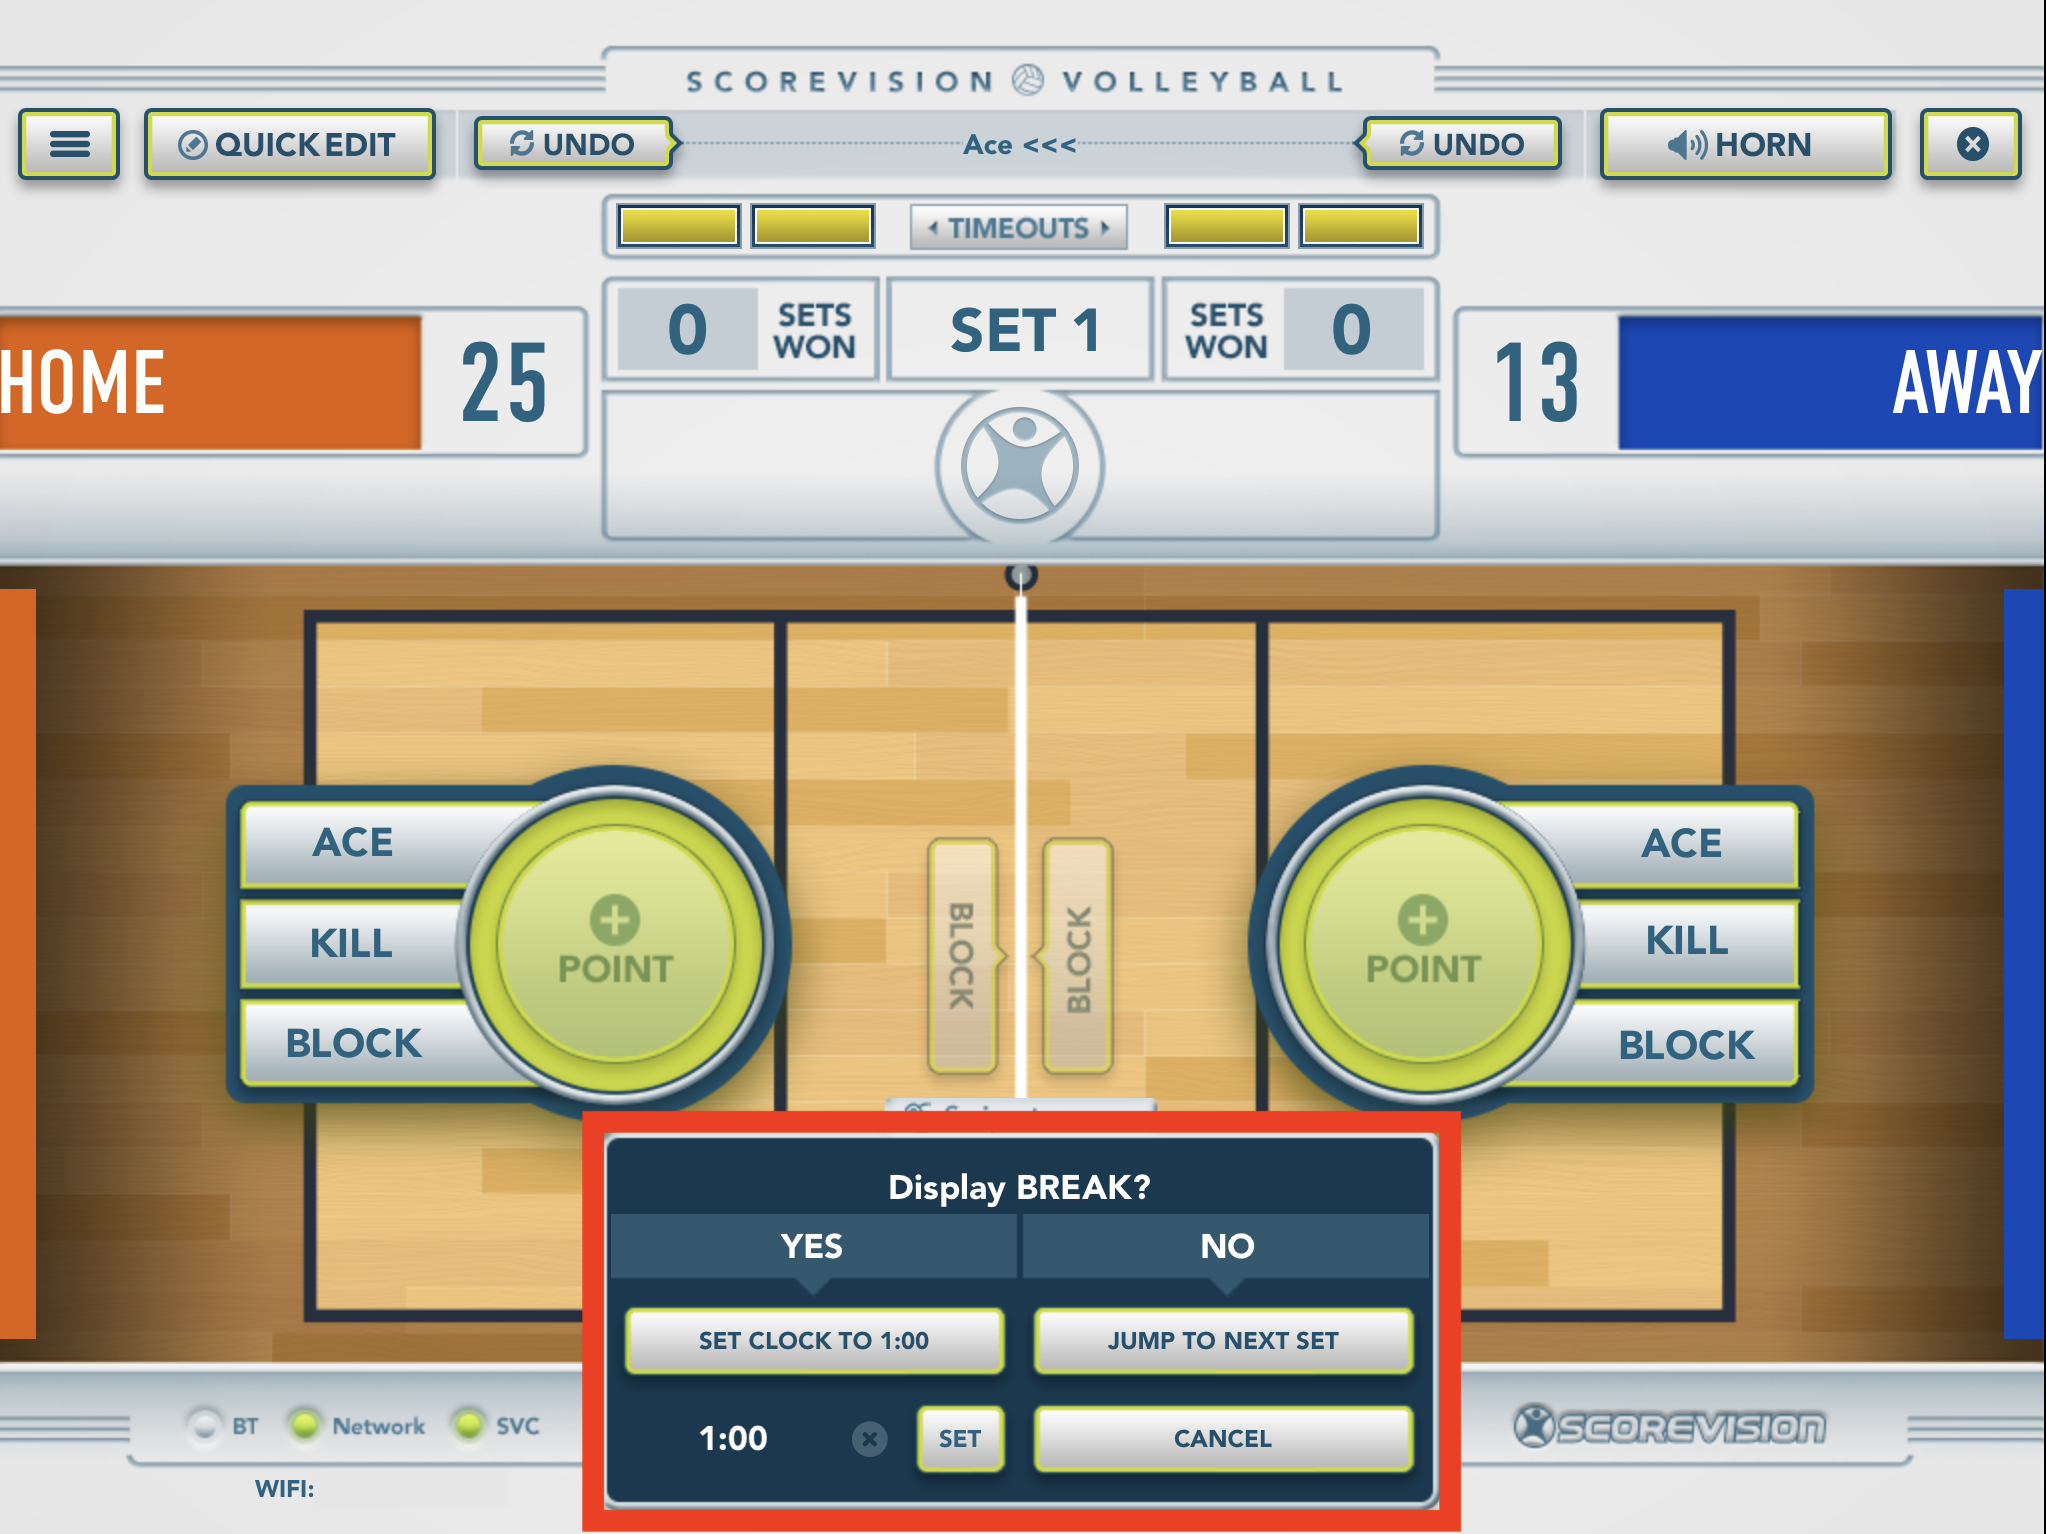
The length of the period break clock can be set when you create your season in the cloud. It also can be edited in the same manner as the pre-game clock as explained earlier in this article. Press SET to engage the period break and press PAUSE or END to interrupt the clock as needed.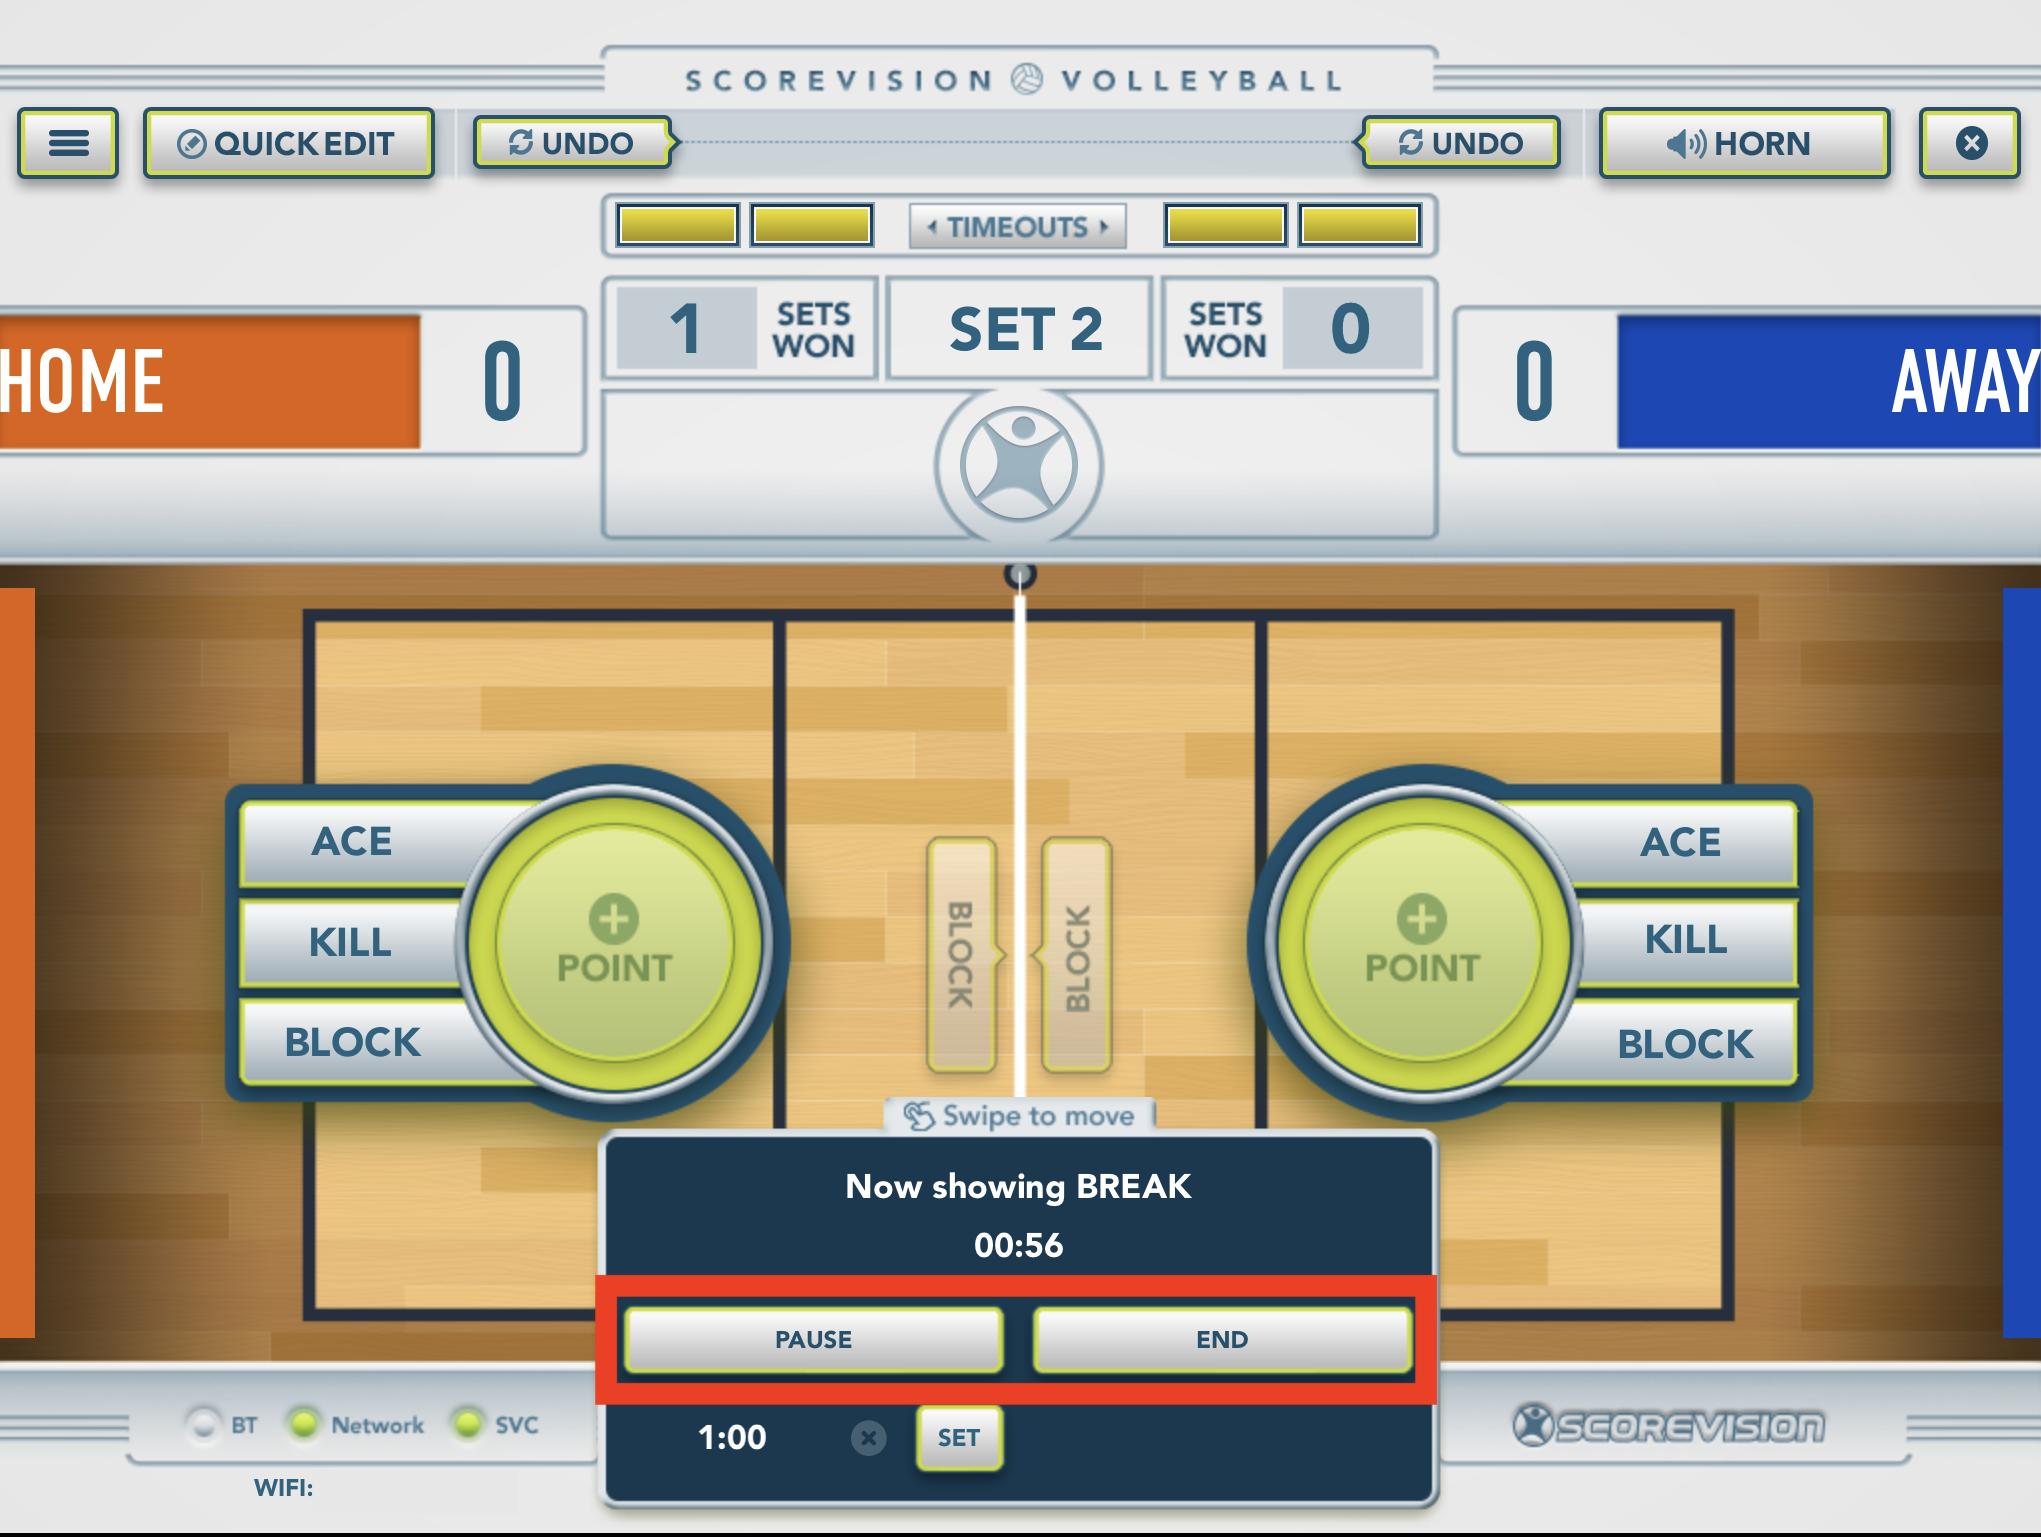 3. The app is coded to ensure that set 1 and 2 conclude at 25 points and the set 3 concludes at 15 points. The app also understands that a set must be won by 2 or more points so it will go beyond 25 or 15 points if the game situation deems necessary.
4. To initiate a timeout, press the TIMEOUTS button near the top of the scorekeeper screen enabling you to apply the timeout to the appropriate team, or official. After selecting the appropriate team or official, a scoreboard assistant for DISPLAY TIMEOUT CLOCK will appear giving you 4 options:
- set clock to default time,
- set clock to custom time,
- just show scoreboard, or
- cancel
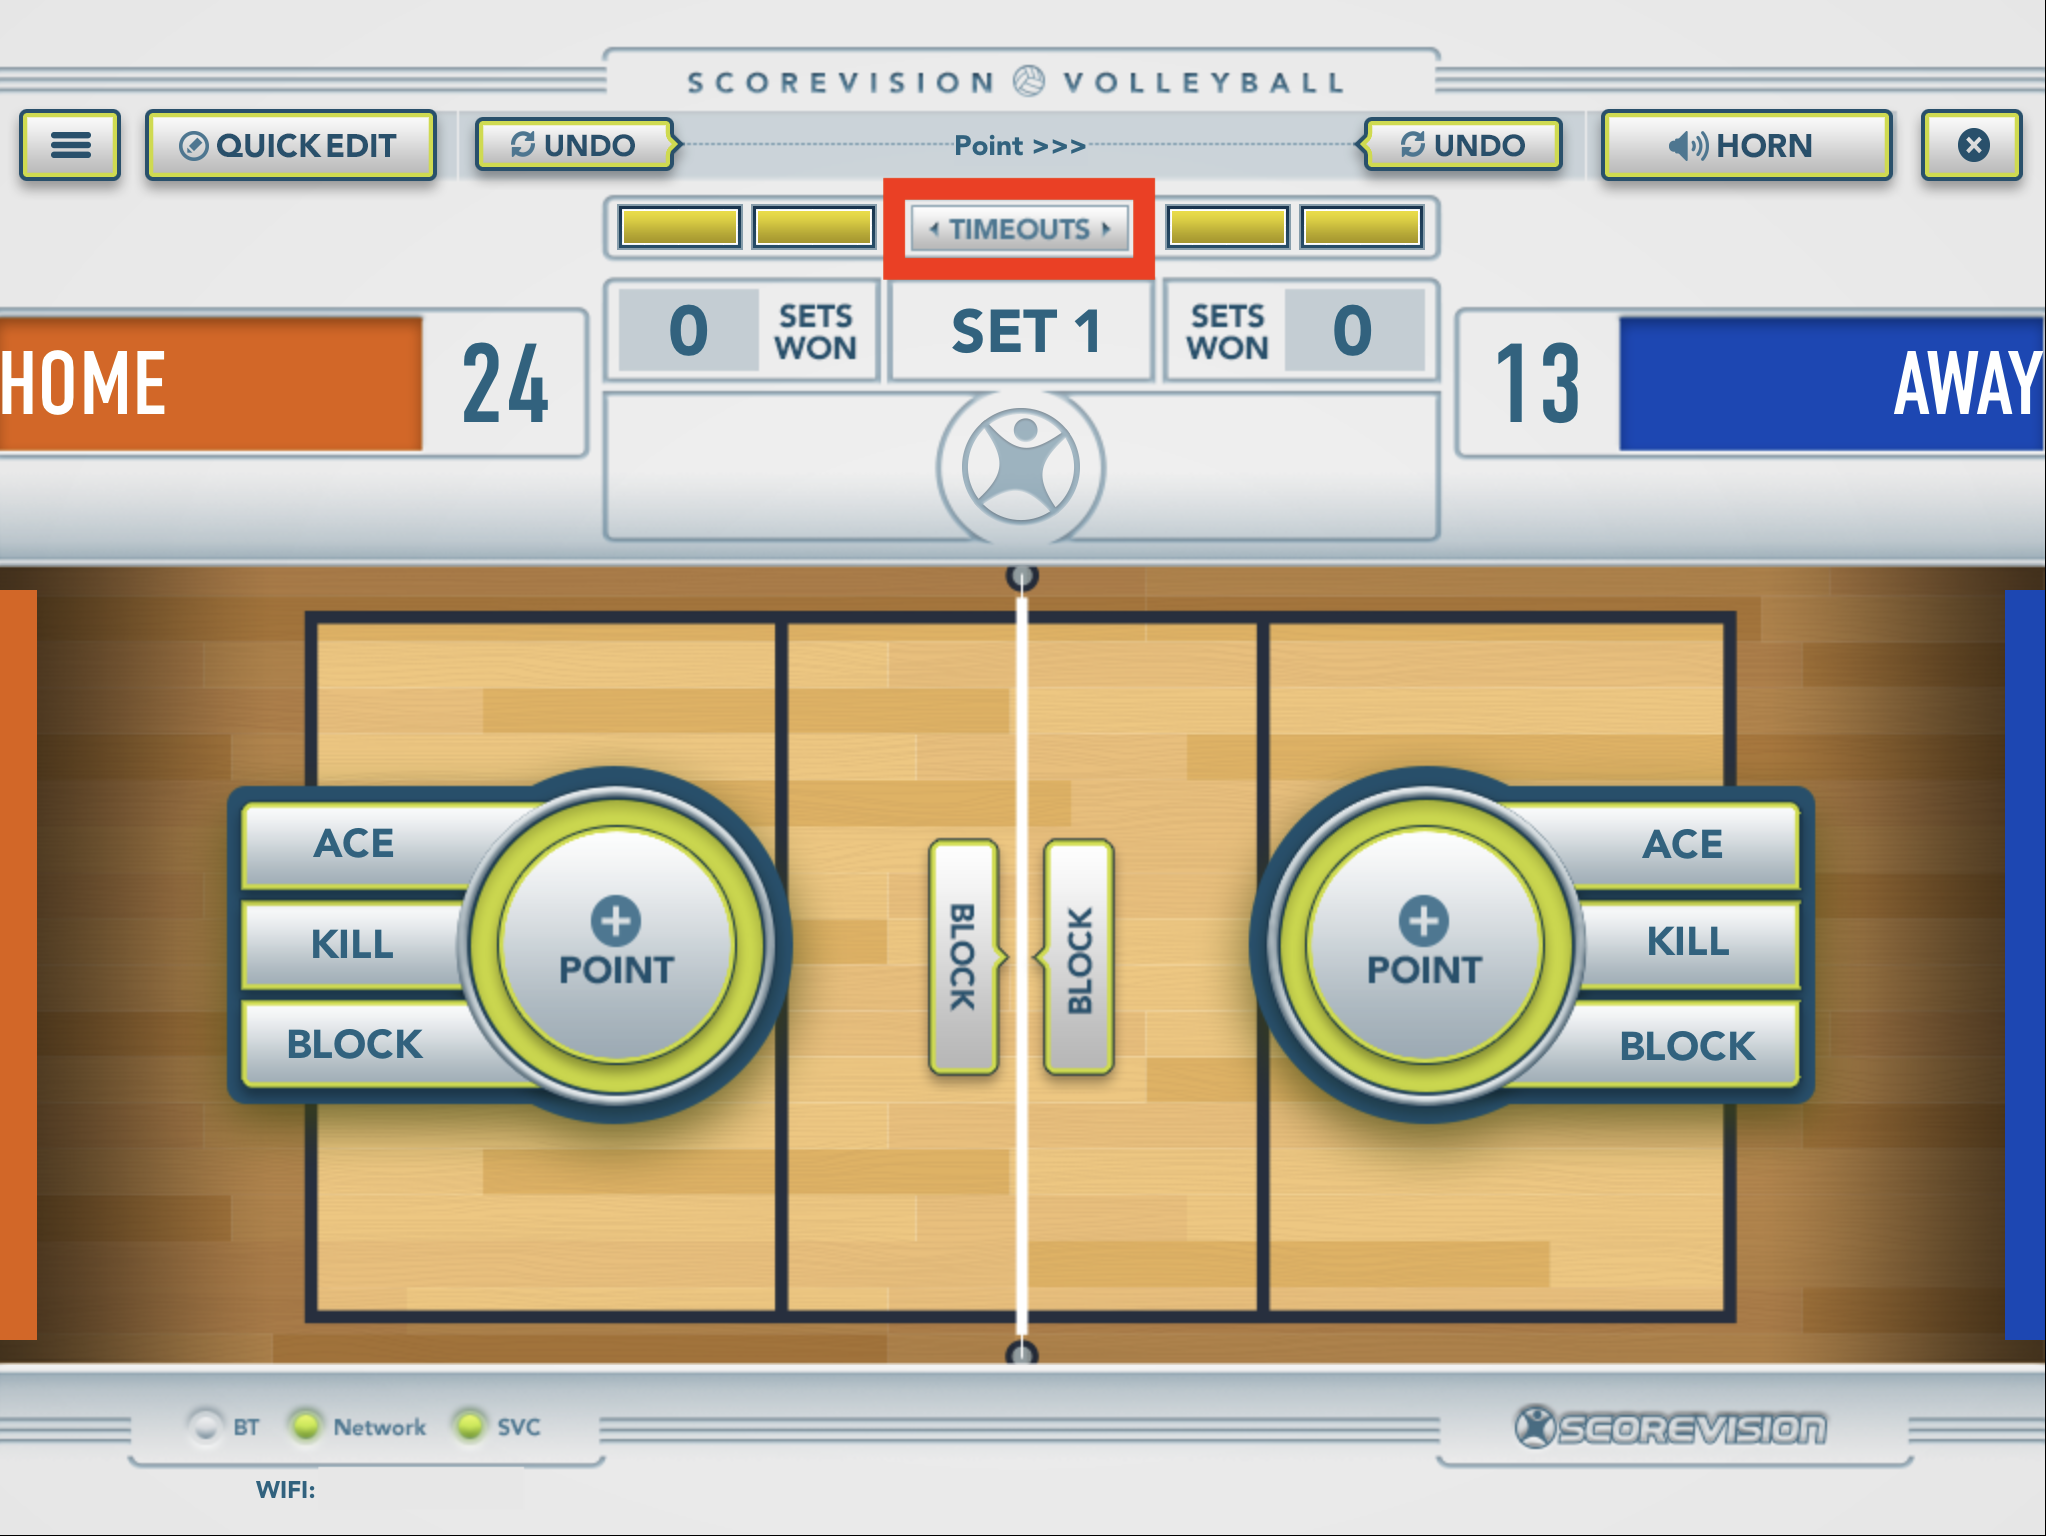

 Notice that aesthetically the timeout yellow bars will change in the app as well as below the team names on your board to reflect the number of remaining timeouts available for each team.
Quick Edit and Undo
1. At any point throughout the game, you can use QUICK EDIT to edit points, timeouts, team names, or even the team color. Press SAVE to apply the changes.


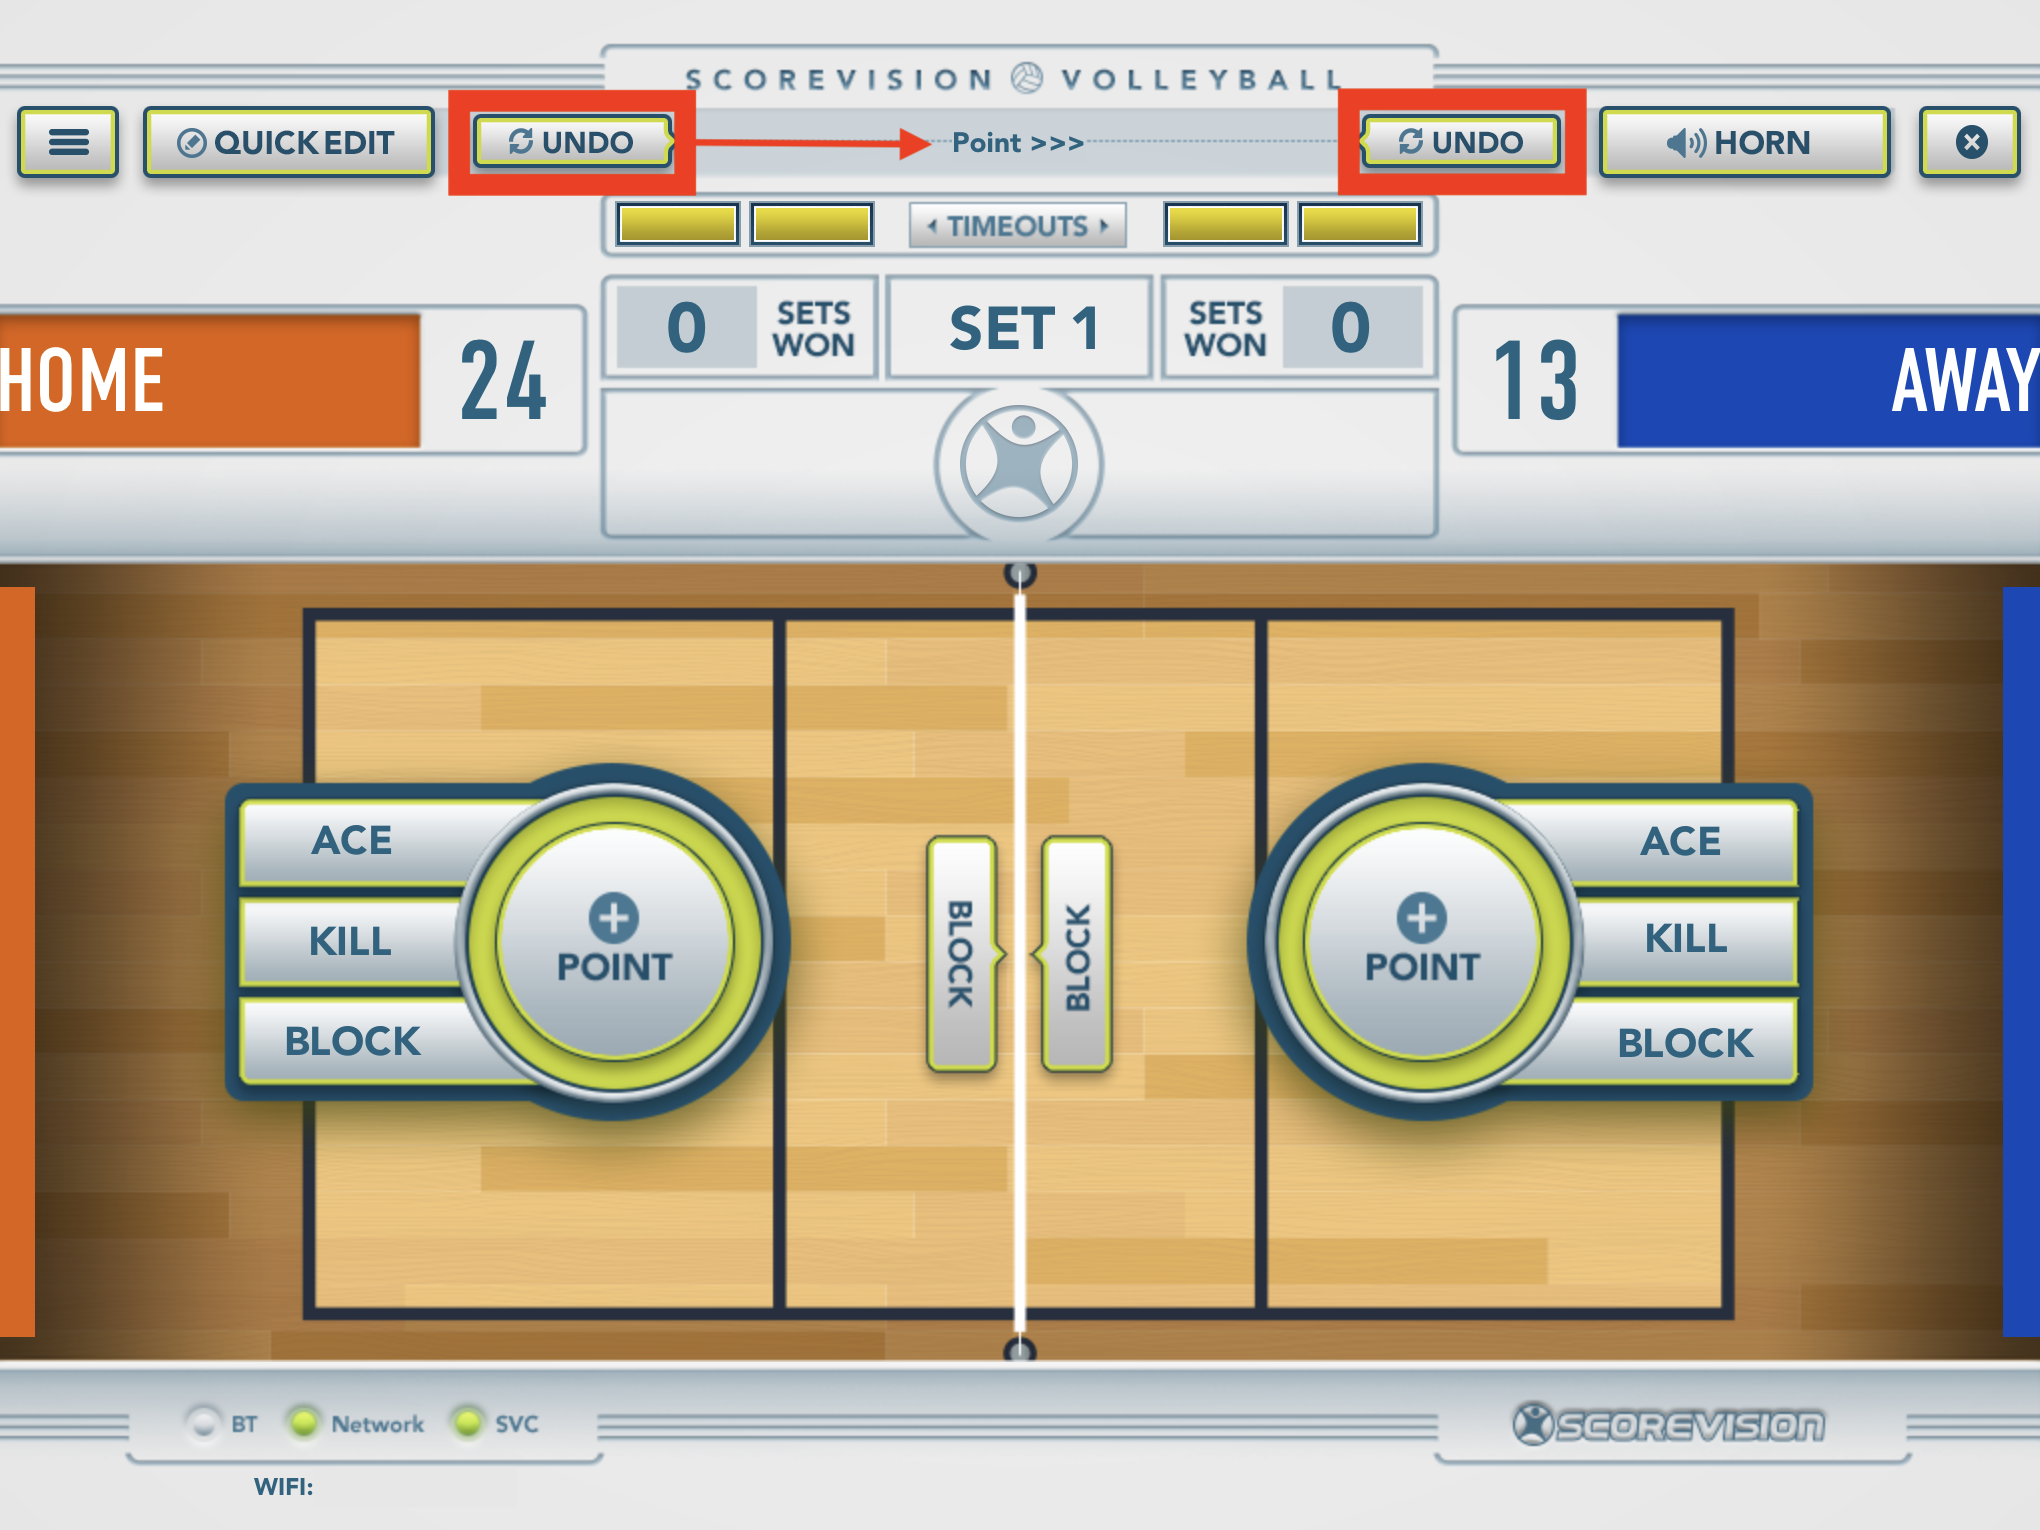
2. At any point throughout the game, you can click UNDO to correct any mistakes. It will undo in order of how actions or points were entered.
Board and Player Stats
Choosing the BOARD & PLAYER STATS as the scorekeeping mode in game options will give you a roster for each team and will allow you to track and display stats of individual players on your scoreboard. Volleyball tracks aces, kills, and blocks.
1. To access the rosters, press ROSTER beneath the sets won section. In the slide out wing that appears, you can edit existing players or add new players. To add a player, press the plus sign button and then enter the jersey number and press SAVE. The player will be added to the roster but will not have a name assigned. When showing on the board, the player name will remain blank unless you utilize the edit pencil button as shown in the next section. 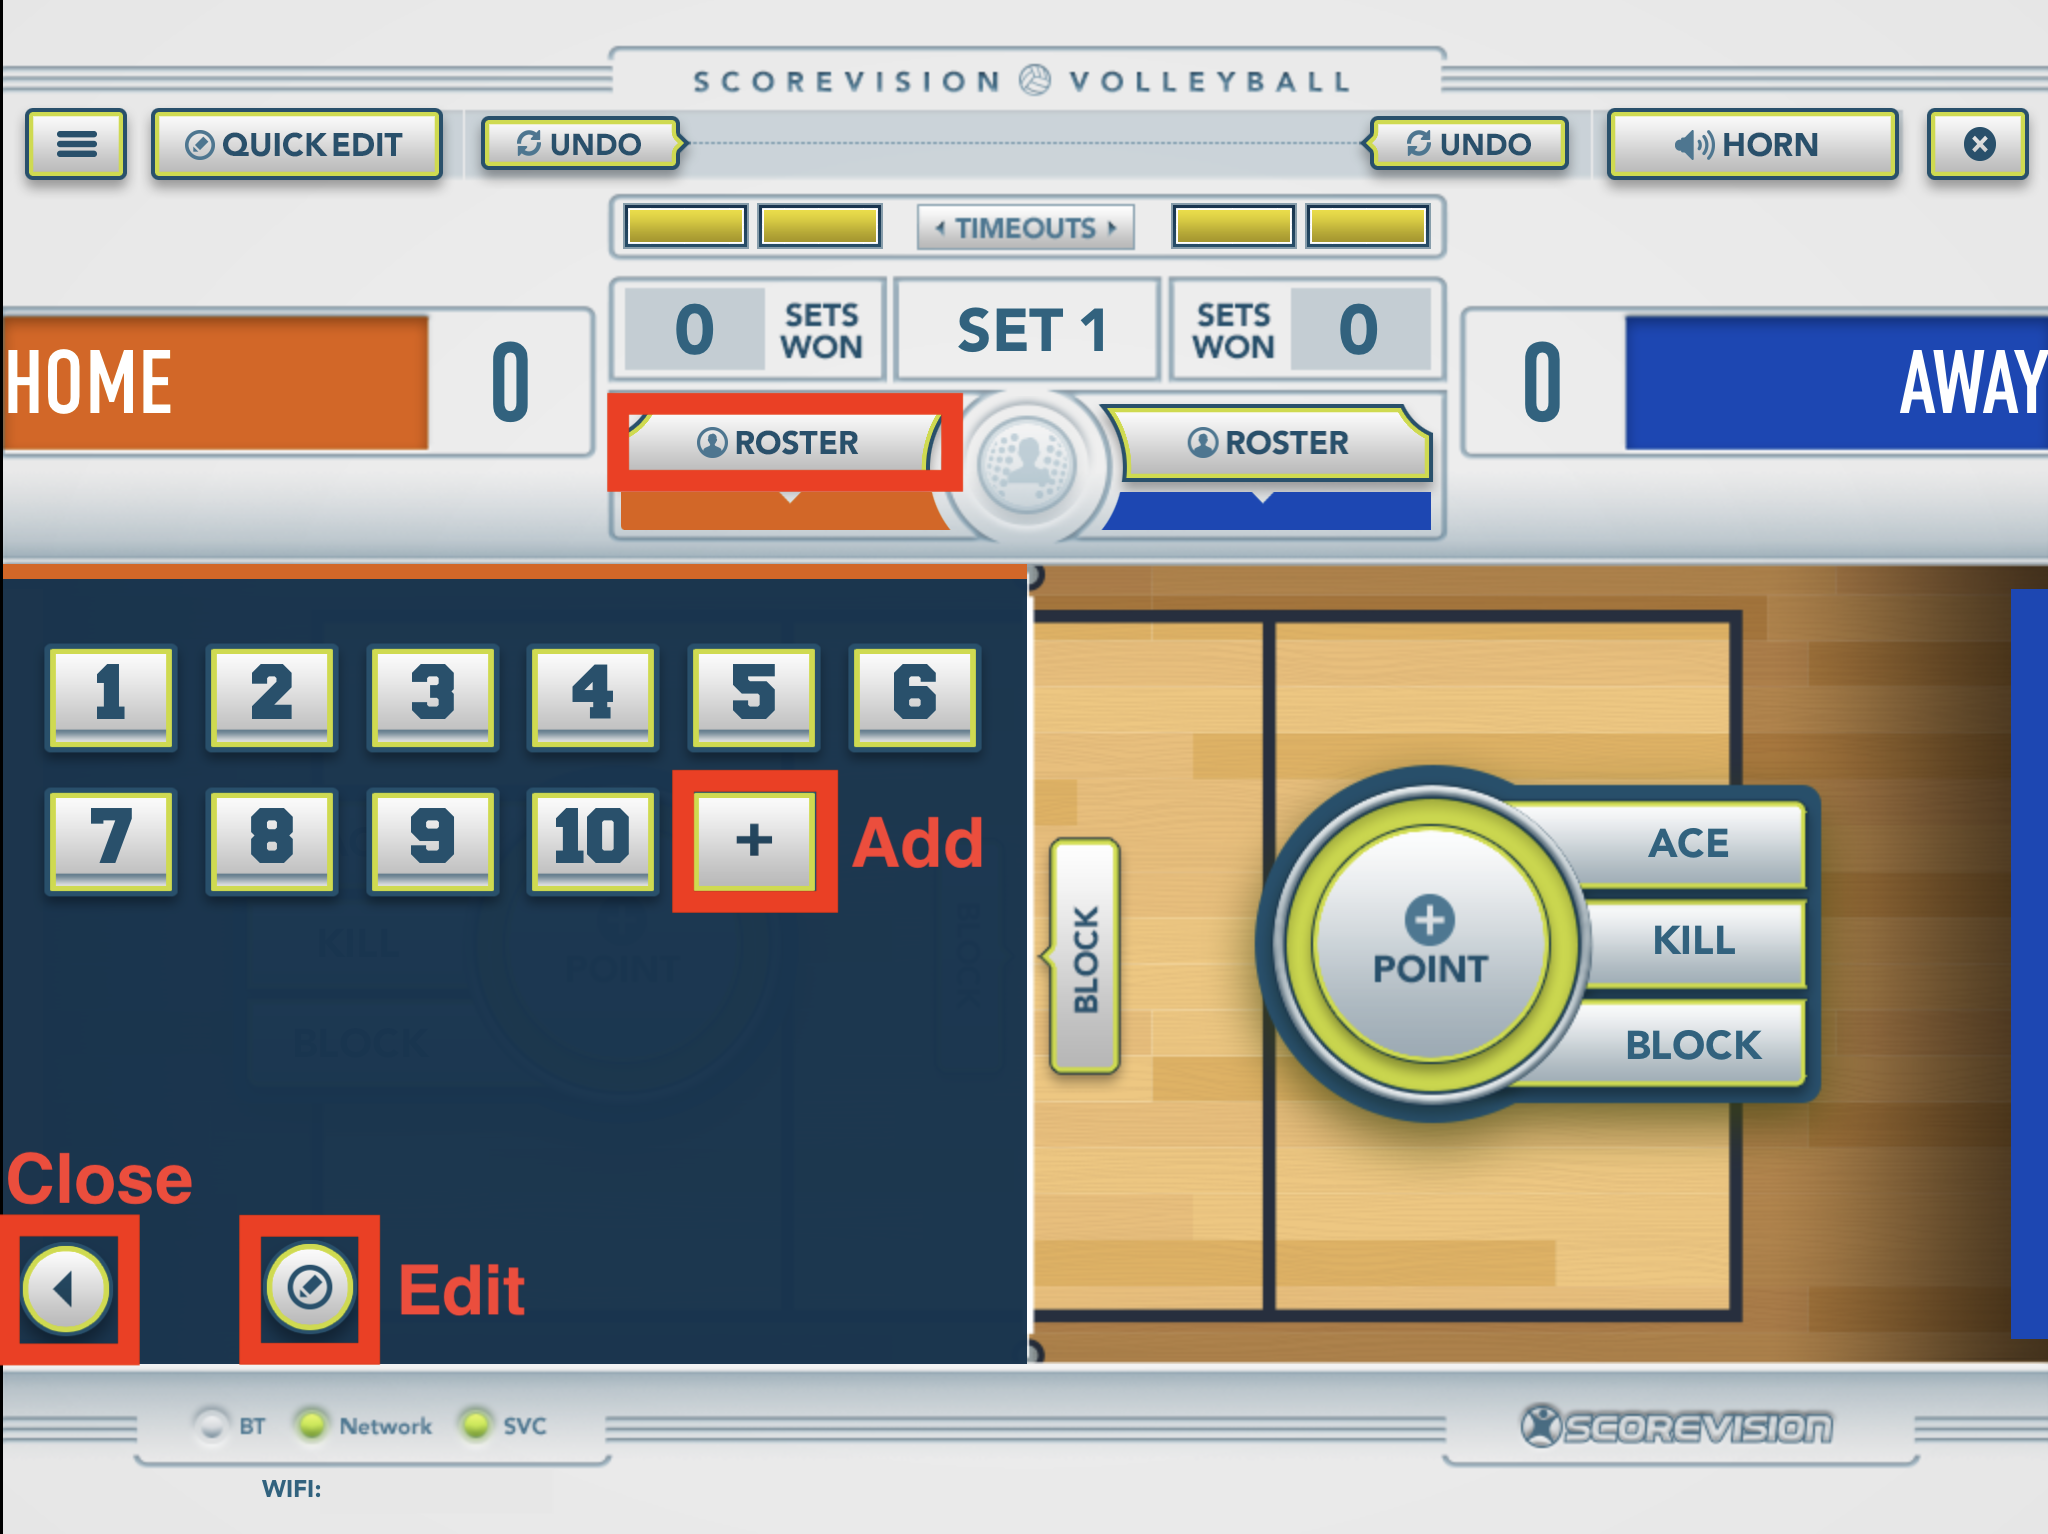 2. Press the pencil icon at the bottom of the roster wing to edit player details. Press on a player’s name to review that player’s information – you can update first and last names as well as the jersey number. If a player was not suited up or has to be taken out of the game for any reason, you can press "N" under the SUITED UP option for that player. This will remove that player from the game roster.
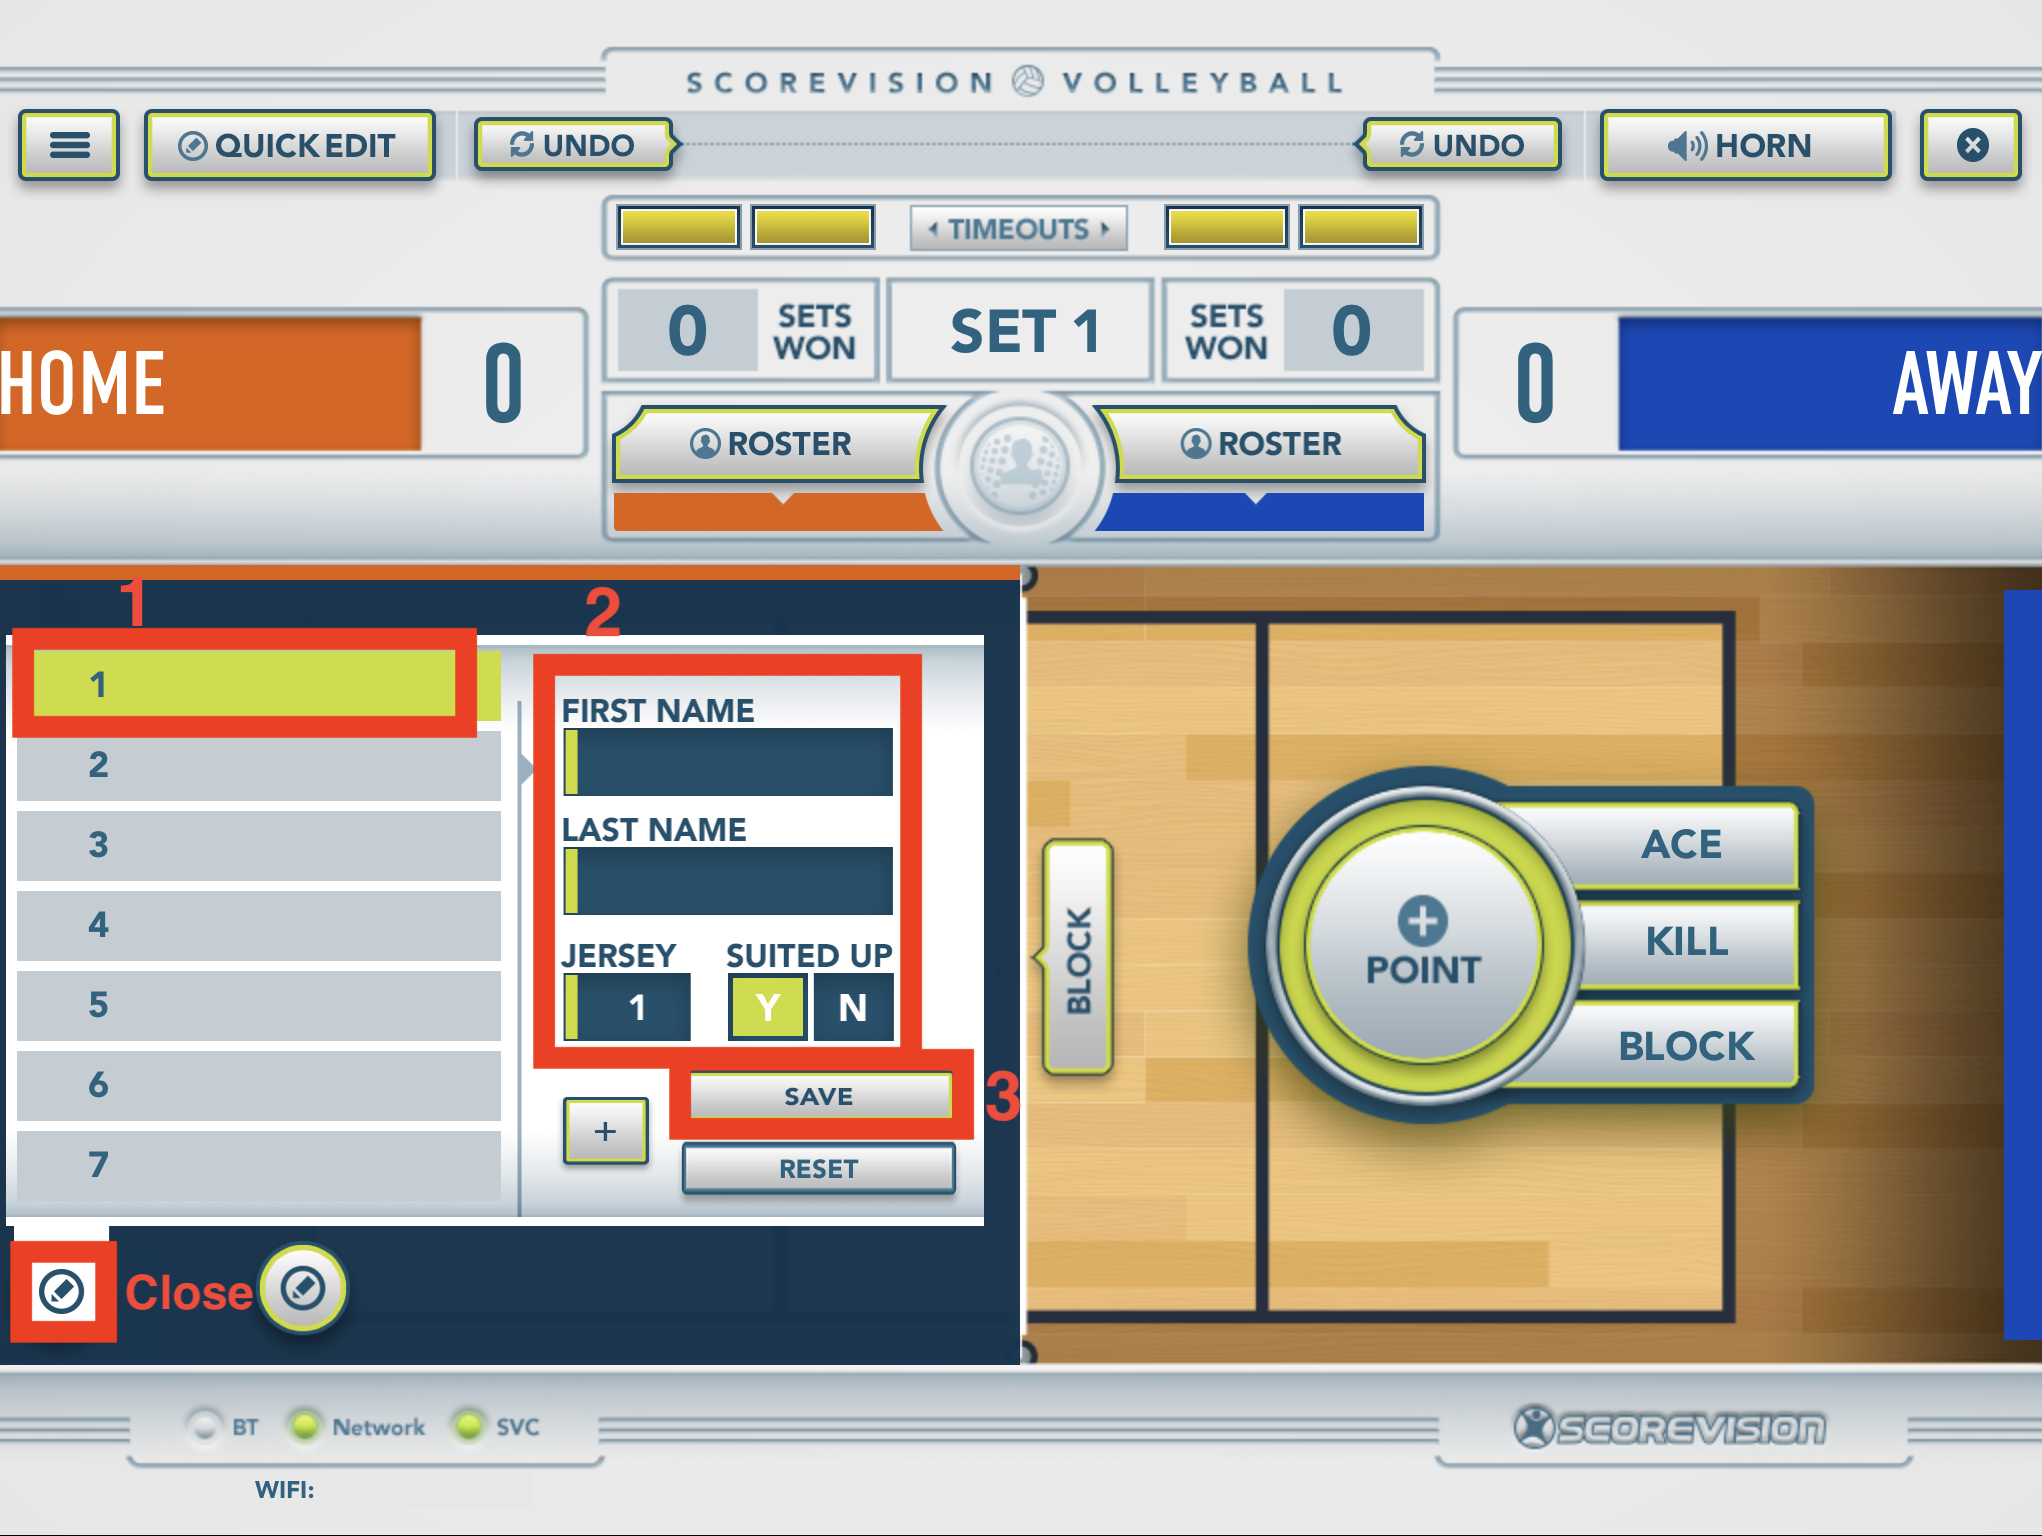
Once you’re comfortable with your rosters, you are ready to score a game.
Entering Player Stats
1. To add points, press POINT, ACE, KILL, or BLOCK based on the result of play.
If you click POINT, it will add a point to the team's total without asking to assign it to a player.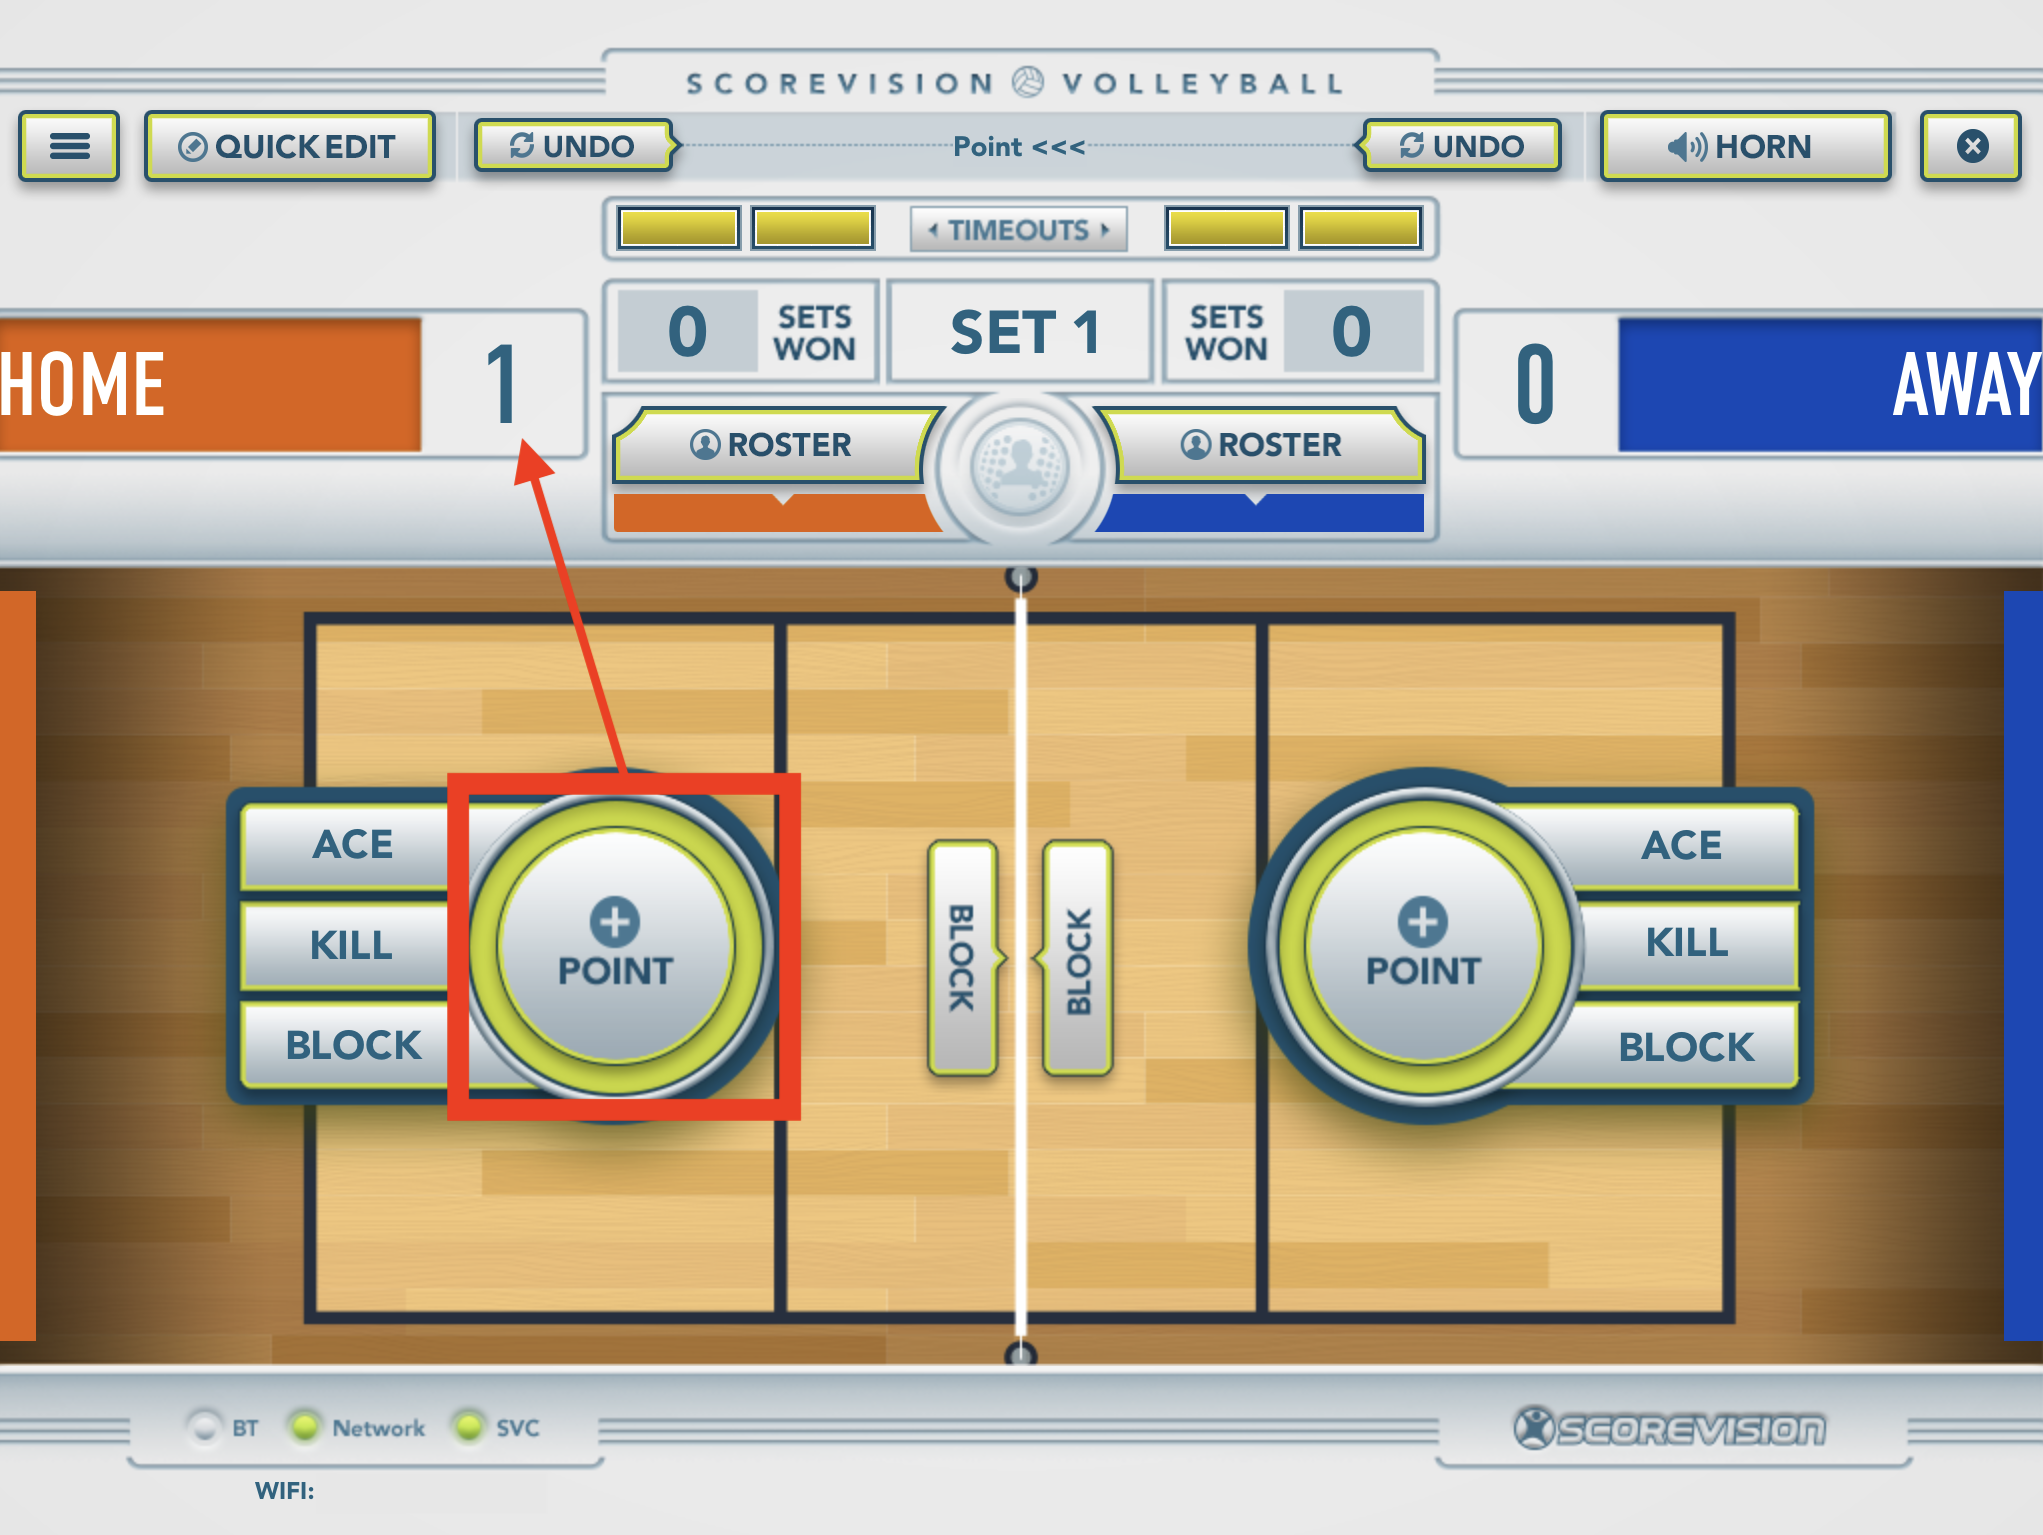 On the other hand, for a termination point, click ACE, KILL, or BLOCK, then the roster will pop up to assign that to an individual player.
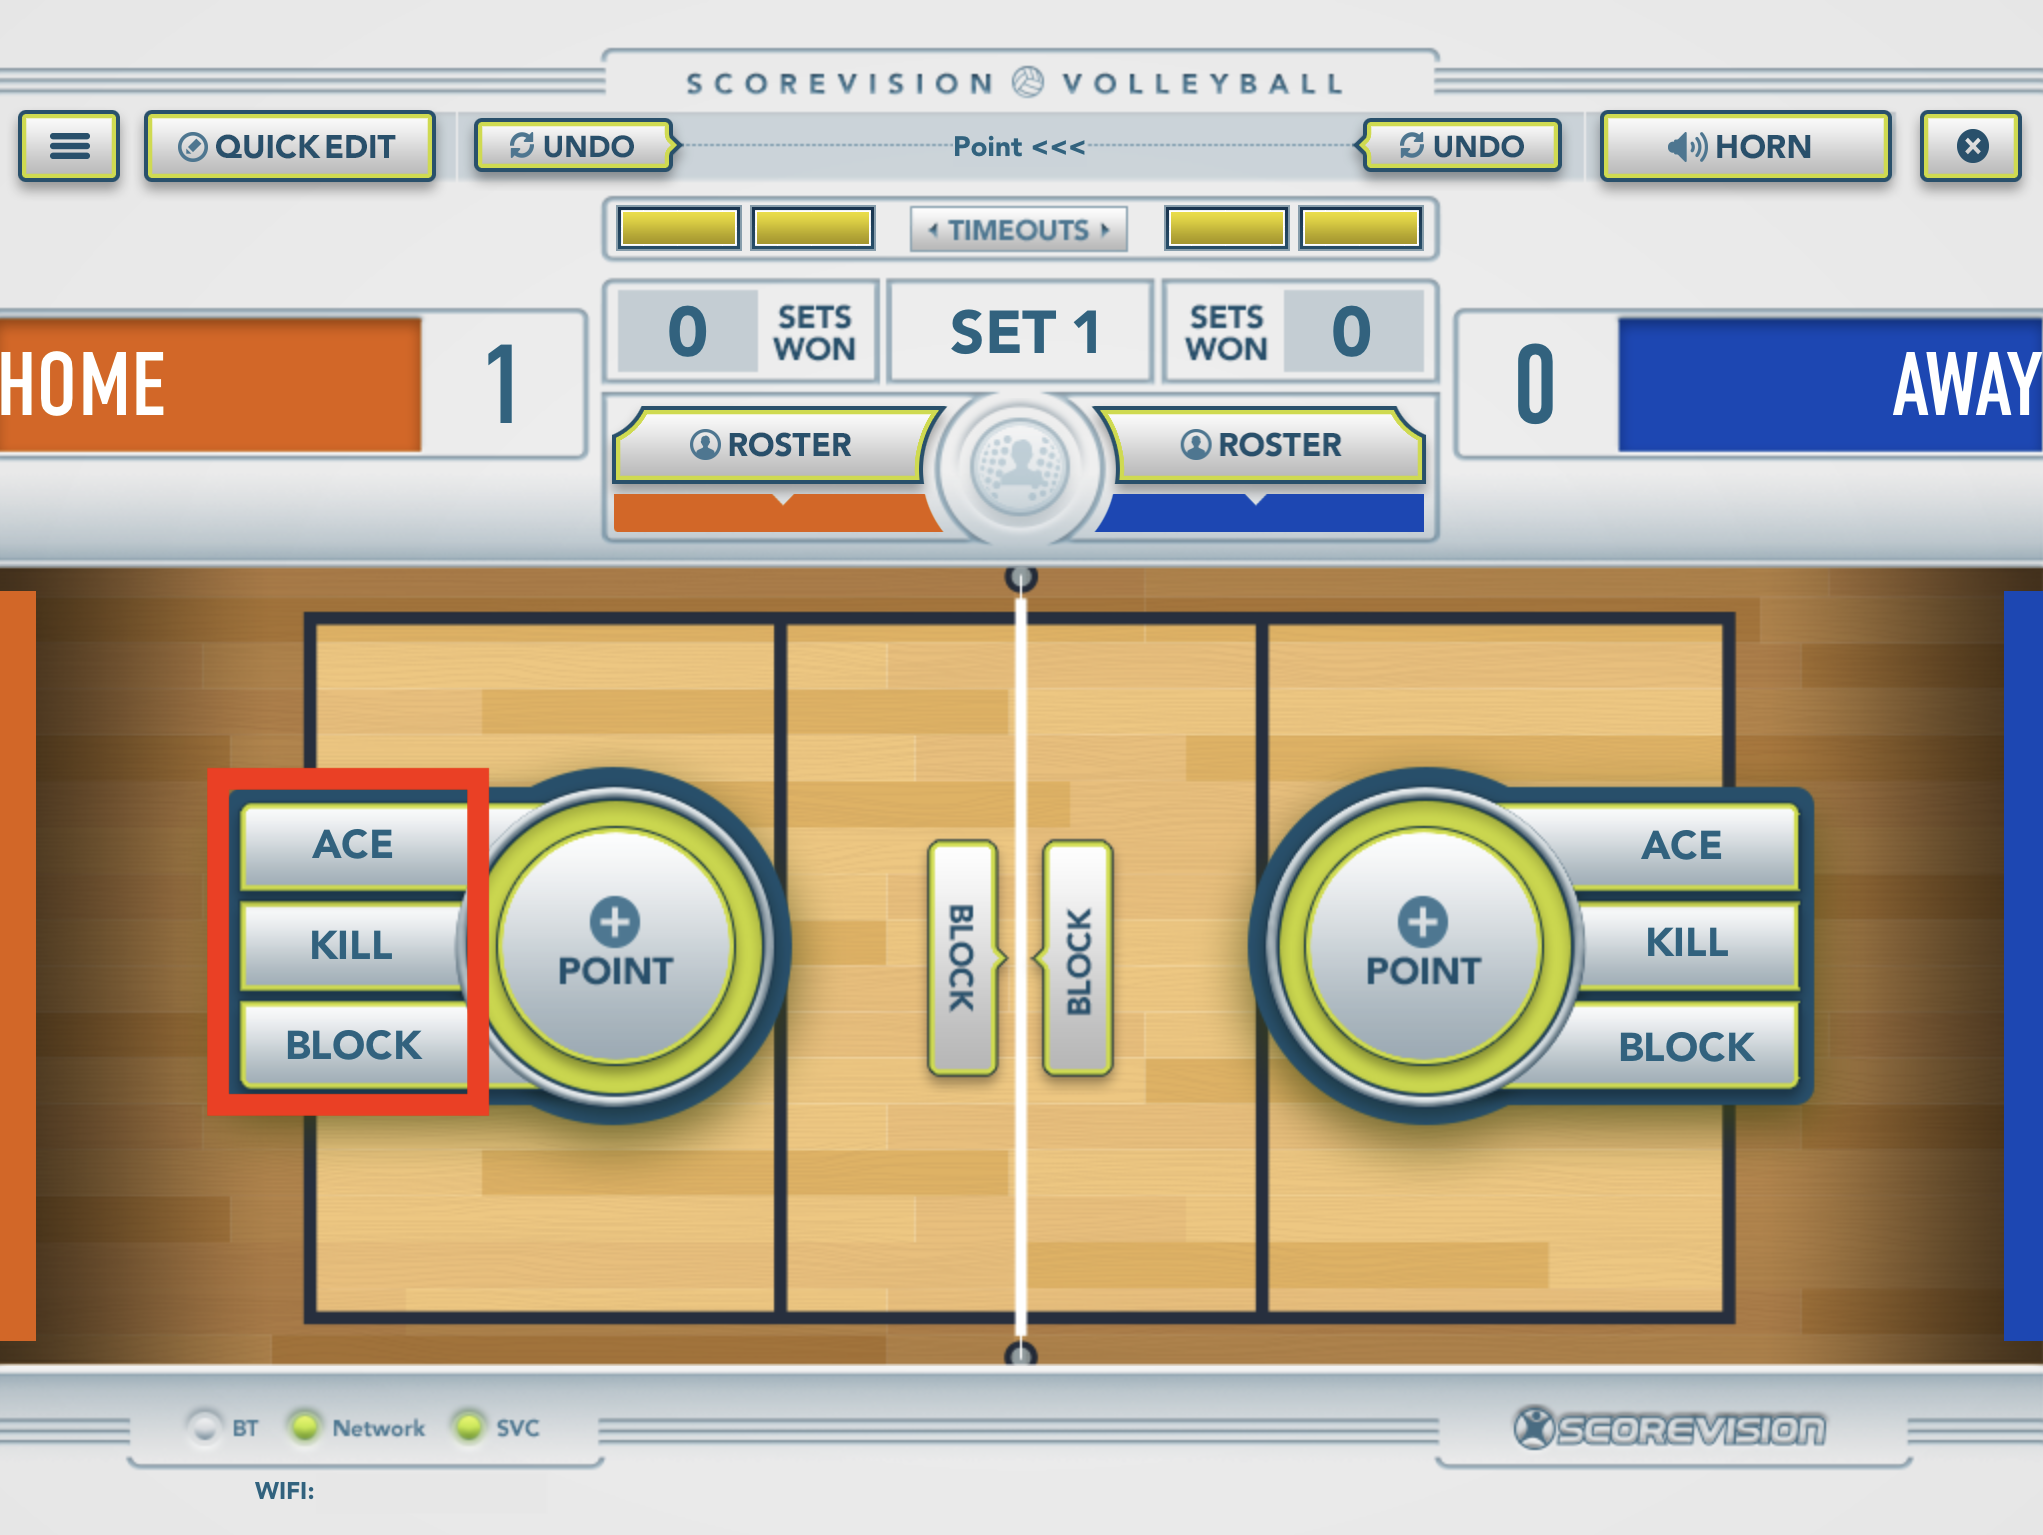 To assign it to a player, click on that player's number once the roster pops up. NOTE: If you are in SCOREBOARD ONLY mode, then you will not be prompted to assign points to individual players since that mode does not track stats.
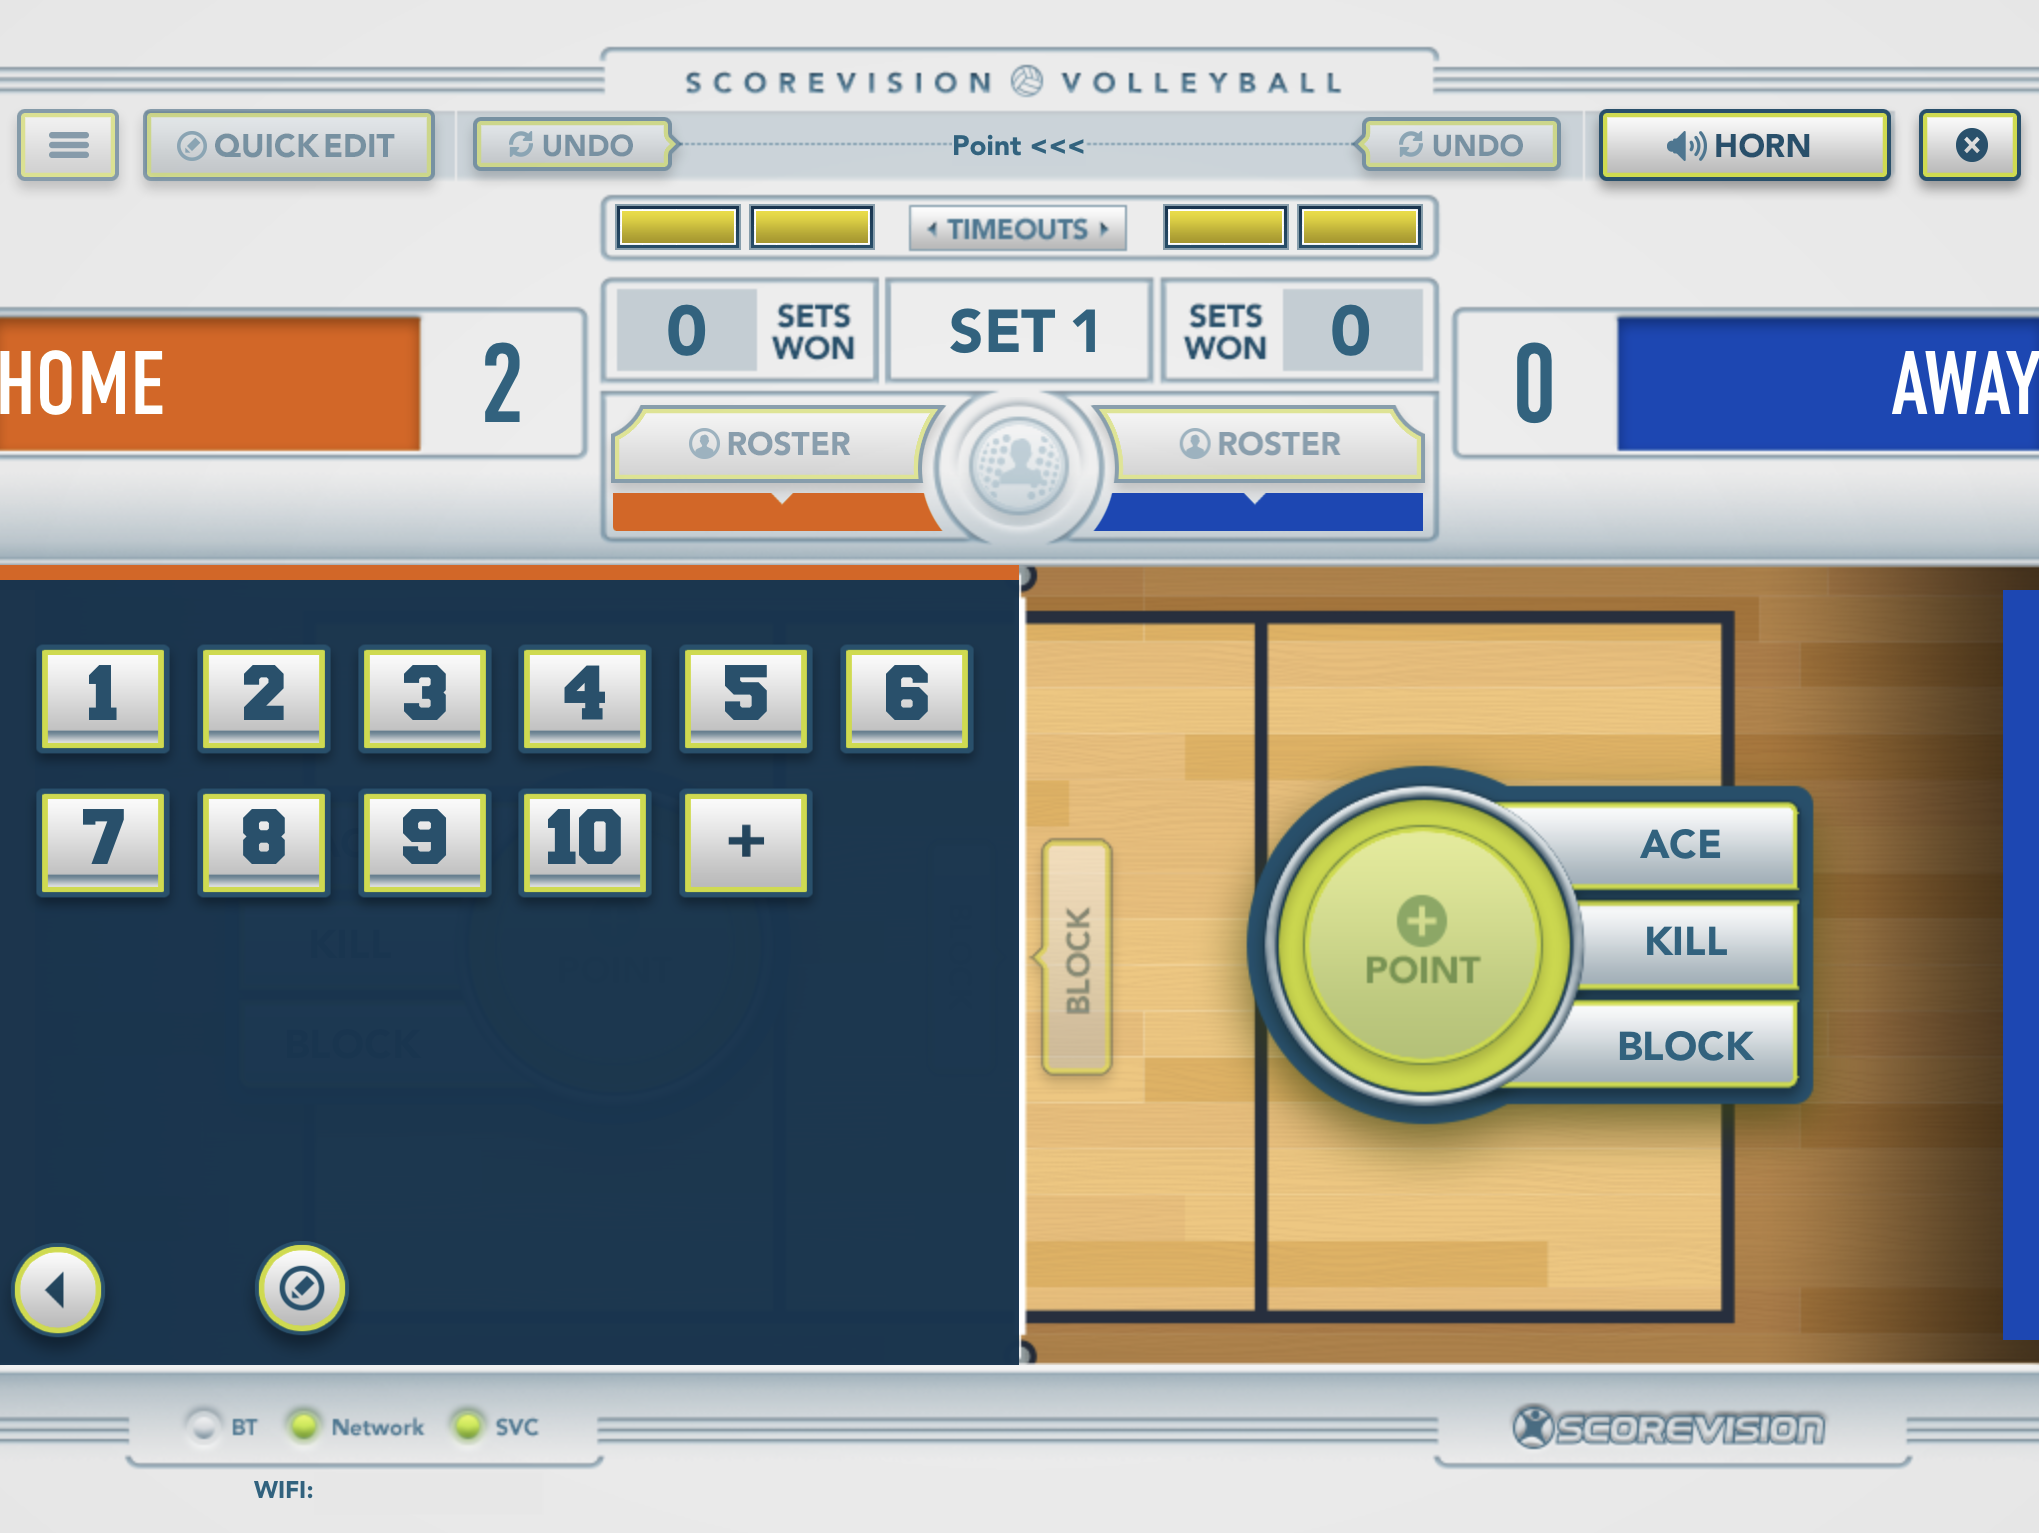 Notice on your board that a yellow box will show the leading player for each stat.
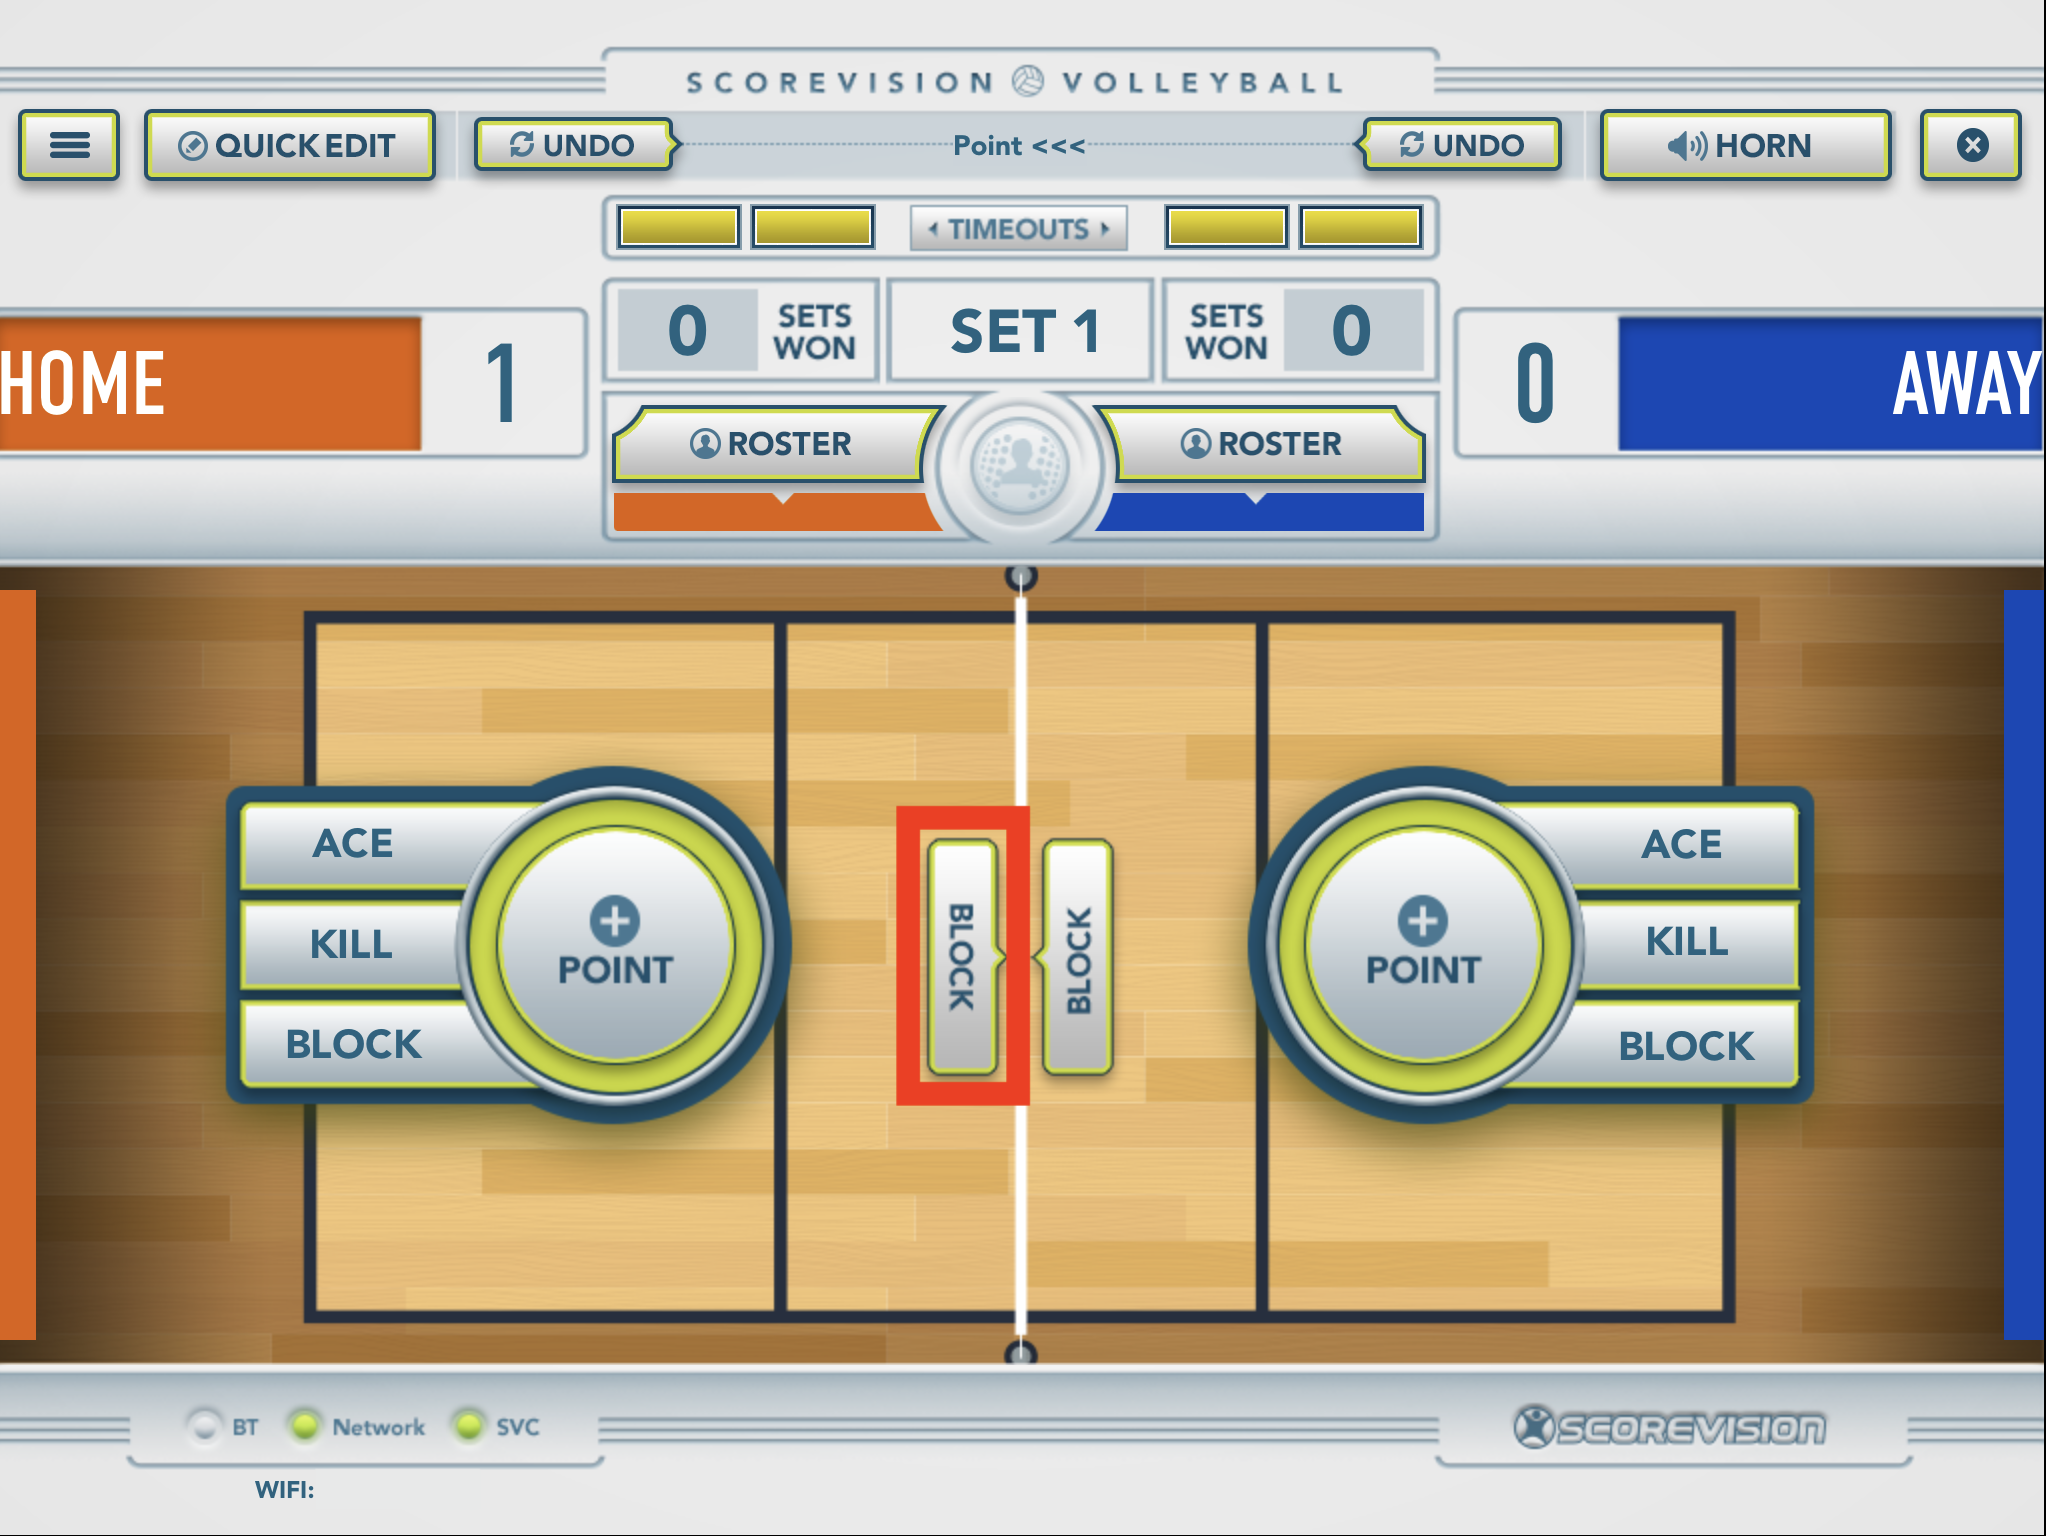
2. For a non-termination block (if you plan to track touches), you can select the BLOCK icon in the center of the screen. Once you click it, the roster will pop out for you to assign it to an individual player. NOTE: The use of this feature is optional.
Player Accolade
Once you’ve assigned an ace, kill, or block to a player, the "player accolade" button will light up in the middle of the scorekeeper screen. You can press it to feature that specific player on the scoreboard in a special accolade animation that was setup in the cloud prior to this game.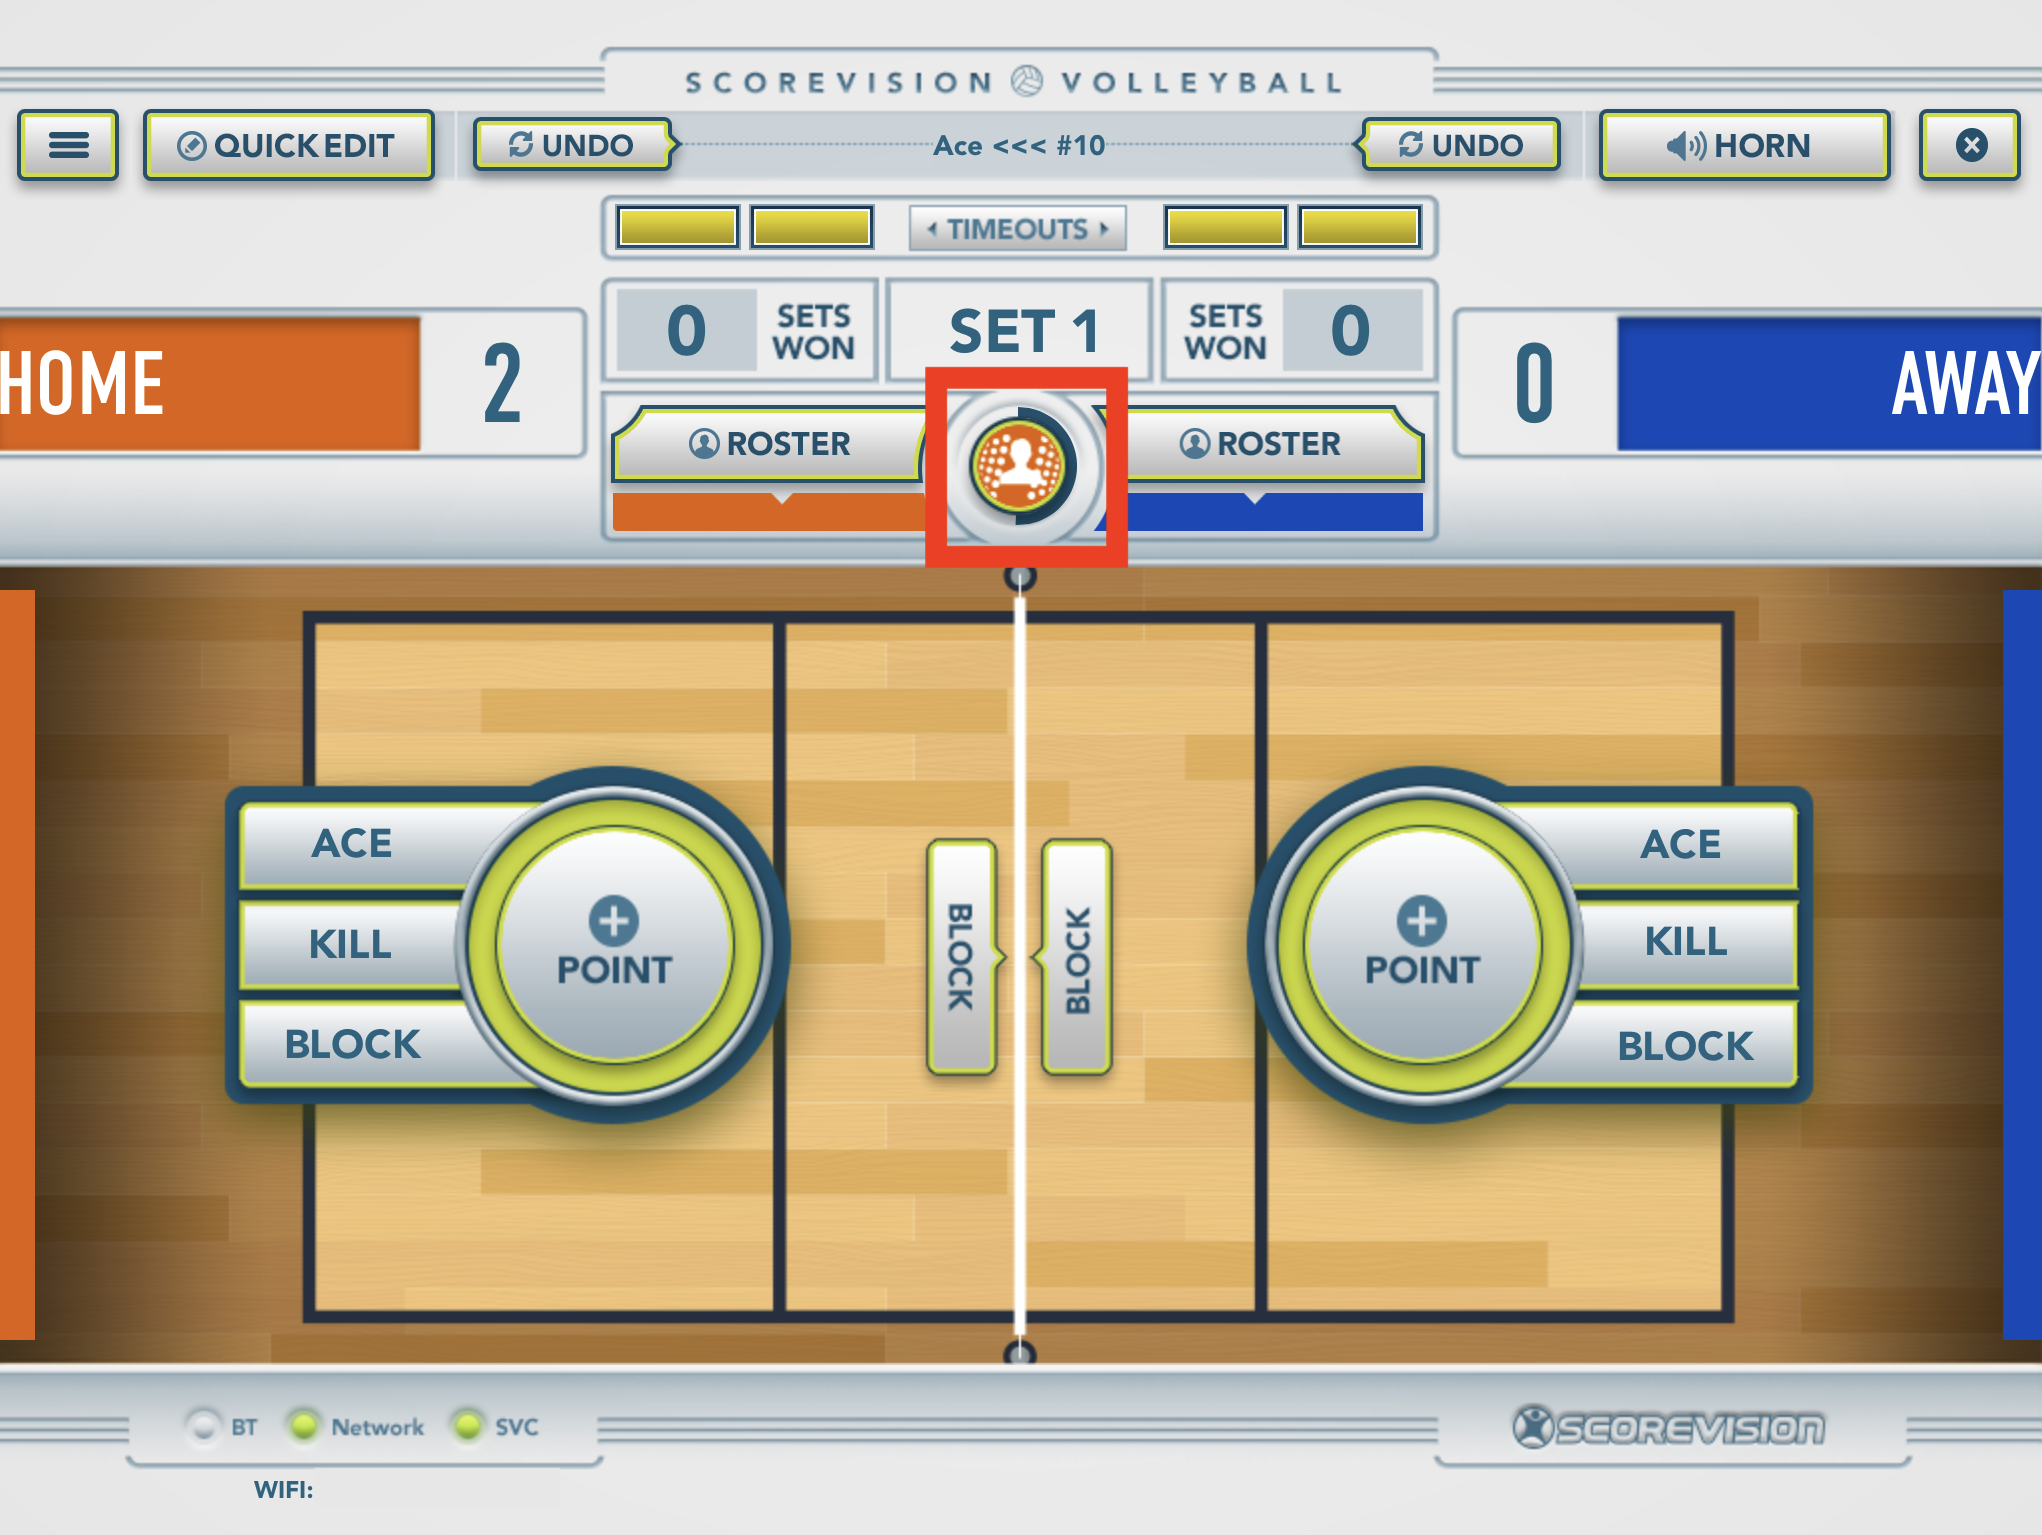
Ending a Match
Once the game is over, a scoreboard assistant will appear that allows you to end the match, or go back to make changes if necessary.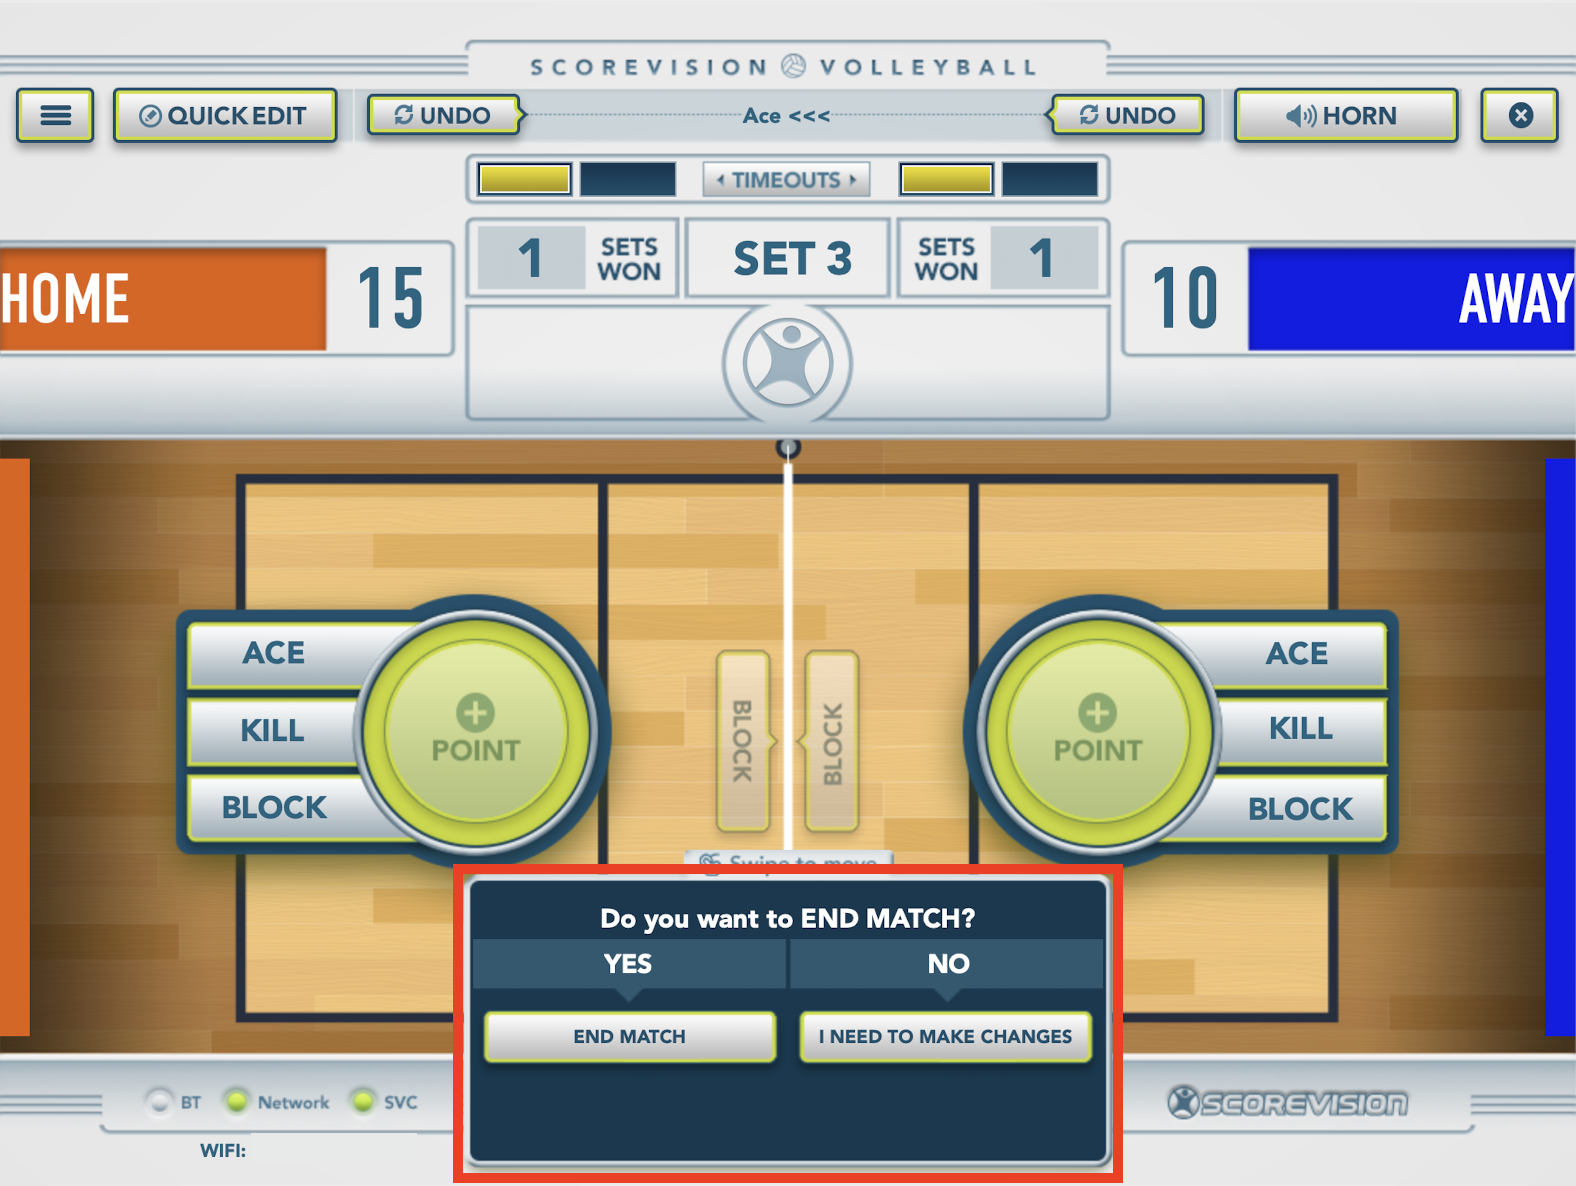
- END MATCH completes the game and archives the results in the cloud.
- I NEED TO MAKE CHANGES allows you to make adjustments to the game data by using the Quick Edit or Undo features discussed earlier in this article.
If at anytime during the game you would like to close the game, press the X button in the upper right corner. A window will appear giving you these 3 options:
- save & close out match,
- save & leave match open, or
- cancel


Save & close out match will archive the game in the cloud and you will be unable to access and change data at a future time.
Save & leave match open leaves the game available to access even after you have closed the app. This option may be needed if you need to leave the Scorekeeper App for whatever reason but wish to continue scoring the game when you log back in.
ScoreVision Support Contact Information
If you have any questions or need assistance, our support team is available to help.

